Q1: Which decking material requires the least maintenance?
Composite decking is the winner—no oiling, staining, or sanding needed.
.jpg)
Melbourne’s famously unpredictable climate—sunshine one moment, rain the next—can be tough on outdoor structures, especially decks. Whether you’re building a new deck or upgrading an existing one, choosing the right decking material is critical for longevity, comfort, and aesthetics.
This guide explores the best decking materials suited for Melbourne’s unique weather, helping you make an informed decision that balances style, durability, and maintenance.
Melbourne’s climate features:
These conditions can cause wood to crack, warp, fade, and rot—making your choice of decking material crucial for a long-lasting outdoor area.
Why it’s great for Melbourne:
Merbau is naturally oily and dense, making it highly resistant to termites, rot, and weather fluctuations. It handles Melbourne’s moisture and sun well.
Keep in mind:
Merbau can bleed tannins, especially when wet, so sealing and careful installation are important—especially near paving or pools.
This Australian native hardwood is known for its natural fire resistance (great for bushfire zones) and durability. It’s perfect for coastal Melbourne suburbs that experience wind and salt air.
Tip: Needs annual oiling to maintain colour and prevent graying.
Best brands in Australia: Trex, ModWood, Ekodeck
Treated pine is one of the most budget-friendly decking options and can be stained or painted any colour. However, it’s softer and more prone to warping in Melbourne’s fluctuating conditions.
Use it if: You’re on a tight budget and can commit to regular sealing.
Blackbutt is a locally sourced Australian hardwood, making it sustainable and well-suited to Melbourne’s climate. It’s also BAL-29 fire rated, a requirement in some areas.
Resistant to rust, rot, pests, and UV damage, aluminium is a great low-maintenance option. It stays cool underfoot and doesn’t warp—ideal for decks exposed to full sun.
Note: More expensive and less traditional-looking than timber.
While durability is key, your decking also contributes to your home’s aesthetic and resale value. When selecting materials, consider:
Ensure good airflow under your deck to prevent moisture build-up and timber decay.
Proper drainage is essential to avoid water pooling, especially in wetter Melbourne months.
Even the best materials benefit from regular maintenance — cleaning, oiling, or staining to maintain appearance and structural integrity.
Concerned about environmental impact? Look for:
Eco-friendly decks not only reduce your footprint but may also increase buyer interest if you plan to sell.
Composite decking is the winner—no oiling, staining, or sanding needed.
Yes—especially timber. Use
Composite or aluminium decking — they’re water-resistant and don’t splinter.
Oiling or sealing is recommended every 6–12 months, depending on exposure.
Yes, if you want a long-term, low-maintenance solution. The upfront cost is higher, but savings over time can balance it out.
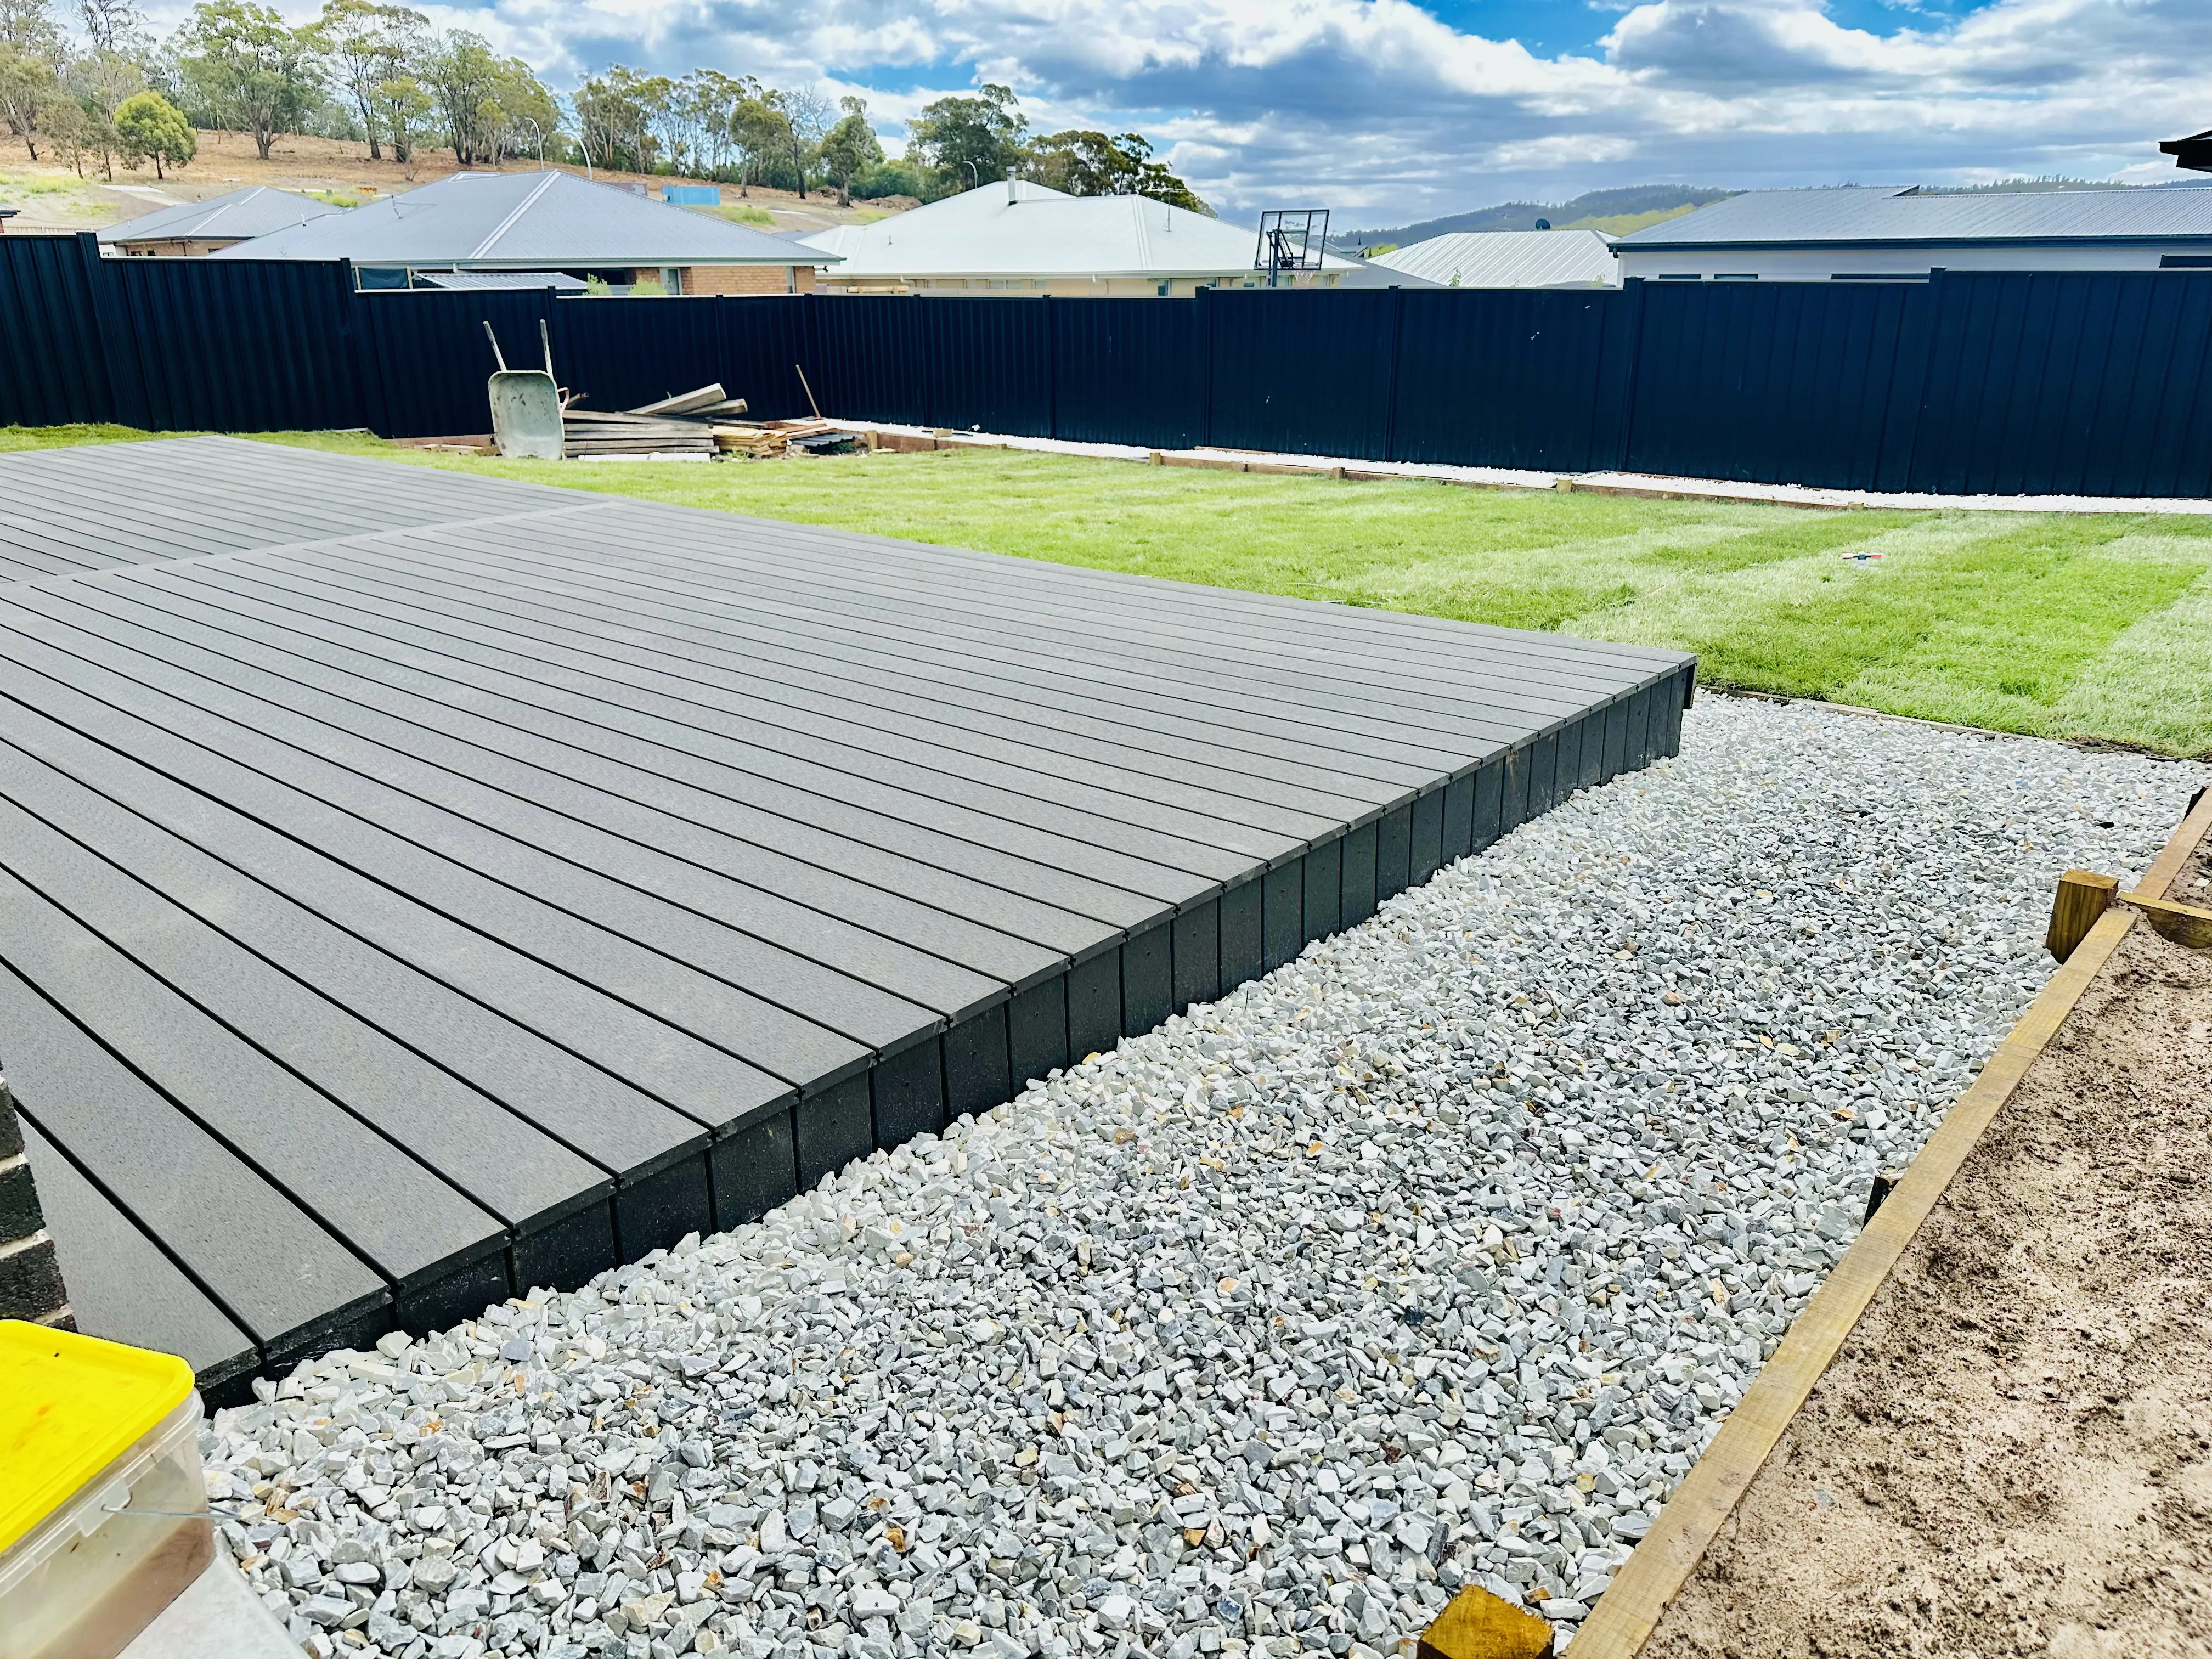
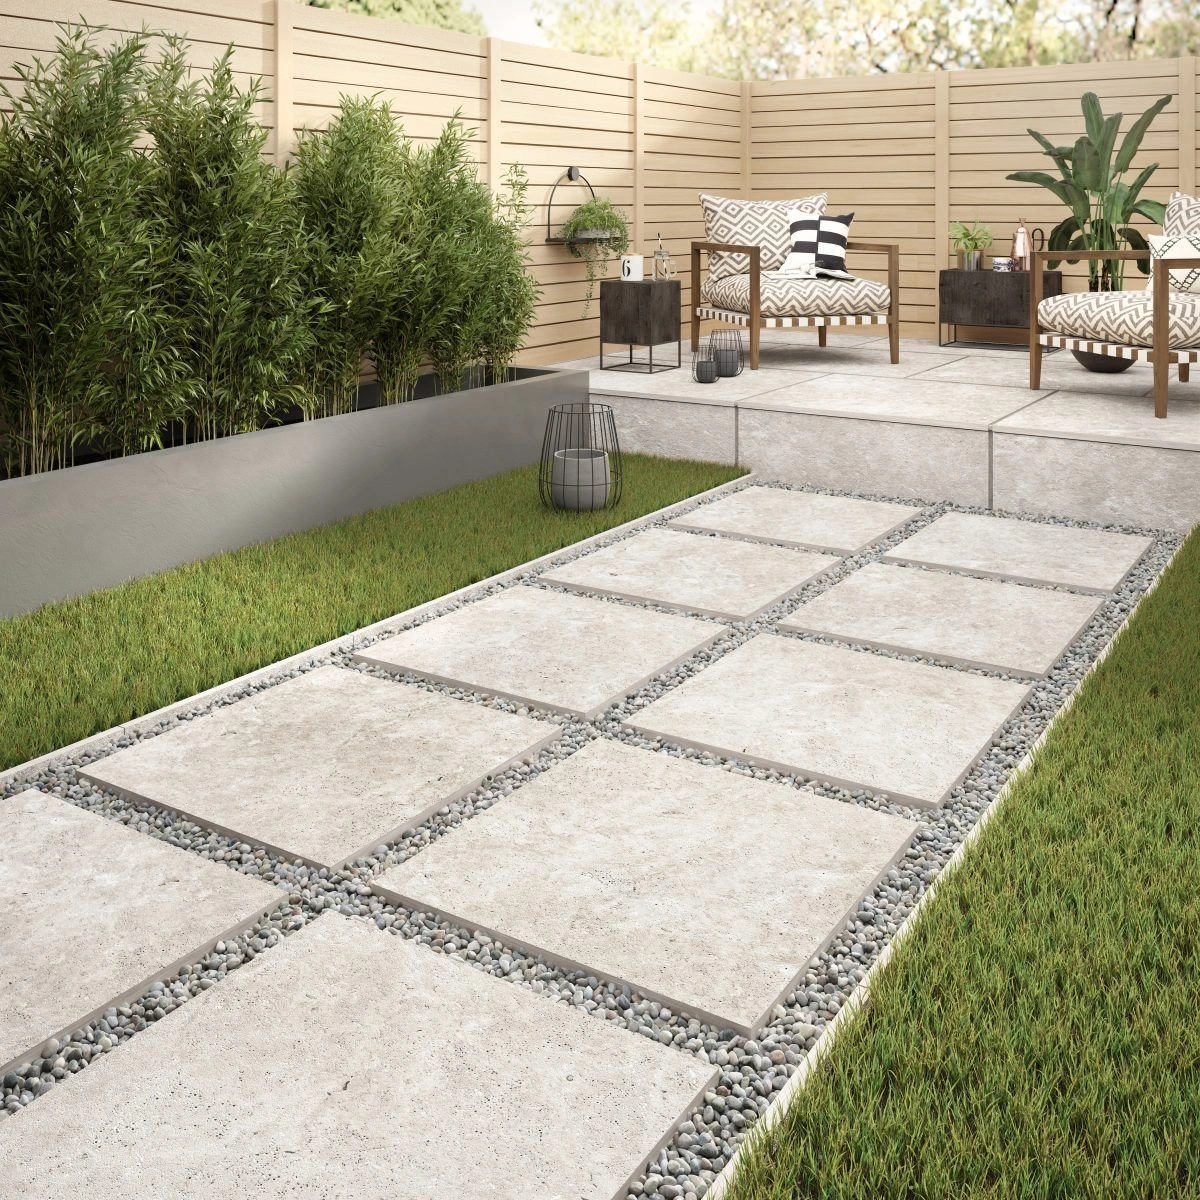
Coastal homes across Victoria demand outdoor structures that handle salt air, strong winds, moisture exposure, and temperature shifts. Timber decks can perform well when maintained properly, but in many coastal locations, stone decking offers greater long term stability and lower structural movement. This guide explains practical outdoor Stone Deck Design and Construction Victoria Australia homeowners can rely on. It covers recommended materials for Coastal Victoria, 2026 design trends, and key maintenance strategies. It also outlines how Sky Nature approaches stone deck construction for coastal conditions with durability and compliance in mind. The goal is simple. Provide accurate information that helps property owners make informed decisions when investing in Stone Decking Victoria Australia. Why Stone Decking Works Well in Coastal Victoria? Coastal Victoria properties experience: Salt laden air that accelerates corrosion High UV exposure Wind driven rain Soil movement in sandy or reactive zones Moisture build up under poorly ventilated decks Natural stone and engineered stone pavers perform well in these conditions when installed with proper sub base preparation and drainage design. Unlike untreated timber, stone does not rot, warp, or host termites. Unlike some composites, it does not fade significantly under prolonged UV exposure. Stone decks also offers: High compressive strength Low long term movement Strong fire resistance performance Better load distribution Minimal structural noise For coastal homes that prioritise structural reliability and visual permanence, outdoor Stone Deck Design and Construction Victoria Australia solutions built with stone provide long term value. Recommended Materials for Coastal Victoria Material selection directly affects performance. Not all stone performs equally in coastal environments. Below are the most suitable materials for Stone Decking service Victoria Australia coastal projects. 1. Bluestone Bluestone is widely used across Victoria due to its density and durability. It offers: High resistance to salt exposure Strong structural integrity Slip resistant finishes when honed or flamed A neutral charcoal appearance suitable for modern coastal homes Bluestone performs particularly well in Melbourne and coastal builds due to its proven track record in local conditions. Best suited for: Contemporary coastal homes Pool surrounds Elevated stone decks Courtyard platforms 2. Travertine Travertine remains popular for coastal homes seeking a lighter appearance. It offers Cooler surface temperature in summer Natural slip resistance A softer coastal aesthetic However, it must be sealed correctly in coastal Victoria due to salt exposure. Without sealing, surface deterioration can occur over time. Best suited for: Hamptons style homes Pool decks Open alfresco areas 3. Granite Granite is extremely dense and performs exceptionally well in harsh environments. It provides Excellent salt resistance Very low water absorption High load capacity Long lifespan with minimal wear It suits exposed coastal sites with high wind and moisture. Best suited for: Cliff top homes High traffic entertainment zones Structural raised decks 4. Porcelain Pavers for Coastal Deck Systems High quality external porcelain pavers are increasingly used in outdoor Stone Deck Design and Construction Victoria Australia projects. They are technically not natural stone but are often considered within stone decking systems. Benefits include: Very low water absorption High stain resistance Consistent finish Lightweight pedestal system installation Porcelain is ideal for raised decks where weight reduction matters. Structural Considerations for Coastal Stone Deck Construction Proper construction matters more than material alone. Coastal Victoria decks must account for Adequate drainage fall to prevent pooling Waterproof membranes for elevated structures Stainless steel fixings rated for marine environments Engineered sub base compaction Expansion joints for thermal movement Outdoor Stone Deck Design Victoria Australia projects that ignore these fundamentals often fail prematurely. Surface cracking, tile lift, or moisture infiltration typically result from poor substrate preparation. Sky Nature prioritises site assessment before design finalisation. Soil type, wind exposure, drainage paths, and existing structure are evaluated before recommending stone type or deck configuration. 2026 Design Trends for Coastal Stone Decks in Victoria Design trends continue to shift toward practicality combined with architectural simplicity. 1. Large Format Pavers Oversized pavers reduce grout lines and create a cleaner appearance. They also reduce long term maintenance. 2. Seamless Indoor to Outdoor Flow Matching interior floor tiles to outdoor stone decking creates visual continuity. This is increasingly popular in premium coastal homes. 3. Neutral Coastal Colour Palettes Soft greys, warm beige tones, and muted charcoal remain dominant across Victoria. 4. Integrated Seating and Stone Features Built in stone benches, fire pit surrounds, and planter edges are being incorporated into deck designs. 5. Raised Pedestal Systems These systems improve drainage and allow concealed services underneath the deck surface. They are ideal for sloped coastal blocks. 2026 outdoor Stone Deck Design and Construction Victoria Australia projects show clear movement toward performance driven aesthetics rather than decorative excess. Key Maintenance for Coastal Decks Even durable materials require structured maintenance. Coastal Victoria properties should follow these principles. Regular Cleaning Salt residue builds up over time. Washing the surface with fresh water every few months reduces crystallisation damage. Sealing Where Required Travertine and some natural stones require sealing every two to three years depending on exposure level. Joint Inspection Grout and expansion joints should be checked annually to prevent water infiltration. Drainage Clearance Blocked drainage channels lead to water pooling and long term structural stress. Rust Inspection Metal components near decks should be marine grade to prevent staining or structural weakening. Stone Decking Victoria Australia installations can last decades when maintained properly. Cost Factors for Stone Decking Victoria Australia Pricing depends on: Material selection Site access Ground preparation Drainage complexity Structural engineering requirements Elevated versus ground level installation Natural stone typically carries higher material costs than timber, but reduced long term maintenance can offset this over time. Why Position Sky Nature for Coastal Stone Deck Construction? Sky Nature operates from Mickleham in Victoria and understands local soil profiles, council considerations, and environmental exposure patterns. The team focuses on structured site evaluation before installation. Key strengths include: Accurate sub base engineering Drainage planning Marine grade fixings Professional stone laying techniques Clear maintenance guidance Rather than offering generic decking solutions in australia, Sky Nature provides outdoor Stone Deck Design and Construction Victoria Australia services built specifically for Victorian conditions. Property owners seeking reliable Stone Decking Victoria Australia installations benefit from working with contractors who understand coastal exposure challenges. Common Questions About Coastal Stone Decking in Victoria 1. Is stone decking slippery in coastal areas? Slip resistance depends on finish selection. Flamed, textured, or honed finishes provide better traction than polished stone. 2. Does salt damage stone decking? Highly porous stone can deteriorate without sealing. Dense stones such as granite and bluestone perform well in marine environments. 3. How long does stone decking last? Properly installed stone decks can last 25 to 50 years or more depending on material and maintenance. 4. Can stone decking be installed on raised structures? Yes. Pedestal systems or reinforced concrete bases allow stone decking for elevated coastal homes. Is stone decking more expensive than timber? Initial cost is generally higher, but long term maintenance and replacement frequency may be lower. Conclusion Outdoor Stone Deck Design and Construction service provider Victoria Australia projects require more than visual planning. Coastal exposure, drainage engineering, material density, and installation technique determine long term performance. For homeowners seeking Stone Decking Victoria Australia solutions that withstand salt air and shifting weather conditions, careful material selection and professional construction are essential. Sky Nature provides structured stone deck solutions designed for Victoria coastal homes. From material guidance to precision installation and maintenance planning, the focus remains on durability, compliance, and long term value. If you are planning a coastal stone deck project in Victoria, discuss your site conditions and long term expectations with Sky Nature to determine the most suitable solution for your property. We love to hear from you Contact Us
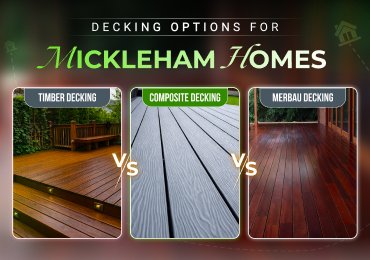
Outdoor living is a key part of many Mickleham homes. A well built deck adds usable space, improves property value, and makes gardens easier to enjoy year round. Choosing the right decking material matters because Mickleham conditions include hot summers, cool winters, and clay heavy soil that can affect ground movement and drainage. Homeowners usually compare three main options Composite decking Traditional timber decking Merbau decking Each option performs differently in durability, maintenance, sustainability, and long term cost. This guide explains those differences clearly so property owners can choose what suits their home, lifestyle, and budget. Sky Nature installs all three options and works with Mickleham homeowners who want practical advice rather than sales talk. Understanding Local Conditions in Mickleham Before comparing materials, it helps to understand the local environment. Mickleham experiences, Strong summer sun that can fade and dry out surfaces Cold winter mornings with moisture and condensation Reactive clay soil that expands and contracts Decking materials must handle temperature changes, moisture exposure, and ground movement without warping or cracking. Maintenance effort also matters because many homeowners prefer low upkeep outdoor spaces. Composite Decking for Mickleham Homes Composite decking Mickleham is made from a blend of recycled timber fibres and plastic polymers. It is designed to look like natural timber while offering higher durability and lower maintenance. Benefits of Composite Decking: Composite decking performs well in Mickleham conditions. It resists moisture and does not absorb water like natural timber. It does not splinter, crack, or warp easily. It handles heat better than many softwoods. It requires no sanding, staining, or oiling. Cleaning usually only needs water and mild detergent. Many composite decking products used in Victoria are designed to meet Australian standards for UV resistance and outdoor use. Maintenance Requirements: Maintenance is minimal. No annual sealing or oiling. No risk of termite damage. Colour remains stable for many years. This makes composite decking attractive for busy households or rental properties. Sustainability Factors: Composite decking often uses recycled materials. It reduces demand for new timber harvesting. Long lifespan means fewer replacements over time. For eco conscious homeowners, composite decking Victoria products are often the most sustainable option. Cost Considerations: Initial cost is usually higher than standard timber. Long term costs are lower due to reduced maintenance. Over a 10 to 20 year period, composite decking often becomes cost effective. Traditional Timber Decking in Mickleham Timber decking includes treated pine and other hardwood options excluding merbau. Many homeowners still prefer the natural look and feel of real timber. Benefits of Timber Decking: Natural timber has a warm and traditional appearance. It suits classic garden designs and older homes. Initial installation costs can be lower. Timber decking is easy to repair if individual boards are damaged. Maintenance Requirements: Timber requires regular care. Annual oiling or sealing is recommended. Boards can fade, crack, or splinter if neglected. Moisture exposure increases the risk of rot over time. In Mickleham, timber decks exposed to full sun and rain need consistent maintenance to remain safe and visually appealing. Durability in Local Conditions: Timber performance depends on quality and maintenance. Clay soil movement can affect substructure if not installed correctly. Poor drainage increases wear and lifespan reduction. Professional installation and correct spacing are critical. Cost Considerations: Lower upfront cost than composite. Higher long term maintenance expenses. Timber suits homeowners who enjoy hands on upkeep and prefer a natural ageing look. Merbau Decking in Melbourne and Mickleham Merbau decking is a popular hardwood option across Melbourne. It is known for strength, density, and rich colour. Benefits of Merbau Decking: Merbau is extremely durable. It handles heavy foot traffic well. Natural oils provide resistance to decay and insects. It delivers a premium appearance. Merbau decking Melbourne homes often use it for entertaining areas and large decks. Maintenance Requirements: Merbau still needs care. Regular oiling preserves colour and surface strength. Tannin bleed can stain surrounding surfaces if not sealed correctly. Sun exposure can cause greying without maintenance. Proper installation and sealing are essential in residential areas. Environmental Considerations: Merbau is a natural hardwood. Responsible sourcing is critical. Some products are certified while others are not. Homeowners focused on sustainability should confirm sourcing standards. Cost Considerations: Higher material cost than standard timber. Comparable or slightly lower than composite in some cases. Long lifespan if maintained properly. Merbau suits homeowners wanting a strong, premium timber finish and who are comfortable with ongoing care. Composite vs Timber vs Merbau Comparison Appearance: Composite offers consistent colour and finish. Timber offers natural grain variation. Merbau offers deep rich tones and premium look. Maintenance: Composite requires the least maintenance. Timber requires regular sealing. Merbau requires oiling and tannin management. Durability: Composite resists weather and moisture best. Merbau is the strongest natural timber option. Standard timber durability depends on care. Sustainability: Composite often uses recycled materials. Timber sustainability depends on sourcing. Merbau requires careful certification checks. Long Term Cost: Composite offers the lowest long term cost. Timber has lower upfront cost but higher upkeep. Merbau sits between both depending on maintenance. Choosing the Right Decking for Your Mickleham Home The right decking choice depends on lifestyle and priorities. Choose composite decking if, You want minimal maintenance You prefer consistent appearance You value long term durability Choose timber decking if, You enjoy natural ageing timber You are comfortable with regular upkeep You want lower upfront cost Choose merbau decking if, You want premium hardwood strength You entertain often You are willing to maintain the surface properly A professional site assessment helps determine drainage needs, substructure requirements, and board spacing to avoid future problems. Decking Material Comparison for Mickleham Homes Feature Composite Decking Timber Decking Merbau Decking Common use in Mickleham Modern homes and low maintenance outdoor areas Traditional homes and garden decks Premium decks and entertaining areas Material type Recycled wood fibre and plastic blend Natural softwood or hardwood Dense natural hardwood Appearance Uniform colour and consistent finish Natural grain and texture Rich dark colour with natural grain Maintenance level Very low High Moderate to high Oiling or sealing Not required Required regularly Required regularly Resistance to moisture High Moderate High Performance in heat Stable and fade resistant Can dry and crack Strong but may fade Splinter and crack risk Very low Moderate to high Low Termite resistance Yes Depends on treatment Naturally resistant Suitability for clay soil Excellent when installed correctly Good with correct substructure Excellent with strong framing Sustainability Often uses recycled materials Depends on timber source Depends on certification Expected lifespan 20 to 30 years 10 to 15 years with maintenance 20 to 25 years with maintenance Upfront cost Higher Lower Medium to high Long term cost Low High Medium Best for Busy homeowners and eco conscious buyers Homeowners who prefer natural timber Homeowners wanting a premium timber deck Professional Deck Installation Matters Material choice is only part of the result. Installation quality directly affects safety, lifespan, and appearance. Proper decking installation includes Correct footing depth for clay soil Adequate ventilation under the deck Accurate spacing for expansion and drainage Compliance with local building standards Poor installation leads to movement, uneven boards, and early wear regardless of material choice. Decking Services in Mickleham by Sky Nature Sky Nature provides professional decking Mickleham homeowners trust for practical advice and reliable workmanship. Services include: Decking services for new builds and existing homes Composite decking installation Substructure design for clay soil conditions Low maintenance decking solutions The team understands local soil behaviour, council requirements, and long term performance expectations. You can explore related services through, Decking Services, Composite Decking & Merbau Decking. Each service is designed to suit Mickleham homes and Melbourne climate conditions. Frequently Asked Questions 1. Which decking material is best for Mickleham homes? There is no single best option for every home. Composite decking suits low maintenance needs. Timber suits homeowners who prefer a natural look and regular upkeep. Merbau suits those wanting a strong and premium hardwood deck. Local soil and sun exposure also affect the final choice. 2. Is composite decking suitable for Victoria’s climate? Yes. Composite decking Victoria products are designed to handle heat, moisture, and temperature changes. They resist warping, splintering, and fading better than many natural timbers when installed correctly. 3. How much maintenance does merbau decking require? Merbau decking requires regular oiling to maintain colour and surface protection. It can release natural tannins if not sealed properly. With proper care, merbau performs well in Melbourne and Mickleham conditions. 4. Does timber decking last long in clay soil areas like Mickleham? Timber decking can last well if installed with a strong substructure and good drainage. Clay soil movement makes professional installation important. Regular maintenance helps extend lifespan. 5. Is composite decking more expensive than timber? Composite decking usually costs more upfront than standard timber. Over time, it can be more cost effective because it does not need sanding, staining, or sealing. 6. Do I need council approval for a new deck in Mickleham? Some decks require council approval depending on height, size, and location. A local decking service can advise on compliance and handle requirements during planning and installation. Final Thoughts on Decking Choices There is no single best decking option for every home. The best choice balances durability, maintenance effort, sustainability, and budget. Composite decking suits modern low maintenance living. Timber decking suits traditional styles and hands on owners. Merbau decking suits premium outdoor entertaining spaces. With correct planning and professional deck installation, all three options can perform well in Mickleham. Request a Decking Quote from a Local Mickleham Team If you are planning a new deck or replacing an existing one, working with a local team makes a difference. Request a decking quote from a local Mickleham team at Sky Nature. You will receive honest advice, clear material options, and a solution designed for your property and lifestyle. We love to hear from you Contact Us
Outdoor living is a big part of the Australian lifestyle, and homeowners across Victoria are always searching for durable, low-maintenance, and stylish decking solutions. While timber and composite decks remain popular, stone decking in victoria australia is quickly gaining attention for its timeless beauty and ability to withstand Australia’s diverse climate. In this guide, we’ll explore why stone decking is a smart choice, the best materials available, and tips for maintaining your deck in top condition. Why Choose Stone Decking in Victoria? Victoria’s climate can be unpredictable—hot summers, chilly winters, and rainy coastal conditions mean outdoor spaces need materials that last. Here’s why stone decking stands out: Weather resistance: Unlike timber, stone doesn’t warp, rot, or attract termites. Low maintenance: Minimal cleaning and sealing compared to wood. Aesthetic appeal: A natural, elegant look that complements both modern and traditional homes. Longevity: With proper installation, stone decks can last for decades. Types of Stone Decking Materials Not all stone is created equal. Choosing the right material depends on your design, budget, and lifestyle needs. Bluestone: Popular in Victoria, known for its durability and non-slip surface. Granite: A premium option, extremely hard-wearing and stylish. Sandstone: Softer underfoot, with warm tones ideal for garden settings. Porcelain Pavers: A modern alternative, lightweight yet strong, resistant to staining. Tip: Always choose a stone that suits your outdoor usage. For poolside decking, slip-resistant options like bluestone or textured porcelain are best. Stone Decking vs. Other Decking Materials Wondering how stone compares to other options? Stone vs. Timber: Timber looks warm but requires constant maintenance; stone is sturdier and termite-proof. Stone vs. Composite: Composite is eco-friendly and stylish, but stone offers unmatched natural appeal and longer lifespan. Stone vs. Concrete: Concrete can crack over time, while stone is more durable and visually appealing. By weighing these factors, many Victorian homeowners see stone decking as a smart, long-term investment. Cost & Installation Factors While stone decking may have a higher upfront investment than timber or composite, it offers long-term savings. Key factors that influence cost include: Type of stone selected Size and complexity of the deck design Labour and installation techniques Site preparation (leveling, drainage, etc.) Pro tip: Think of stone decking as a “once in a lifetime” investment. Unlike timber, it doesn’t need frequent replacement. Maintenance Tips for Stone Decking Keeping your stone deck looking great is easier than you think: Regular cleaning: Sweep off leaves and debris to prevent staining. Gentle washing: Use mild soap and water; avoid harsh chemicals. Sealing (if needed): Some stones benefit from sealing to enhance durability. Algae & moss control: A quick clean in wet months prevents slippery surfaces. With basic care, your stone deck can stay beautiful for decades. Best Uses of Stone Decking in Victoria Stone decking is versatile and works beautifully in different outdoor areas: Pool surrounds: Slip-resistant and heat-tolerant surfaces. Patios & courtyards: Elegant entertaining spaces. Garden walkways: Blends naturally with landscapes. Outdoor kitchens: Durable surface for high-use areas. No matter your outdoor design goals, stone decking adds both functionality and visual appeal. Frequently Asked Questions (FAQs) 1. Is stone decking good for the Australian climate? Yes. Stone is naturally resistant to heat, rain, and pests, making it ideal for Victoria’s changing weather. 2. What is the most durable stone for decking? Granite and bluestone are among the most durable, withstanding heavy use and harsh climates. 3. Does stone decking get hot in summer? Lighter-coloured stones like sandstone and porcelain reflect heat better and stay cooler underfoot. 4. Can stone decking be slippery when wet? Most outdoor-grade stone is textured for slip resistance, but proper sealing and cleaning also reduce slipperiness. 5. How long does stone decking last? With correct installation, stone decking can last 20–50 years, far longer than timber alternatives. Conclusion Stone decking is one of the smartest choices for homeowners in Victoria who want durability, low maintenance, and timeless style. From pool surrounds to patios and walkways, stone elevates outdoor living spaces while adding long-term value to your property. Looking for expert stone decking installation in Victoria, Australia? At Skynature, we specialise in designing and building custom stone decks that blend beauty with functionality. Contact us today to discuss your project and create an outdoor space that lasts for decades. We love to hear from you Contact Us
Top dressing your lawn is one of the best ways to transform patchy turf into a thriving, vibrant green expanse. But to get that dream lawn, it's not just about top dressing—you'll want to tackle thatch buildup, ensure proper aeration, and maintain consistent care. This guide walks you through dethatching your lawn, choosing lawn dethatching services (if needed), preparing your soil, aerating your lawn, and applying top dressing for professional-grade results. Why Top Dressing Lawn Matters Top dressing involves spreading a thin mix of compost, sand, and soil over your turf. It: Improves soil structure and drainage Encourages healthy root growth Smooths out unevenness and repairs bare patches Works best after dethatching and aerating But if your lawn is caked with old grass debris, it will block air, water, and nutrients. That’s where dethatching your lawn and aerating your lawn come in. Step 1 – Dethatching Your Lawn for Better Penetration Dethatching removes the buildup of dead grass and organic material at the soil surface (the “thatch layer”). If left unchecked, thatch: Prevents water and nutrients from reaching roots Encourages pests and disease Makes top dressing ineffective How to dethatch your lawn: Check thatch depth—anything over ½ inch is problematic. For small areas, use a handheld dethatching rake; for large lawns, rent or hire a power dethatcher. Go over the lawn once lengthwise, then sideways. Remove debris and dispose of it—or compost it if clean. If this sounds tricky, consider lawn dethatching services—many local providers can do a neat, efficient job. Pairing a service with your top dressing process saves time and guarantees effectiveness. Step 2 – Aerating Your Lawn Before Top Dressing After dethatching, aerating your lawn is key to ensuring the amendments reach the root zone. Core aeration relieves compaction and fosters root development through better water absorption. DIY aeration steps: Ensure soil is moderately moist (water first if dry). Use a core aerator (plug-style) over the lawn once or twice, spacing passes evenly. Leave soil plugs on the surface—they break down, enriching your lawn. Combining dethatching and aeration creates healthy entry points for top dressing to work wonders. Step 3 – Choose the Best Top Dressing Mix A high-quality top dressing mix typically includes: 40–60% coarse sand (improves drainage) 30–40% quality compost (adds nutrients) 10–20% topsoil (for texture consistency) Local suppliers or turf professionals can blend premixed solutions. Use a shovel or wheelbarrow to haul the mix to your lawn area. Step 4 – Applying Top Dressing to Your Lawn How to top dressing lawn properly: Use a shovel or drop spreader to distribute ⅛ to ¼ inch of mix evenly. Lightly rake to incorporate into grass without smothering it. Water thoroughly to help the mix settle. Don’t mow for a few days, or set mower high and catch clippings. This seals the amendments into working with your existing soil and plants. Step 5 – Follow-up Care & Maintenance Continue watering lightly and regularly for 1–2 weeks. Fertilize with a balanced lawn feed a month later. Resume mowing at the proper height (usually 2½–3 inches). Consider spot-treating with compost in bare or low areas. Combine seasonal dethatching, aerating, and top dressing annually or bi-annually for optimal lawn health. Spread the Load: Hire Professional Lawn Dethatching & Aerating Services If the idea of rental gear or repetitive work isn’t for you, a pro service can help: Lawn dethatching services—cut thatch back fast; leaves minimal mess. Aerating your lawn services—offers plug aeration for compaction relief. Combined with top dressing lawn services, you can skip the hassles and get expert results. FAQ – Common Questions About Top Dressing Lawn Q1: Can I top dress without dethatching? You can—but you’ll see poor soil contact and little benefit unless thatch is removed first. Q2: When is the best time to aerate and top dress? Early spring or early autumn—when grass is actively growing—for best recovery. Q3: How much top dressing should I apply? A thin layer of about ⅛ to ¼ inch per application; don’t smother the grass. Final Thoughts: A Beautiful Lawn Starts with the Basics Proper dethatching your lawn, aerating your lawn, and carefully layering top dressing lawn mix sets the foundation for a thick, green lawn that resists weeds, drought, and disease. Whether you tackle it yourself or hire lawn dethatching services, this seasonal care will pay dividends in long-term turf health—and will make your garden a standout in the neighborhood. When you're ready for expert help or just need the right products, visit Sky Nature to explore soil mixes, top dressing blends, and professional lawn care services. We love to hear from you Contact Us