Blogs
Our Latest Blogs
Transform your outdoor space with expert fencing, durable decking, and precision mowing services, ensuring beauty, privacy, and perfection.
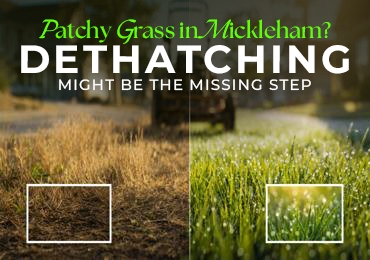
Patchy Grass in Mickleham? Dethatching Might Be the Missing Step
Patchy grass in Mickleham is rarely just a watering issue. In many local lawns, the real constraint is what sits between the soil and the grass. A dense thatch layer builds up over time and quietly blocks the basics your lawn depends on. If your lawn looks uneven even after regular care, a targeted lawn dethatching service Mickleham is often the missing step that restores consistency. Why Patchy Lawns Are Common in Mickleham Mickleham lawns face a mix of clay-heavy soil, new estate construction, and irregular maintenance patterns. These factors create ideal conditions for thatch build-up. Key local triggers include: Rapid grass growth in spring followed by dry stress in summer Clay soil reducing natural decomposition of organic matter Frequent mowing without removal of clippings Irrigation that keeps the surface moist but not the root zone Over time, this leads to a compacted organic layer that separates the grass from the soil. What Actually Happens When Thatch Builds Up Thatch is not just dead grass. It is a compressed layer of stems, roots, and debris that changes how your lawn behaves. Once it crosses about 15 mm, it starts to: Block water from reaching the root zone Trap moisture at the surface, increasing disease risk Limit oxygen exchange in the soil Prevent fertiliser from penetrating effectively This is why lawns can look dry and overwatered at the same time. The roots are still starved. This is where lawn dethatching becomes a corrective process, not just maintenance. Learn How Aeration Supports Lawn Health Aeration improves soil condition by creating small openings that allow air, water, and nutrients to reach the roots. It is useful when the soil feels hard or drainage is poor. Read more about when and why aeration is needed How Lawn Dethatching Fixes Patchy Growth A proper lawn dethatching service Mickleham removes the barrier layer and resets the lawn's surface. The immediate technical improvements are: Direct soil exposure for water and nutrients Improved root respiration due to better airflow Activation of dormant growth points More uniform soil temperature across the lawn This creates conditions where new growth can spread into previously weak areas. How to Confirm Your Lawn Needs Dethatching Instead of guessing, use simple field checks. Dig a small section of turf and measure the thatch layer. If it is more than 10 to 15 mm, dethatching is recommended Run a hose for 5 minutes. If water pools or runs off, the surface is blocked Press your foot into the lawn. A spongy feel usually indicates heavy thatch Check root depth. Shallow roots combined with patchy grass signal poor soil access These indicators are more reliable than visual appearance alone. Dethatching vs Aeration in Real Scenarios In Mickleham, lawns often need both, but in the correct order. If the surface is blocked, dethatching comes first If the soil is hard underneath, aeration follows Doing aeration without removing thatch limits its effectiveness because the holes do not properly connect to the soil system. Best Timing for Lawn Dethatching Victoria Australia Timing should align with active recovery phases. In lawn dethatching Victoria Australia conditions: Early spring supports fast regrowth after removal Early autumn allows recovery before winter dormancy Avoid peak summer in Mickleham. High temperatures slow recovery and increase stress on exposed roots. Compare Dethatching and Aeration for Better Results Dethatching removes the surface layer that blocks water and nutrients, while aeration works deeper in the soil. Both serve different purposes and are often used together for healthier lawns. See a clear comparison here What Most DIY Dethatching Gets Wrong DIY dethatching often removes too little or too much. Common issues include: Shallow passes that leave the problem layer intact Aggressive raking that damages healthy crowns Uneven coverage leading to inconsistent regrowth No follow-up care such as fertilising or watering adjustment This is why many lawns remain patchy even after effort. Sky Nature Expert Solution for Lawn Dethatching A structured approach is what separates visible improvement from temporary results. Sky Nature delivers lawn dethatching service Mickleham with a focus on correction, not just cleanup. Their process includes: Measuring thatch depth and lawn condition Selecting the right dethatching intensity Even removal across the entire lawn area Post-service guidance for recovery and growth This ensures the lawn does not just look cleaner but actually grows back stronger. If your lawn in Mickleham is still uneven after regular care, book a professional lawn dethatching service Mickleham with Sky Nature and fix the root cause, not just the surface. What Results to Expect After Dethatching Recovery is progressive but measurable. Within 2 to 4 weeks: Water starts penetrating evenly New shoots appear in previously bare patches Grass colour becomes more consistent Within 6 to 8 weeks: Lawn density improves across the full area Patchiness reduces significantly Maintenance becomes easier and more predictable Final takeaway Patchy grass in Mickleham is usually a system issue, not a surface issue. When thatch blocks the connection between soil and grass, no amount of watering or mowing will fix it. Addressing this layer through proper lawn dethatching is often the turning point. With the right timing and method, lawns across Victoria Australia can recover into a more even and resilient surface. We love to hear from you Contact Us
- 21 March, 2026
- 6 min Read
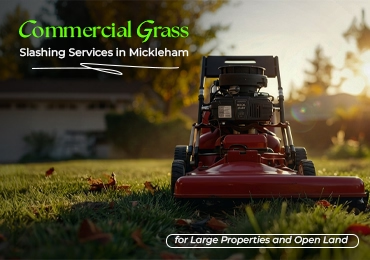
Commercial Grass Slashing Services in Mickleham for Large Properties and Open Land
Grass grows fast across open land in Mickleham. Vacant blocks, commercial sites, roadside areas, and large residential properties often become overgrown within weeks. Long grass is not only an untidy sight. It can also attract pests, create fire risks during dry months, and make land difficult to maintain. Regular cutting and slashing keep properties safe, accessible, and presentable. This is where professional grass slashing services in Mickleham become essential for property owners and businesses. Grass Slashing Services in Mickleham for Large and Difficult Areas Standard mowing works well for small residential lawns. However, large areas require stronger equipment and experienced operators. Grass slashing services in Mickleham are designed for Vacant land and development sites Commercial properties and industrial yards Roadside and boundary areas Acreage properties Overgrown residential lawns Slashing equipment can cut through tall grass, weeds, and dense vegetation quickly. This keeps the land manageable and reduces future maintenance costs. A professional commercial gardener Mickleham property owners trust will assess the land first. The right equipment and cutting method are selected depending on grass height, ground condition, and property size. Why Commercial Properties Need Regular Grass Cutting Service Mickleham Commercial land requires consistent maintenance. Overgrown vegetation can create several problems. Fire risk during the dry season in Victoria Increased pests such as snakes and rodents Poor appearance for clients or tenants Blocked access areas and pathways Council compliance issues A scheduled grass cutting service Mickleham businesses rely on helps avoid these problems. Routine slashing keeps the property safe while maintaining a clean and professional look. Businesses such as warehouses, construction sites, and commercial estates often rely on a commercial gardener Mickleham team for ongoing land maintenance. Professional Lawn Mowing in Victoria for Commercial and Residential Properties Large commercial areas are not the only properties that benefit from professional mowing. Many homeowners in Mickleham now use professional lawn mowing in Victoria to manage their yards. Busy schedules, fast grass growth, and seasonal changes make lawn care difficult for many households. Professional teams provide Routine lawn mowing Edge trimming Weed control support Seasonal grass management Cleanup of clippings and debris This service supports both commercial clients and residential lawn care needs. A combined approach works well. Large areas can be handled through grass slashing services in Mickleham while smaller lawn areas receive detailed mowing and edging. Residential Lawn Care in Growing Suburbs Like Mickleham Mickleham continues to grow with new housing developments and expanding residential areas. With this growth comes the need for reliable residential lawn care. Homeowners often face common lawn challenges. Uneven grass growth Thick weeds during warm seasons Patchy lawns after summer heat Fast growth during spring A professional grass cutting service Mickleham residents use regularly helps maintain healthy and manageable lawns. Regular maintenance improves lawn density, prevents weeds from spreading, and keeps outdoor spaces usable throughout the year. Choosing a Reliable Commercial Gardener Mickleham Selecting the right service provider makes a difference in long term property maintenance. A reliable commercial gardener Mickleham property managers choose should offer Experience with large scale grass slashing Proper equipment for different terrain types Flexible scheduling for seasonal growth Safe and efficient work practices Consistent results across large areas Professional teams understand the land conditions across Victoria. Soil types, seasonal rainfall, and temperature changes all affect grass growth. Experienced operators adjust cutting schedules to match these local conditions. Benefits of Scheduled Grass Slashing Services in Mickleham Many property owners wait until grass becomes too long before arranging maintenance. This often leads to higher costs and more difficult cleanup. Scheduled grass slashing services in Mickleham provide several advantages. Reduced fire hazards during dry months Lower long term maintenance costs Better land accessibility Improved property appearance Healthier grass growth Routine cutting prevents weeds from dominating the area and keeps vegetation at manageable levels. Commercial landowners often combine grass slashing with routine grass cutting service Mickleham programs to maintain both large and smaller areas. When Professional Lawn Mowing in Victoria Becomes Necessary Some signs indicate that professional help is needed. Grass grows faster than it can be maintained Large areas become difficult to manage with home equipment Overgrowth starts affecting property access Land needs clearing before development or construction Regular mowing becomes time consuming Professional lawn mowing in Victoria services solve these problems quickly. Commercial equipment allows large areas to be cleared efficiently while maintaining an even cut across the property. Frequently Asked Questions What is the difference between grass slashing and lawn mowing? Grass slashing is used for large areas with tall grass and weeds. Heavy duty equipment cuts through thick vegetation quickly. Lawn mowing is designed for maintained lawns where grass height is already controlled. How often should grass slashing services in Mickleham be scheduled? Most commercial properties benefit from grass slashing every four to eight weeks depending on seasonal growth. Spring and early summer usually require more frequent cutting. Can grass slashing services be used for residential properties? Yes. Large residential blocks, acreage homes, and vacant land areas often require grass slashing services in Mickleham when grass becomes too tall for regular mowing. Why should businesses hire a commercial gardener Mickleham service? A commercial gardener Mickleham service helps businesses maintain safe and clean properties. Regular maintenance prevents fire hazards, controls weeds, and improves the overall appearance of the site. Do grass cutting services in Mickleham include lawn cleanup? Most professional services include removal or mulching of grass clippings after mowing. This helps keep lawns tidy and supports healthy grass growth. Is professional lawn mowing in Victoria necessary for small lawns? Even small lawns benefit from professional lawn mowing in Victoria. Regular mowing improves lawn health, prevents weed growth, and saves homeowners time. Sky Nature Grass Slashing and Lawn Care Solutions For property owners in Mickleham, reliable maintenance services are important. Large open spaces, new developments, and growing residential areas require consistent land care. Sky Nature provides professional grass slashing services in Mickleham for commercial properties, vacant land, and acreage blocks. The team also delivers dependable residential lawn care and grass cutting service Mickleham homeowners can rely on. With experience in professional lawn mowing in Victoria, Sky Nature focuses on safe equipment use, efficient work, and consistent property maintenance. Property managers, developers, and homeowners can request a customised maintenance plan based on property size, grass growth, and seasonal conditions. If your land or lawn in Mickleham needs regular care, contact Sky Nature to discuss a professional grass slashing and lawn maintenance solution. We love to hear from you Contact Us
- 14 March, 2026
- 7 min Read
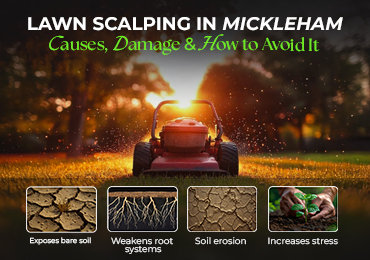
Lawn Scalping in Mickleham: Causes, Damage & How to Avoid It
A well-kept lawn is one of the biggest features of any home in Mickleham. But one mistake many homeowners or inexperienced mowing services make is scalping – cutting the grass too short, exposing bare soil, and leaving the lawn weak and patchy. While some warm-season grasses can occasionally benefit from a seasonal scalping, in most cases it causes more harm than good. In this blog, we’ll cover why scalping happens, the damage it causes, how to avoid it when choosing a mowing service, and what to do if it happens. 1. The Benefits of Pool Decking Lawn scalping happens when grass is cut too short – often below the recommended mowing height – exposing the crown of the grass or even the soil underneath. Instead of a neat, green lawn, you’re left with brown patches, uneven growth, and increased weed invasion. In Mickleham’s climate, with hot summers and cool winters, scalping can set your lawn back for weeks, leaving it vulnerable at the time it needs strength the most. Why and How Scalping Happens Scalping can occur for several reasons, most of which are preventable: Mower set too low – Cutting below the recommended grass height is the most common cause. Uneven lawns – Bumpy or sloped ground in areas around Mickleham can cause mower blades to dip too low. Dull mower blades – Instead of slicing cleanly, they tear the grass, stressing the lawn further. Cutting too much at once – Removing more than one-third of the grass blade in a single mow. Seasonal timing – Mowing stressed lawns during drought or heat waves amplifies scalping damage. The Damage Scalping Causes A scalped lawn doesn’t just look bad – it can cause lasting damage: Exposes bare soil → inviting weeds and pests. Weakens root systems → reducing the lawn’s ability to absorb nutrients and water. Soil erosion → common in open areas and larger blocks around Mickleham. Increases stress → leaving grass more vulnerable to heat, drought, and disease. Once the crown (the growth point of the grass) is damaged, the lawn often takes weeks to recover, sometimes requiring overseeding or professional repair. How to Avoid Scalping (When Hiring a Mowing Service) If you’re choosing a lawn mowing service in Mickleham, here’s what to look for to avoid scalping: Ask about mowing height – Professionals should never cut more than one-third of the grass height in one mow. Skynature’s lawn mowing service follows this golden rule. Check their equipment – A good service uses sharp blades and adjusts height for different lawns. Look for local experience – Mickleham has a mix of residential blocks and acreage properties, so a team experienced in ride-on mowing for large areas is essential. Consistency over shortcuts – Regular mowing keeps lawns healthy without the need for aggressive cuts. Best Practices After Mowing After each mow, a little care goes a long way in keeping your lawn resilient: Light watering to reduce stress. Remove heavy clippings if the grass was long, but mulch mowing is ideal for nutrient recycling. Check for uneven or patchy spots early, so they can be corrected before damage spreads. What to Do If Scalping Happens If your lawn has been scalped, here’s how to help it recover: Water deeply to reduce stress. Fertilise lightly (avoid heavy feeding immediately). Overseed or top-dress bare patches. Aerate compacted soil to improve root recovery. Be patient – recovery can take weeks depending on the season and severity. For larger lawns or repeated scalping damage, professional recovery services may be needed. Scalping vs. Dethatching It’s important not to confuse scalping with dethatching: Scalping = cutting grass too short, damaging it. Dethatching = removing the thick layer of dead grass and debris that builds up on the soil surface. This process is beneficial when done at the right time, but it’s very different from scalping. FAQs About Lawn Scalping How do I stop lawn scalping after mowing? Raise your mower deck, sharpen blades, and mow regularly so you don’t cut too much at once. What should I do after scalping a lawn? Water, lightly fertilise, and overseed bare patches. Avoid mowing again until regrowth is visible. Does scalping a lawn kill weeds? It may reduce some weeds temporarily, but bare soil often allows more weeds to invade. Scalped lawn recovery time? Anywhere from 2–6 weeks depending on season, grass type, and severity. Is scalping the same as dethatching? No. Dethatching removes debris; scalping cuts the grass too short. Conclusion Scalping is one of the most common lawn care mistakes, but it’s also one of the easiest to avoid with the right practices. For homeowners in Mickleham, Victoria 3064, where lawns are exposed to both summer heat and winter chill, avoiding scalping is key to maintaining a green, healthy yard. At Skynature, we provide professional mowing services tailored to local conditions in Mickleham. Whether it’s regular lawn mowing or ride-on mowing for acreage, we ensure your lawn is cut at the right height and cared for all year round. We love to hear from you Contact Us
- 22 February, 2026
- 7 min Read
Outdoor Stone Deck Solutions for Coastal Victoria Homes
Coastal homes across Victoria demand outdoor structures that handle salt air, strong winds, moisture exposure, and temperature shifts. Timber decks can perform well when maintained properly, but in many coastal locations, stone decking offers greater long term stability and lower structural movement. This guide explains practical outdoor Stone Deck Design and Construction Victoria Australia homeowners can rely on. It covers recommended materials for Coastal Victoria, 2026 design trends, and key maintenance strategies. It also outlines how Sky Nature approaches stone deck construction for coastal conditions with durability and compliance in mind. The goal is simple. Provide accurate information that helps property owners make informed decisions when investing in Stone Decking Victoria Australia. Why Stone Decking Works Well in Coastal Victoria? Coastal Victoria properties experience: Salt laden air that accelerates corrosion High UV exposure Wind driven rain Soil movement in sandy or reactive zones Moisture build up under poorly ventilated decks Natural stone and engineered stone pavers perform well in these conditions when installed with proper sub base preparation and drainage design. Unlike untreated timber, stone does not rot, warp, or host termites. Unlike some composites, it does not fade significantly under prolonged UV exposure. Stone decks also offers: High compressive strength Low long term movement Strong fire resistance performance Better load distribution Minimal structural noise For coastal homes that prioritise structural reliability and visual permanence, outdoor Stone Deck Design and Construction Victoria Australia solutions built with stone provide long term value. Recommended Materials for Coastal Victoria Material selection directly affects performance. Not all stone performs equally in coastal environments. Below are the most suitable materials for Stone Decking service Victoria Australia coastal projects. 1. Bluestone Bluestone is widely used across Victoria due to its density and durability. It offers: High resistance to salt exposure Strong structural integrity Slip resistant finishes when honed or flamed A neutral charcoal appearance suitable for modern coastal homes Bluestone performs particularly well in Melbourne and coastal builds due to its proven track record in local conditions. Best suited for: Contemporary coastal homes Pool surrounds Elevated stone decks Courtyard platforms 2. Travertine Travertine remains popular for coastal homes seeking a lighter appearance. It offers Cooler surface temperature in summer Natural slip resistance A softer coastal aesthetic However, it must be sealed correctly in coastal Victoria due to salt exposure. Without sealing, surface deterioration can occur over time. Best suited for: Hamptons style homes Pool decks Open alfresco areas 3. Granite Granite is extremely dense and performs exceptionally well in harsh environments. It provides Excellent salt resistance Very low water absorption High load capacity Long lifespan with minimal wear It suits exposed coastal sites with high wind and moisture. Best suited for: Cliff top homes High traffic entertainment zones Structural raised decks 4. Porcelain Pavers for Coastal Deck Systems High quality external porcelain pavers are increasingly used in outdoor Stone Deck Design and Construction Victoria Australia projects. They are technically not natural stone but are often considered within stone decking systems. Benefits include: Very low water absorption High stain resistance Consistent finish Lightweight pedestal system installation Porcelain is ideal for raised decks where weight reduction matters. Structural Considerations for Coastal Stone Deck Construction Proper construction matters more than material alone. Coastal Victoria decks must account for Adequate drainage fall to prevent pooling Waterproof membranes for elevated structures Stainless steel fixings rated for marine environments Engineered sub base compaction Expansion joints for thermal movement Outdoor Stone Deck Design Victoria Australia projects that ignore these fundamentals often fail prematurely. Surface cracking, tile lift, or moisture infiltration typically result from poor substrate preparation. Sky Nature prioritises site assessment before design finalisation. Soil type, wind exposure, drainage paths, and existing structure are evaluated before recommending stone type or deck configuration. 2026 Design Trends for Coastal Stone Decks in Victoria Design trends continue to shift toward practicality combined with architectural simplicity. 1. Large Format Pavers Oversized pavers reduce grout lines and create a cleaner appearance. They also reduce long term maintenance. 2. Seamless Indoor to Outdoor Flow Matching interior floor tiles to outdoor stone decking creates visual continuity. This is increasingly popular in premium coastal homes. 3. Neutral Coastal Colour Palettes Soft greys, warm beige tones, and muted charcoal remain dominant across Victoria. 4. Integrated Seating and Stone Features Built in stone benches, fire pit surrounds, and planter edges are being incorporated into deck designs. 5. Raised Pedestal Systems These systems improve drainage and allow concealed services underneath the deck surface. They are ideal for sloped coastal blocks. 2026 outdoor Stone Deck Design and Construction Victoria Australia projects show clear movement toward performance driven aesthetics rather than decorative excess. Key Maintenance for Coastal Decks Even durable materials require structured maintenance. Coastal Victoria properties should follow these principles. Regular Cleaning Salt residue builds up over time. Washing the surface with fresh water every few months reduces crystallisation damage. Sealing Where Required Travertine and some natural stones require sealing every two to three years depending on exposure level. Joint Inspection Grout and expansion joints should be checked annually to prevent water infiltration. Drainage Clearance Blocked drainage channels lead to water pooling and long term structural stress. Rust Inspection Metal components near decks should be marine grade to prevent staining or structural weakening. Stone Decking Victoria Australia installations can last decades when maintained properly. Cost Factors for Stone Decking Victoria Australia Pricing depends on: Material selection Site access Ground preparation Drainage complexity Structural engineering requirements Elevated versus ground level installation Natural stone typically carries higher material costs than timber, but reduced long term maintenance can offset this over time. Why Position Sky Nature for Coastal Stone Deck Construction? Sky Nature operates from Mickleham in Victoria and understands local soil profiles, council considerations, and environmental exposure patterns. The team focuses on structured site evaluation before installation. Key strengths include: Accurate sub base engineering Drainage planning Marine grade fixings Professional stone laying techniques Clear maintenance guidance Rather than offering generic decking solutions in australia, Sky Nature provides outdoor Stone Deck Design and Construction Victoria Australia services built specifically for Victorian conditions. Property owners seeking reliable Stone Decking Victoria Australia installations benefit from working with contractors who understand coastal exposure challenges. Common Questions About Coastal Stone Decking in Victoria 1. Is stone decking slippery in coastal areas? Slip resistance depends on finish selection. Flamed, textured, or honed finishes provide better traction than polished stone. 2. Does salt damage stone decking? Highly porous stone can deteriorate without sealing. Dense stones such as granite and bluestone perform well in marine environments. 3. How long does stone decking last? Properly installed stone decks can last 25 to 50 years or more depending on material and maintenance. 4. Can stone decking be installed on raised structures? Yes. Pedestal systems or reinforced concrete bases allow stone decking for elevated coastal homes. Is stone decking more expensive than timber? Initial cost is generally higher, but long term maintenance and replacement frequency may be lower. Conclusion Outdoor Stone Deck Design and Construction service provider Victoria Australia projects require more than visual planning. Coastal exposure, drainage engineering, material density, and installation technique determine long term performance. For homeowners seeking Stone Decking Victoria Australia solutions that withstand salt air and shifting weather conditions, careful material selection and professional construction are essential. Sky Nature provides structured stone deck solutions designed for Victoria coastal homes. From material guidance to precision installation and maintenance planning, the focus remains on durability, compliance, and long term value. If you are planning a coastal stone deck project in Victoria, discuss your site conditions and long term expectations with Sky Nature to determine the most suitable solution for your property. We love to hear from you Contact Us
- 21 February, 2026
- 9 min Read

Commercial & Contract Gardening in Mickleham: What Property Managers Should Look For
Commercial properties in Mickleham require structured and consistent landscape management. Unlike residential gardening, commercial and contract gardening involves compliance, scheduling discipline, safety systems, reporting, and long term asset protection. Property managers overseeing offices, retail complexes, childcare centres, medical facilities, warehouses, and strata developments need a provider who understands performance standards, documentation, and risk management. This guide explains what to look for when hiring a provider for commercial and contract gardening Victoria. It also outlines the exact services required to maintain healthy grounds throughout the year in Mickleham’s soil and climate conditions. Understanding Commercial and Contract Gardening Commercial gardening refers to ongoing landscape maintenance for business and multi property sites. Contract gardening usually involves a formal agreement with defined scope, frequency, reporting structure, and performance expectations. A professional contract includes: Scheduled lawn mowing and edging Seasonal pruning and plant management Weed control and herbicide compliance Irrigation monitoring Green waste removal Safety and risk reporting Turf renovation and soil correction when required Commercial gardening Mickleham is not simply mowing large lawns. It is structured grounds management aligned with operational risk and presentation standards. Why Mickleham Commercial Landscapes Require Specialist Care? Mickleham, The region is known for clay heavy soil profiles, hot summers, and variable rainfall. These factors directly affect turf performance and plant health across commercial sites. Clay soil leads to: Poor drainage Surface compaction Root restriction Water pooling Patchy turf Commercial properties experience higher foot traffic and vehicle movement, which increases compaction. Property managers should understand that lawn failure in Mickleham is rarely a mowing issue alone. It is usually a soil structure and maintenance frequency issue. For a deeper breakdown of why lawns fail locally and which services fix each problem, refer to Why Mickleham Lawns Struggle Year Round and the Exact Services That Fix Each Problem, This resource explains seasonal turf stress patterns specific to the area. What Property Managers Should Look For in a Commercial Gardening Provider? 1. Structured Maintenance Planning A provider offering contract gardening Victoria should present a written maintenance schedule. It should outline: Weekly and fortnightly tasks Seasonal turf renovation timing Fertiliser programs Irrigation reviews Risk inspections Without structure, results decline quickly. 2. Experience With Clay Soil Turf Management Mickleham lawns require: Core aeration Dethatching Soil conditioning Controlled watering If a provider only offers mowing, turf health will deteriorate over time. A commercial gardening Mickleham provider should understand soil remediation, not just surface maintenance. 3. Compliance and Safety Systems Commercial sites must meet workplace and public safety standards. Look for: Public liability insurance Safe chemical handling procedures Equipment risk management Incident reporting capability Working With Children compliance for childcare centres Contract gardening Victoria involves documentation and risk control. 4. Clear Communication and Reporting Property managers need updates, not guesswork. A professional contractor should provide: Before and after photos Maintenance reports Irrigation fault alerts Plant replacement recommendations Budget forecasting advice Communication is a key indicator of service quality. 5. Capability Beyond Lawn Mowing Commercial landscapes include: Garden beds Shrubs and hedging Trees Irrigation systems Hardscape edges Choose a provider who offers full gardening services, not just turf cutting. Core Services Required for Commercial Gardening in Mickleham Lawn Mowing and Turf Maintenance Commercial lawn mowing victoria australia must follow correct cutting heights. Cutting too low weakens turf in summer. Essential inclusions: Precision edging Clipping management Height control Seasonal aeration Dethatching where required Aeration reduces compaction common in clay soil. Weed Control and Herbicide Management Commercial sites require safe application methods. Over application damages turf and surrounding plants. A proper contract includes: Pre emergent weed control Spot spraying Compliance documentation Environmental safety practices Pruning and Shrub Management Unmanaged shrubs create safety hazards and reduce visibility around driveways and pedestrian paths. Maintenance includes: Structural pruning Seasonal trimming Deadwood removal Height control Irrigation Monitoring Overwatering clay soil causes pooling and fungal growth. Underwatering causes thinning. A commercial gardener in Mickleham should: Inspect irrigation zones Adjust seasonal run times Detect leaks Prevent overspray onto pavements Soil Conditioning and Renovation In Mickleham, soil health directly affects turf quality. Corrective services include: Top dressing Organic soil amendments Aeration Fertilisation programs This is often the difference between short term improvement and long term lawn stability. The Cost of Inconsistent Commercial Gardening When maintenance is irregular, problems escalate: Weed infestation Soil compaction Irrigation damage Plant stress Complaints from tenants Rectification costs more than structured maintenance. Contract gardening Victoria should reduce long term repair expenses. How Commercial Gardening Supports Asset Value Well maintained landscapes: Improve tenant satisfaction Reduce slip hazards Support drainage control Improve property presentation Protect turf and plant investments For strata and retail managers, appearance directly influences occupancy and reputation. Seasonal Maintenance Requirements in Mickleham Summer Mowing frequency increases Water management is critical Turf stress monitoring is required Autumn Aeration Overseeding Soil improvement Winter Weed prevention Drainage monitoring Reduced mowing Spring Fertilisation Growth management Plant health checks The blog referenced earlier explains the lawn specific challenges in more detail. Commercial vs Residential Gardening in Mickleham Key Area Commercial Gardening Mickleham Residential Gardening Maintenance Structure Planned and contract based with defined scope and schedules Flexible and often arranged as needed Service Agreement Formal contract gardening Victoria agreement with performance standards Informal agreement or casual booking Soil Management Clay soil remediation, aeration, dethatching, structured fertilisation programs Basic soil improvement and occasional fertilising Turf Care Height controlled mowing, seasonal renovation, compaction management Standard mowing and general lawn care Compliance Public liability insurance, chemical handling compliance, safety documentation Minimal compliance requirements Reporting Written reports, site inspections, before and after photos Verbal updates or informal communication Irrigation Oversight Scheduled irrigation checks and seasonal adjustments Basic sprinkler monitoring Risk Management Trip hazard checks, overgrowth control, visibility management Limited safety assessment Service Scope Lawn care, garden beds, pruning, weed control, soil conditioning, asset protection Primarily lawn mowing and light gardening Visit Frequency Weekly or fortnightly scheduled visits As requested by homeowner Budget Planning Long term maintenance planning and forecasting Short term service based spending Objective Asset value protection and professional presentation Basic upkeep and visual improvement Questions Property Managers Should Ask Before Signing a Contract What is included in the base service scope How are seasonal renovations handled Are reports provided What insurances are held How are urgent issues addressed What experience do you have with commercial gardening Mickleham Clear answers indicate operational maturity. Why Choose a Local Provider? A local provider understands: Mickleham soil structure Growth cycles in Victoria Local council requirements Water restrictions Sky Nature operates in Mickleham and focuses on long term landscape health rather than short term cosmetic results. The team provides structured commercial gardening and contract gardening services tailored to local conditions. Long Term Maintenance Planning A long term contract should include: Annual soil improvement strategy Turf renovation planning Budget forecasting Scheduled audits Commercial properties perform best when maintenance is proactive, not reactive. Conclusion Commercial and contract gardening in Mickleham requires structured systems, soil knowledge, compliance standards, and consistent execution. Property managers should prioritise providers who understand clay soil management, seasonal turf stress, and reporting requirements. A formal contract gardening Victoria agreement protects landscape assets and reduces long term costs. For properties seeking consistent results, professional planning is essential. Discuss a long term maintenance plan with Sky Nature to ensure your commercial landscape remains healthy, compliant, and professionally maintained throughout the year. We love to hear from you Contact Us
- 13 February, 2026
- 9 min Read

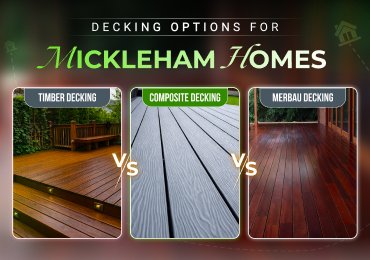
Decking Options for Mickleham Homes: Composite vs Timber vs Merbau
Outdoor living is a key part of many Mickleham homes. A well built deck adds usable space, improves property value, and makes gardens easier to enjoy year round. Choosing the right decking material matters because Mickleham conditions include hot summers, cool winters, and clay heavy soil that can affect ground movement and drainage. Homeowners usually compare three main options Composite decking Traditional timber decking Merbau decking Each option performs differently in durability, maintenance, sustainability, and long term cost. This guide explains those differences clearly so property owners can choose what suits their home, lifestyle, and budget. Sky Nature installs all three options and works with Mickleham homeowners who want practical advice rather than sales talk. Understanding Local Conditions in Mickleham Before comparing materials, it helps to understand the local environment. Mickleham experiences, Strong summer sun that can fade and dry out surfaces Cold winter mornings with moisture and condensation Reactive clay soil that expands and contracts Decking materials must handle temperature changes, moisture exposure, and ground movement without warping or cracking. Maintenance effort also matters because many homeowners prefer low upkeep outdoor spaces. Composite Decking for Mickleham Homes Composite decking Mickleham is made from a blend of recycled timber fibres and plastic polymers. It is designed to look like natural timber while offering higher durability and lower maintenance. Benefits of Composite Decking: Composite decking performs well in Mickleham conditions. It resists moisture and does not absorb water like natural timber. It does not splinter, crack, or warp easily. It handles heat better than many softwoods. It requires no sanding, staining, or oiling. Cleaning usually only needs water and mild detergent. Many composite decking products used in Victoria are designed to meet Australian standards for UV resistance and outdoor use. Maintenance Requirements: Maintenance is minimal. No annual sealing or oiling. No risk of termite damage. Colour remains stable for many years. This makes composite decking attractive for busy households or rental properties. Sustainability Factors: Composite decking often uses recycled materials. It reduces demand for new timber harvesting. Long lifespan means fewer replacements over time. For eco conscious homeowners, composite decking Victoria products are often the most sustainable option. Cost Considerations: Initial cost is usually higher than standard timber. Long term costs are lower due to reduced maintenance. Over a 10 to 20 year period, composite decking often becomes cost effective. Traditional Timber Decking in Mickleham Timber decking includes treated pine and other hardwood options excluding merbau. Many homeowners still prefer the natural look and feel of real timber. Benefits of Timber Decking: Natural timber has a warm and traditional appearance. It suits classic garden designs and older homes. Initial installation costs can be lower. Timber decking is easy to repair if individual boards are damaged. Maintenance Requirements: Timber requires regular care. Annual oiling or sealing is recommended. Boards can fade, crack, or splinter if neglected. Moisture exposure increases the risk of rot over time. In Mickleham, timber decks exposed to full sun and rain need consistent maintenance to remain safe and visually appealing. Durability in Local Conditions: Timber performance depends on quality and maintenance. Clay soil movement can affect substructure if not installed correctly. Poor drainage increases wear and lifespan reduction. Professional installation and correct spacing are critical. Cost Considerations: Lower upfront cost than composite. Higher long term maintenance expenses. Timber suits homeowners who enjoy hands on upkeep and prefer a natural ageing look. Merbau Decking in Melbourne and Mickleham Merbau decking is a popular hardwood option across Melbourne. It is known for strength, density, and rich colour. Benefits of Merbau Decking: Merbau is extremely durable. It handles heavy foot traffic well. Natural oils provide resistance to decay and insects. It delivers a premium appearance. Merbau decking Melbourne homes often use it for entertaining areas and large decks. Maintenance Requirements: Merbau still needs care. Regular oiling preserves colour and surface strength. Tannin bleed can stain surrounding surfaces if not sealed correctly. Sun exposure can cause greying without maintenance. Proper installation and sealing are essential in residential areas. Environmental Considerations: Merbau is a natural hardwood. Responsible sourcing is critical. Some products are certified while others are not. Homeowners focused on sustainability should confirm sourcing standards. Cost Considerations: Higher material cost than standard timber. Comparable or slightly lower than composite in some cases. Long lifespan if maintained properly. Merbau suits homeowners wanting a strong, premium timber finish and who are comfortable with ongoing care. Composite vs Timber vs Merbau Comparison Appearance: Composite offers consistent colour and finish. Timber offers natural grain variation. Merbau offers deep rich tones and premium look. Maintenance: Composite requires the least maintenance. Timber requires regular sealing. Merbau requires oiling and tannin management. Durability: Composite resists weather and moisture best. Merbau is the strongest natural timber option. Standard timber durability depends on care. Sustainability: Composite often uses recycled materials. Timber sustainability depends on sourcing. Merbau requires careful certification checks. Long Term Cost: Composite offers the lowest long term cost. Timber has lower upfront cost but higher upkeep. Merbau sits between both depending on maintenance. Choosing the Right Decking for Your Mickleham Home The right decking choice depends on lifestyle and priorities. Choose composite decking if, You want minimal maintenance You prefer consistent appearance You value long term durability Choose timber decking if, You enjoy natural ageing timber You are comfortable with regular upkeep You want lower upfront cost Choose merbau decking if, You want premium hardwood strength You entertain often You are willing to maintain the surface properly A professional site assessment helps determine drainage needs, substructure requirements, and board spacing to avoid future problems. Decking Material Comparison for Mickleham Homes Feature Composite Decking Timber Decking Merbau Decking Common use in Mickleham Modern homes and low maintenance outdoor areas Traditional homes and garden decks Premium decks and entertaining areas Material type Recycled wood fibre and plastic blend Natural softwood or hardwood Dense natural hardwood Appearance Uniform colour and consistent finish Natural grain and texture Rich dark colour with natural grain Maintenance level Very low High Moderate to high Oiling or sealing Not required Required regularly Required regularly Resistance to moisture High Moderate High Performance in heat Stable and fade resistant Can dry and crack Strong but may fade Splinter and crack risk Very low Moderate to high Low Termite resistance Yes Depends on treatment Naturally resistant Suitability for clay soil Excellent when installed correctly Good with correct substructure Excellent with strong framing Sustainability Often uses recycled materials Depends on timber source Depends on certification Expected lifespan 20 to 30 years 10 to 15 years with maintenance 20 to 25 years with maintenance Upfront cost Higher Lower Medium to high Long term cost Low High Medium Best for Busy homeowners and eco conscious buyers Homeowners who prefer natural timber Homeowners wanting a premium timber deck Professional Deck Installation Matters Material choice is only part of the result. Installation quality directly affects safety, lifespan, and appearance. Proper decking installation includes Correct footing depth for clay soil Adequate ventilation under the deck Accurate spacing for expansion and drainage Compliance with local building standards Poor installation leads to movement, uneven boards, and early wear regardless of material choice. Decking Services in Mickleham by Sky Nature Sky Nature provides professional decking Mickleham homeowners trust for practical advice and reliable workmanship. Services include: Decking services for new builds and existing homes Composite decking installation Substructure design for clay soil conditions Low maintenance decking solutions The team understands local soil behaviour, council requirements, and long term performance expectations. You can explore related services through, Decking Services, Composite Decking & Merbau Decking. Each service is designed to suit Mickleham homes and Melbourne climate conditions. Frequently Asked Questions 1. Which decking material is best for Mickleham homes? There is no single best option for every home. Composite decking suits low maintenance needs. Timber suits homeowners who prefer a natural look and regular upkeep. Merbau suits those wanting a strong and premium hardwood deck. Local soil and sun exposure also affect the final choice. 2. Is composite decking suitable for Victoria’s climate? Yes. Composite decking Victoria products are designed to handle heat, moisture, and temperature changes. They resist warping, splintering, and fading better than many natural timbers when installed correctly. 3. How much maintenance does merbau decking require? Merbau decking requires regular oiling to maintain colour and surface protection. It can release natural tannins if not sealed properly. With proper care, merbau performs well in Melbourne and Mickleham conditions. 4. Does timber decking last long in clay soil areas like Mickleham? Timber decking can last well if installed with a strong substructure and good drainage. Clay soil movement makes professional installation important. Regular maintenance helps extend lifespan. 5. Is composite decking more expensive than timber? Composite decking usually costs more upfront than standard timber. Over time, it can be more cost effective because it does not need sanding, staining, or sealing. 6. Do I need council approval for a new deck in Mickleham? Some decks require council approval depending on height, size, and location. A local decking service can advise on compliance and handle requirements during planning and installation. Final Thoughts on Decking Choices There is no single best decking option for every home. The best choice balances durability, maintenance effort, sustainability, and budget. Composite decking suits modern low maintenance living. Timber decking suits traditional styles and hands on owners. Merbau decking suits premium outdoor entertaining spaces. With correct planning and professional deck installation, all three options can perform well in Mickleham. Request a Decking Quote from a Local Mickleham Team If you are planning a new deck or replacing an existing one, working with a local team makes a difference. Request a decking quote from a local Mickleham team at Sky Nature. You will receive honest advice, clear material options, and a solution designed for your property and lifestyle. We love to hear from you Contact Us
- 07 February, 2026
- 11 min Read
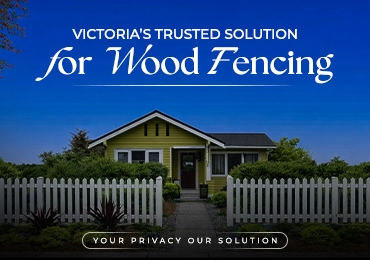
Victoria Trusted Solution for Wood Fencing - Your Privacy Our Solution
Wood fencing remains one of the most reliable ways to secure privacy, define boundaries, and improve the appearance of residential properties across Victoria. In suburbs like Mickleham, where new housing estates sit alongside established homes, fencing needs to serve multiple purposes. It must provide privacy, meet local expectations, last through changing weather, and suit the layout of the land. Many homeowners struggle to Choose the right fencing option for Mickleham because advice online is often generic or focused on other regions. This guide is written specifically for Mickleham, Victoria. It explains how wood fencing works, when it is the right choice, what types are suitable, and how local conditions affect installation and long term performance. The goal is simple. Help you make an informed decision that protects your privacy and avoids costly mistakes. Why Wood Fencing Is Still a Trusted Choice in Victoria? Wood fencing has been used across Victoria for decades because it works. It provides solid visual screening, adapts well to uneven land, and fits both modern and traditional homes. In Mickleham, properties often face close neighbouring boundaries, shared side fences, and minimal setbacks in newer estates. Wood fencing offers consistent coverage without gaps and can be installed to suit different block shapes. Key reasons homeowners choose wood fencing include, Strong privacy with minimal visibility Natural appearance that blends with gardens and landscaping Flexible height and design options Ability to repair or replace sections without rebuilding the entire fence While other materials have their place, timber fencing continues to be a dependable solution for residential privacy fencing in Victoria. Understanding Privacy Needs in Mickleham Homes Privacy concerns in Mickleham are shaped by how the suburb has developed. Many newer homes are built closer together, often with two storey designs overlooking neighbouring yards. Established homes may have older fencing that no longer provides adequate screening. Common privacy challenges include, Backyards exposed to neighbouring windows Side boundaries shared with multiple properties Front fencing limits set by estate guidelines Noise transfer through open or poorly built fences Wood fencing addresses these issues by creating a continuous barrier that blocks sightlines and defines private outdoor spaces clearly. When Wood Fencing Is the Right Choice? Wood fencing works best when privacy is a priority and homeowners are comfortable with periodic maintenance. It is particularly suitable for Back and side boundary fencing Homes that want a natural finish rather than metal Properties with uneven ground or slight slopes Households planning landscaping or garden features Wood fencing may not be ideal if zero maintenance is required or if the property is exposed to extreme wind without shelter. In these cases, reinforced designs or alternative fencing types may be considered. Types of Wood Fencing Suitable for Mickleham Not all wood fencing is the same. Choosing the right type depends on how the fence will be used and where it will be installed. 1. Timber Paling Fencing Timber paling fencing is one of the most common residential fencing options in Victoria. It provides full privacy and suits both new estates and older homes. Best used for rear and side boundaries Cost effective for long fence runs Simple to repair and replace over time This style is practical and widely accepted across Mickleham properties. 2. Lapped and Capped Wood Fencing Lapped and capped fencing improves durability and appearance by adding top rails and capping boards. Better resistance to warping Cleaner finished look Improved lifespan compared to basic paling fences This option is often chosen by homeowners looking for a balance between cost and long term performance. 3. Slatted Wood Fencing Slatted wood fencing uses evenly spaced timber boards and is often selected for privacy with a modern look. Suitable for front fencing where allowed Allows airflow while reducing visibility Works well with landscaping and modern homes Spacing must be carefully planned to ensure privacy goals are met. When discussing fencing types, it helps to understand how timber performs in different Victorian conditions. A related example is explained in an existing Sky Nature article on fencing performance in Sunbury weather, which highlights how climate and exposure influence fencing material choices across Victoria. Wood Fencing Type Best Use Area Privacy Level Maintenance Level Suitable for Mickleham Conditions Timber Paling Fencing Side and rear boundaries High Medium Yes. Common choice for residential blocks and shared boundaries Lapped and Capped Fencing Rear boundaries and long fence runs High Low to medium Yes. Better durability for wind and soil movement Slatted Wood Fencing Front fencing and feature areas Medium to high depending on spacing Medium Yes. Suitable where design and airflow are required Standard Wood Boundary Fence Property separation High Medium Yes. Works well for both new estates and older homes Wood Fence with Gate Integration Entry points and access areas High Medium Yes. Requires professional alignment and installation Wood Fencing Compared With Other Fencing Options Wood fencing is often compared with Colorbond and other metal fencing options. Each has strengths. Wood fencing offers better visual warmth and adaptability. It is easier to modify and repair and integrates naturally with gardens. Colorbond fencing offers low maintenance and uniform appearance. It is often chosen for side boundaries and long straight runs. In Mickleham, many homeowners combine materials by using timber fencing where privacy matters most and metal fencing where durability and access are priorities. New Housing Estates vs Established Properties The age and layout of your property affect fencing decisions. New Housing Estates New estates in Mickleham may have developer guidelines or estate rules that influence fencing height, materials, and placement. Boundary alignment with neighbours is also important. Wood fencing is commonly approved for rear and side boundaries but front fencing may be restricted. Established Properties Established homes usually offer more flexibility. Fence height and style are often determined by existing structures and neighbour agreements. Wood fencing is well suited for replacing aging fences without changing the character of the property. Understanding these differences helps avoid disputes and unnecessary changes later. Fence Height and Local Considerations in Mickleham Fence height rules can vary depending on location and fence position. Front fences are usually lower and may have material restrictions Side and rear fences typically allow greater height Corner blocks may have visibility requirements Professional fence installers help navigate these considerations and ensure fencing is installed correctly from the start. Common Problems With Poorly Installed Wood Fencing Many fencing issues are caused by rushed or low quality installation. Common problems include, Leaning posts due to shallow footings Gaps forming as timber dries Uneven fence lines Early timber deterioration These issues reduce privacy and shorten the life of the fence. Proper post depth, quality timber, and correct spacing prevent most long term problems. Question Clear Answer Is wood fencing suitable for homes in Mickleham Victoria Yes. Wood fencing works well in Mickleham for side and rear boundaries. It provides strong privacy and adapts to both new estates and established properties when installed correctly. How long does wood fencing last in Victoria A professionally installed wood fence can last 10 to 15 years or more with basic maintenance such as inspections and timber treatment. Does wood fencing require regular maintenance Wood fencing requires occasional maintenance including checking posts, replacing damaged boards, and applying protective treatments when needed. Is wood fencing better than Colorbond for privacy Wood fencing generally provides better visual privacy because it has no gaps. Colorbond fencing offers low maintenance but has a more uniform appearance. Can wood fencing be installed on sloped land Yes. Wood fencing can be stepped or raked to suit sloped land, which makes it suitable for uneven blocks in Mickleham. Are there height rules for wood fencing in Mickleham Fence height rules depend on fence location such as front, side, or rear boundaries. Professional installers help ensure fencing meets local expectations. Is wood fencing suitable for new housing estates Yes. Wood fencing is commonly used in new estates for side and rear boundaries, but developer guidelines may apply. Can damaged wood fencing be repaired or does it need replacement Most wood fencing issues can be repaired by replacing individual boards or posts without rebuilding the entire fence. Is wood fencing a good option for backyard privacy Yes. Wood fencing is one of the most effective options for backyard privacy due to its solid construction and flexible height options. Should I use a professional installer for wood fencing Professional installation ensures correct post depth, alignment, durability, and suitability for local conditions. Maintenance Expectations for Wood Fencing Wood fencing requires basic maintenance to remain effective. Periodic inspection for loose boards Treatment or staining when needed Prompt repair of damaged sections With proper care, timber fencing can last many years and continue providing reliable privacy. Why Professional Installation Matters? Professional Fence installation ensures Accurate boundary placement Correct post depth and alignment Consistent fence height Compliance with local expectations For Mickleham homeowners, professional installation reduces the risk of disputes and rework while delivering a cleaner final result. Choosing a Local Wood Fencing Provider in Mickleham Local experience matters when installing wood fencing. Contractors familiar with Mickleham understand soil conditions, estate layouts, and common fencing expectations. A local provider offers practical advice based on real properties, not generic recommendations. Conclusion Wood fencing remains a trusted solution for privacy and boundary definition in Mickleham, Victoria. When chosen correctly and installed professionally, it delivers strong visual screening, adaptability, and long term value. Understanding fencing types, local conditions, and installation standards helps homeowners make confident decisions. Whether you are building new or replacing an existing fence, wood fencing continues to be a reliable option for residential properties across Victoria. We love to hear from you Contact Us
- 31 January, 2026
- 10 min Read
Why Mickleham Lawns Struggle Year Round and the Exact Services That Fix Each Problem
Lawns in Mickleham, face challenges that are very different from older suburbs across Melbourne. Many residential areas here were developed quickly. Topsoil was often removed or compacted during construction. What remains underneath is heavy clay that holds water in winter and turns hard in summer. These conditions affect both new and established homes. Homeowners often notice thinning grass, uneven growth, surface water after rain, moss in shaded areas, or lawns that never seem to improve despite regular watering and mowing. These are not random problems. They are predictable outcomes of soil structure, climate, and maintenance timing. This guide explains the most common lawn problems Mickleham homeowners experience throughout the year & Each problem is matched to the exact professional lawn care service in Mickleham that fixes it. The goal is clarity. When you understand the cause, the solution becomes straightforward. The Ground Reality in Mickleham Lawns Mickleham sits on clay dominant soil. Clay is nutrient rich but poorly structured for turf. It compacts easily under foot traffic, construction machinery, and even regular mowing. Compacted clay limits oxygen, water movement, and root growth. Victoria’s weather adds pressure. Hot dry summers stress shallow roots. Cold wet winters restrict evaporation. Lawns remain wet on the surface while roots struggle below. This combination explains why lawn care Mickleham requirements are more technical than they appear. Problem 1: Grass Looks Healthy on Top but Feels Spongy or Dies Back Many lawns appear green but decline quickly under heat or foot traffic. The surface may feel soft or bouncy when walked on. This is usually caused by a thick layer of organic debris building up between the soil and the grass. This layer is called thatch. Thatch blocks water and nutrients from reaching the roots. It also creates a shallow root system that fails under stress. Service That Fixes It Dethatching Service Mickleham Dethatching removes this compacted organic layer. It allows water, oxygen, and fertiliser to reach the soil again. In Mickleham lawns, dethatching is often essential even when grass looks visually acceptable. This process is particularly important for couch and kikuyu lawns, which are common across Victoria and produce thatch quickly. A clear explanation of how dethatching compares with aeration is covered in this guide on Dethatching Vs. Aeration Problem 2: Water Pools on the Lawn After Rain or Irrigation Standing water after rain is one of the most common lawn problems Mickleham homeowners report. This is not a watering issue. It is a soil structure issue. Clay soil has very small particles. When compacted, it prevents water from moving down into the root zone. Over time, roots suffocate and turf thins out. Service That Fixes It Lawn Aeration Mickleham Aeration physically opens the soil. Small cores or channels are created to allow water and oxygen to move deeper. This relieves compaction and encourages deeper root growth. Aeration is especially effective for lawns built on construction fill or areas with regular foot traffic such as side paths and play areas. In Mickleham, aeration works best when combined with soil amendments and proper mowing height. On its own, it solves drainage. Combined with dethatching, it restores overall lawn health. Problem 3: Grass Grows Unevenly Across the Lawn One side of the lawn grows thick and green. Another area remains thin or bare. This is extremely common in new estates. The cause is usually inconsistent soil depth and clay exposure. Builders often leave uneven topsoil. Some sections may sit directly on clay while others have adequate soil depth. This issue is explained in detail here Why grass does not grow evenly in Mickleham Service That Fixes It Lawn Renovation and Targeted Soil Correction Uneven growth cannot be fixed by mowing or watering alone. It requires targeted intervention. This may include partial renovation, soil levelling, aeration, and topdressing. Professional assessment is critical because treating the entire lawn the same way often wastes time and money. In Mickleham, zone based treatment delivers better long term results. Problem 4: Lawn Looks Worn Out Even with Regular Mowing Some homeowners mow every one or two weeks yet the lawn never looks dense or healthy. The grass appears stressed. Weeds invade quickly. Colour fades fast after mowing. This is often due to incorrect mowing height or frequency. Cutting too short exposes soil, increases evaporation, and weakens roots. Cutting too infrequently removes too much leaf at once, shocking the plant. Service That Fixes It Professional Lawn Mowing Professional mowing is not just about appearance. It is about consistency and correct height for the grass type and season. In professional lawn care Victoria, mowing is used as a health management tool. Blade sharpness, cutting pattern, and timing all influence turf density and weed resistance. For Mickleham lawns on clay soil, correct mowing reduces compaction stress and supports deeper root systems. Problem 5: Lawn Thins Out Every Summer No Matter What You Do Summer heat exposes weak root systems. Lawns that rely on surface moisture fail quickly during heatwaves. This problem repeats each year. The underlying cause is shallow rooting caused by compacted soil, thatch buildup, or both. Service That Fixes It Combined Dethatching and Aeration This is where service sequencing matters. Dethatching clears the surface barrier. Aeration opens the soil. Together, they create conditions for deeper roots. This combination is one of the most effective long term solutions for clay soil lawn issues in Mickleham. It prepares lawns to survive summer rather than react to damage after it occurs. Problem 6: Moss or Algae Appears in Winter Moss thrives in wet, compacted, shaded areas. It does not cause lawn problems. It reveals them. In Mickleham, winter moss indicates poor drainage and low soil oxygen. Service That Fixes It Aeration and Drainage Correction Removing moss without correcting soil structure leads to repeat growth. Aeration improves drainage. In some cases, soil amendments are required to rebalance conditions. This is a common issue in older properties with mature trees and limited sunlight. Lawn problem observed in Mickleham Primary cause Most effective service Why this service works Lawn feels spongy or dies back in heat Thatch buildup blocking water and nutrients Dethatching service Mickleham Removes organic layer and allows moisture and oxygen to reach roots Water pools on the surface after rain Compacted clay soil Lawn aeration Mickleham Opens soil channels to improve drainage and root oxygen Grass grows unevenly across the lawn Uneven topsoil and exposed clay Lawn renovation Corrects soil depth and improves root establishment Lawn looks thin despite regular mowing Incorrect mowing height or frequency Professional lawn mowing Maintains turf strength and reduces stress on roots Lawn dries out quickly in summer Shallow root system Dethatching and aeration Encourages deeper roots that retain moisture longer Moss appears in winter Poor drainage and low soil oxygen Lawn aeration Mickleham Improves drainage and reduces conditions moss prefers How These Services Work Together Over the Year? Effective lawn care Mickleham is not about one service. It is about timing and combination. Dethatching removes surface barriers. Aeration fixes compaction. Professional mowing maintains plant strength. Renovation corrects structural issues. When these are applied based on diagnosis rather than routine, lawns stabilise instead of declining. Frequently Asked Questions How often should lawns in Mickleham be dethatched? Most lawns benefit from dethatching every one to two years depending on grass type and growth rate. High growth grasses may require it more frequently. Is aeration necessary for new lawns? Yes. New lawns are often installed on compacted soil. Aeration helps roots establish properly from the start. Can mowing alone fix poor lawn health? No. Mowing maintains appearance but does not correct soil or root problems. What grass types struggle most in clay soil? Most turf types struggle when clay is compacted. Couch and kikuyu tolerate clay better but still require aeration and dethatching. When is the best time for lawn renovation in Victoria? Spring and early autumn provide the best conditions for recovery and root development. Why does my lawn dry out quickly even after watering? Shallow roots and compacted soil prevent water from reaching deeper layers where roots should grow. Is professional lawn care worth it in Mickleham? Yes. Local soil and climate conditions make professional assessment more cost effective than repeated trial and error treatments. A Local Perspective on Professional Lawn Care in Mickleham Mickleham lawns are shaped by clay soil, construction practices, and Victoria’s climate. Generic lawn advice often fails here because it does not account for these factors. Sky Nature works with both new and established residential properties across Mickleham. Their approach focuses on identifying the specific cause behind lawn failure and applying the correct service rather than over treating or guessing. This diagnostic approach is why targeted services deliver better outcomes than one size fits all lawn programs. Conclusion Lawns in Mickleham struggle for clear and practical reasons. Clay heavy soil, construction compaction, and Victoria’s changing weather place constant pressure on turf throughout the year. These conditions affect new estates and older residential properties alike. When problems appear, they are usually symptoms of deeper soil and root issues rather than surface level neglect. Understanding which problem is present makes the solution straightforward. Thatch buildup requires dethatching. Compacted soil requires aeration. Weak growth and poor density require correct mowing practices. Areas that never improve need targeted renovation rather than repeated general treatments. Consistent, problem based lawn care delivers better long term results than reacting after damage has already occurred. When services are applied at the right time and for the right reason, lawns in Mickleham can remain healthy, resilient, and visually consistent across all seasons. We love to hear from you Contact Us
- 21 January, 2026
- 9 min Read
How Mulching Helps Victoria’s Gardens Survive January Heat
January is the most demanding month for gardens across Victoria. Extended heatwaves, dry winds, high UV exposure, and rapid moisture loss place ongoing stress on lawns, garden beds, and soil. Even well maintained spaces can decline quickly when soil is left exposed, leading to wilting plants, fading lawns, and watering that delivers limited results. These challenges are common across properties relying on standard lawn care Victoria practices during peak summer. Mulching is one of the most effective ways to protect gardens during January heat. When applied correctly, mulch helps regulate soil temperature, slow moisture loss, and reduce stress on plants and turf. For many homeowners seeking practical garden care solutions Victoria Australia, mulching is not an optional extra. It is a core part of maintaining healthy landscapes through summer. This guide explains how mulching works, why it matters in January, and how it supports long term lawn and garden health across Victoria, particularly when used as part of a reliable landscaping service Victoria in Australia. Why January Is the Hardest Month for Gardens in Victoria? Victoria’s summer climate is unpredictable. January often brings consecutive hot days, sudden heat spikes, and drying winds. These conditions affect gardens in several ways. Bare soil absorbs and holds heat. Surface temperatures rise quickly and transfer heat directly into the root zone. This damages fine roots and reduces the plant’s ability to take up water. Moisture evaporates rapidly. Even regular watering can be lost within hours during hot days. This leads to shallow root growth and stressed plants. Clay soils common across many Victorian suburbs become harder and less permeable when dry. Water struggles to penetrate, and roots remain close to the surface where heat impact is highest. Lawns and garden beds in new housing estates are particularly vulnerable due to compacted soil and limited organic matter. Mulching addresses all of these issues at the soil level. What Mulching Actually Does in Summer? Mulch is a protective layer placed over the soil surface. Its function goes beyond appearance. In summer, mulch acts as a buffer between the soil and the environment. Mulch reduces soil temperature by shielding it from direct sunlight. This keeps the root zone cooler and more stable. Mulch slows evaporation. Moisture remains available in the soil for longer periods, reducing watering frequency. Mulch improves soil condition over time. Organic mulches break down gradually and support beneficial soil organisms. Mulch limits weed growth. Fewer weeds means less competition for water and nutrients during peak summer stress. When applied correctly, mulch supports both garden beds and lawn edges during January heat. How Mulching Protects Gardens During January Heat? 1. Soil temperature control Mulched soil stays significantly cooler than exposed soil. This protects plant roots from heat stress and allows consistent nutrient uptake. 2. Moisture retention Mulch reduces evaporation by covering the soil surface. Water applied through irrigation or rainfall remains available for longer. This is especially important during water restrictions and extreme heat days. 3. Root protection Roots remain active and healthy when temperature and moisture levels are stable. Mulch helps prevent sudden drying that can cause root damage. 4. Reduced soil compaction In clay heavy soils, mulch prevents surface crusting. This allows water to move into the soil rather than running off. 5. Weed suppression Weeds thrive in summer heat. Mulch limits light penetration and reduces weed germination, which helps conserve moisture for desired plants. Best Mulch Types for Victoria’s Climate Not all mulch performs the same in summer. Choosing the right type matters. Common mulch options and suitability Mulch Type Best Use Water Retention Clay Soil Suitability Summer Performance Pine bark Garden beds and trees High Good Excellent Hardwood mulch Garden beds Moderate to high Good Very good Sugarcane mulch Vegetable gardens High Moderate Good Straw mulch Seasonal beds Moderate Moderate Short term Pebbles or stone Decorative areas Low Not suitable Heat retaining Organic mulches are generally better for summer garden health in Victoria. They improve soil structure and moisture retention over time. Inorganic mulches such as stone may increase heat around plants and are best limited to non planted areas. Mulching and Clay Soil in Victoria Clay soil is common across many parts of Victoria, including both established suburbs and new housing developments. In summer, clay soil becomes dense and resistant to water penetration. This leads to uneven moisture distribution and stressed lawns. Mulch improves clay soil performance by slowing water movement at the surface. This gives moisture time to penetrate rather than run off. Over time, organic mulch contributes to improved soil structure and microbial activity. Uneven lawn growth, dry patches, and shallow roots are common signs of clay soil stress. These issues are explained in detail in this guide on grass not growing evenly due to clay soil conditions in Victoria. Read the full Blog Mulching works best when combined with other soil improvement practices. Mulching Compared to Other Summer Lawn Care Practices Mulching is most effective when used as part of a complete summer lawn care approach. Watering alone cannot protect roots from heat if soil is exposed. Mowing helps reduce stress but does not address soil temperature or moisture loss. Fertilising during extreme heat can increase stress if moisture levels are unstable. Mechanical lawn treatments such as aeration and dethatching address deeper soil and surface issues. For lawns affected by compaction or thatch build up, understanding whether aeration or dethatching is required is critical during summer. This is covered in detail here Read the full blog on Dethatching Vs Aeration Mulching complements these treatments by protecting the soil after corrective work is done. Common Mulching Mistakes in Summer Incorrect mulching reduces effectiveness and can cause plant stress. Applying mulch too thin allows heat to pass through and reduces moisture retention. Applying mulch too thick restricts airflow and can trap excess moisture around stems. Mulching dry soil locks in dryness. Soil should be watered before mulch is applied. Piling mulch against plant trunks or stems encourages rot and pests. Using fresh or unseasoned mulch can draw nitrogen from the soil during decomposition. Correct depth is usually 50 to 75 millimetres for garden beds. When and How Often to Mulch in Victoria? January mulching should be done early in the day or during cooler periods. Soil should be moist before application. Mulch should be topped up once or twice a year depending on breakdown rate. Signs mulch needs refreshing include visible soil, rapid drying after watering, and increased weed growth. Lawns do not require full surface mulching but benefit from mulched edges and organic matter management. When DIY Mulching Is Not Enough? Some gardens continue to struggle even after mulching. This usually indicates underlying soil or lawn issues. Persistent dry patches may signal compaction or poor soil structure. Runoff during watering suggests deeper infiltration problems. Thin lawns often require aeration, dethatching, or soil conditioning. In these cases, professional garden care provides better long term results. Sky Nature’s Expert Approach to Summer Garden Care in Victoria Sky Nature provides landscaping services in Victoria australia with a strong focus on local conditions. January heat requires practical solutions based on soil type, plant selection, and climate patterns. Sky Nature takes an integrated approach that includes mulching, lawn care, soil improvement, and seasonal maintenance. This ensures gardens are not only protected during summer but continue to improve over time. For homeowners looking for landscaping service in Victoria Australia, lawn care Victoria solutions, garden care Victoria Australia support, or affordable lawn care services in Australia, working with a local expert reduces risk and improves outcomes. Frequently Asked Questions Does mulch keep soil cool in summer? Yes. Mulch reduces direct heat exposure and stabilises soil temperature. How thick should mulch be in January? Most garden beds perform best with 50 to 75 millimetres of mulch. Is mulching suitable for clay soil? Yes. Mulch helps slow water movement and improves soil condition over time. Can mulch reduce watering needs? Yes. Mulched soil retains moisture longer and reduces evaporation. Is mulching useful for lawns? Mulch supports lawn health indirectly by improving soil edges, reducing heat stress, and supporting root zones. Final Thoughts January heat is unavoidable in Victoria, but garden damage does not have to be. Mulching is a practical and proven way to protect soil, conserve water, and reduce plant stress during the most demanding month of the year. When applied correctly and supported by proper lawn and soil care, mulch helps gardens survive summer and recover faster once temperatures ease. For long term results, combining mulching with expert garden care ensures healthier lawns and landscapes across Victoria. We love to hear from you Contact Us
- 16 January, 2026
- 9 min Read

Dethatching vs Aeration What Mickleham Lawns Need in Summer
Summer is the most demanding season for lawns in Mickleham. High temperatures, dry spells, sudden heavy watering, and clay-heavy soil all place stress on grass that is already struggling to establish strong roots. Many homeowners notice thinning patches, water pooling on the surface, or grass that looks tired despite regular mowing and watering. At this point, the common question is does lawn dethatching services in australia helps? what really the lawn needs dethatching or aeration? Both services improve lawn health, but they solve different problems. Choosing the wrong one, or doing them at the wrong time, can slow recovery or even damage the lawn during summer. This guide explains how dethatching and aeration work, how they affect Mickleham lawns specifically, and how to decide which treatment is needed during the warmer months. How Mickleham Lawns Behave in Summer? Mickleham is known for clay-dominant soil, particularly in newer estates where topsoil depth is limited. Clay soil compacts easily, restricts airflow, and slows drainage. During summer, this leads to shallow roots and grass that dries out quickly even when watered regularly. Most residential lawns in Mickleham are Buffalo, Kikuyu, or Couch. These grasses handle heat reasonably well, but they struggle when roots cannot access oxygen or moisture below the surface. Summer lawn issues in this area often include uneven growth, hard soil, surface runoff, and thatch build-up from fast-growing warm-season grass. Because these problems develop gradually, many lawns suffer from more than one underlying issue at the same time. This is where confusion between dethatching and aeration usually starts. What Lawn Dethatching Does and When It Helps? Thatch is the layer of dead grass stems, roots, and organic matter that sits between the green grass and the soil. A small amount of thatch is normal and even helpful. Problems begin when this layer becomes too thick. In Mickleham, thatch builds up faster in lawns that are fertilised heavily, watered frequently, or mowed too short. Warm-season grasses grow aggressively in summer, and without proper management, dead material accumulates faster than it breaks down. Signs that a lawn needs dethatching include a spongy feel underfoot, water sitting on the surface rather than soaking in, yellowing grass despite regular care, and patchy growth where new shoots struggle to push through. Dethatching removes this compacted organic layer so water, air, and nutrients can reach the soil. However, in summer, timing and method matter. Aggressive dethatching during extreme heat can stress the lawn, especially if the grass is already weak or the soil is dry. For homeowners who want a deeper understanding of how the process works across different Australian conditions, Sky Nature has already covered this in detail in their complete guide to lawn dethatching in Australia, which explains tools, timing, and recovery expectations. What Lawn Aeration Does and Why It Matters in Mickleham? Aeration addresses a different issue. Instead of removing organic material, it focuses on relieving soil compaction. In clay-heavy areas like Mickleham, compaction is one of the biggest reasons lawns struggle in summer. When soil is compacted, grass roots cannot grow deeply. Water runs off instead of soaking in, fertiliser stays near the surface, and oxygen cannot reach the root zone. lawn Aeration in victoria creates small openings in the soil, allowing air, water, and nutrients to move below the surface where roots actually need them. Core aeration is particularly effective for Mickleham lawns because it physically removes plugs of compacted soil rather than simply poking holes. This improves drainage and encourages deeper root growth, which is critical during hot weather. Sky Nature explains this process clearly in their article on why lawn aeration is the secret to a greener yard in Melbourne, and the same principles apply directly to Mickleham conditions. Dethatching and Aeration Compared for Summer Lawns Dethatching removes excess organic material sitting above the soil. Aeration improves the structure of the soil itself. One targets the surface layer, while the other works below ground. Dethatching is most useful when grass feels spongy, water does not penetrate easily, and new shoots struggle to emerge. Aeration is most useful when soil feels hard, lawns dry out quickly, and growth is thin even though watering and mowing are consistent. In summer, aeration is generally safer and more beneficial for clay soil lawns. Dethatching can still be done, but it must be measured and timed carefully to avoid excessive stress. What Your Mickleham Lawn Needs in Summer Not every lawn needs the same treatment. The right approach depends on what is limiting growth. If the lawn looks thin and the soil feels hard, aeration should be the priority If the lawn looks thick but feels spongy and struggles to absorb water, light dethatching may be needed If both problems exist, a staged approach works best Newly laid turf should not be dethatched For newly laid turf, dethatching should be avoided entirely. Aeration may be introduced later once roots are established, depending on soil conditions. Can Dethatching and Aeration Be Done Together Dethatching and aeration can be combined, but only when done in the correct order and under suitable conditions. Dethatching should always come first so that aeration holes are not blocked by loosened debris. In summer, combining both services should only be done when the lawn is actively growing and adequately watered. Attempting both on a stressed lawn can slow recovery and increase weed invasion. Professional lawn care assessment matters here because clay content, lawn type, and sun exposure vary across Mickleham properties. How Mowing and Watering Affect Both Treatments? Mowing height plays a significant role in both thatch build-up and soil compaction. Cutting grass too short increases stress, encourages shallow roots, and accelerates thatch accumulation. Maintaining the correct mowing height allows grass to shade the soil and recover more quickly after aeration or dethatching. Watering deeply but less frequently is far more effective than daily light watering. Aerated lawns benefit the most from deep watering because moisture reaches the root zone rather than evaporating at the surface. This is why mowing services and lawn treatments should work together rather than being treated as separate tasks. A consistent mowing service in Victoria that understands local soil conditions supports long-term lawn health far better than irregular cutting. Common Misunderstandings About Summer Lawn Treatments One common belief is that aeration dries out lawns in summer. In reality, aeration improves moisture retention by allowing water to reach deeper soil layers. Another misconception is that dethatching always damages lawns. When done correctly and at the right time, it improves growth, but aggressive dethatching during heat can be harmful. Some homeowners believe new lawns do not need aeration. In Mickleham, even new turf often sits on compacted subsoil left by construction, making early aeration beneficial once the lawn is established. When Professional Lawn Care Makes a Difference? DIY lawn care has its place, but there are limits. Clay soil requires the right equipment and timing. Incorrect dethatching depth or shallow aeration often fails to solve the problem and can set the lawn back during summer. Professional lawn care services in Victoria bring local knowledge of soil types, grass varieties, and seasonal timing. This reduces risk and improves recovery, especially during periods of heat stress. Frequently Asked Questions Is dethatching safe in summer in Australia? Light dethatching can be safe if the lawn is healthy and well-watered. Heavy dethatching during extreme heat is not recommended. Should clay soil lawns in Mickleham be aerated every year? Most clay soil lawns benefit from annual aeration. Some high-traffic areas may need it more often. Which is better for Buffalo grass in summer? Aeration is usually more beneficial for Buffalo grass in summer because it supports deeper roots without stressing the surface. Can aeration fix poor drainage? Aeration improves drainage by relieving compaction, but severe drainage issues may also require soil improvement. You can read our blog on why aeration is the secret to a greener yard in melbourne for better understanding. Professional Lawn Care for Mickleham Homes Choosing between dethatching and aeration is not about which service is better. It is about which problem needs solving at the right time. Mickleham lawns face unique challenges from clay soil, summer heat, and construction-compacted ground. Addressing these issues correctly improves lawn resilience, appearance, and water efficiency. Conclusion Sky Nature provides professional lawn care services tailored specifically to Mickleham conditions. Their team assesses soil structure, grass type, and seasonal stress before recommending dethatching, aeration, or a combined approach. Alongside expert mowing and ongoing lawn maintenance, Sky Nature helps homeowners achieve healthier lawns that cope better with Victorian summers. If your lawn is struggling despite regular care, a professional assessment can identify the real cause and apply the right solution before further damage occurs. We love to hear from you Contact Us
- 10 January, 2026
- 9 min Read
Grass Not Growing Evenly in Mickleham? How Clay Soil and Poor Topsoil Affect Your Lawn and How to Fix It
Uneven grass growth is one of the most common lawn complaints in Mickleham. Many homeowners notice that one part of the lawn grows thick and green while other areas remain thin, patchy, or bare. This problem often appears within the first year of moving into a new home and continues despite regular watering and mowing. In most cases, the issue is not the grass itself. The real cause lies beneath the surface. Mickleham clay soil combined with poor or shallow topsoil makes it difficult for lawns to establish evenly. Until the soil is improved, no amount of mowing or fertilising will fully solve the problem. This guide explains why uneven lawns are so common in Mickleham, what clay soil and poor topsoil actually are, and how to fix the soil properly for long term results. Why Uneven Lawn Growth Is Common in Mickleham Mickleham sits in an area of Victoria known for heavy clay subsoil. This soil type is naturally dense and slow draining. On top of that, many blocks in Mickleham are part of newer housing estates where the soil has been heavily disturbed during construction. Common factors include: Heavy machinery compacting the ground Removal of quality topsoil during building Thin or uneven topsoil spread before turf installation Lawns laid quickly to complete the property The result is a lawn growing on a shallow layer of low quality soil sitting on hard clay. Grass roots struggle to grow evenly, which leads to patchy coverage and poor lawn health. What Is Mickleham Clay Soil Clay soil is made up of very fine particles that pack tightly together. In Mickleham, this clay layer often sits just below the surface. Key characteristics of Mickleham clay soil include: Very slow drainage High compaction Sticky when wet Hard and cracked when dry Limited air spaces for roots Because the particles are so fine, water moves through clay soil slowly. Air struggles to reach the root zone. Grass roots find it difficult to penetrate deeply, so they remain shallow and weak. How Clay Soil Affects Lawn Growth When grass grows on clay soil without proper preparation, several problems appear Water pools on the surface after rain Roots grow sideways instead of downward. Some areas stay wet while others dry out Nutrients remain locked in the soil Grass grows unevenly across the lawn This is why lawns in Mickleham often look healthy in one corner and thin just a few metres away. What Is Poor Topsoil Topsoil is the upper layer of soil where grass roots grow. Healthy topsoil contains organic matter, nutrients, and beneficial microorganisms. It should be deep enough to allow roots to establish properly. Poor topsoil lacks these qualities. In many Mickleham homes, poor topsoil means The soil layer is too shallow Organic matter is minimal or missing The soil dries out quickly or stays waterlogged The texture is inconsistent across the yard Why Topsoil Is Often Poor in New Mickleham Estates Poor topsoil is rarely accidental. It usually happens during construction. Common causes include: Builders removing topsoil to level the block Topsoil being stockpiled and not replaced evenly Low quality fill soil used instead of proper lawn soil Turf installed before the soil is improved Even when a lawn looks finished, the soil underneath may not be suitable for healthy grass growth. Why Clay Soil and Poor Topsoil Cause Uneven Grass Growth When poor topsoil sits on top of compacted clay soil, grass roots hit a barrier very quickly. They cannot grow deep enough to access moisture and nutrients evenly. This leads to: Strong growth where soil depth is slightly better Weak growth where clay is closer to the surface Uneven colour and density Bare patches that reappear after repairs This problem is common across Mickleham and is one of the main reasons lawns struggle despite regular lawn mowing service visits. How to Identify Clay Soil and Poor Topsoil in Your Lawn You can confirm soil problems with a few simple checks. Dig a small hole about 15 to 20 centimetres deep. If you hit hard clay quickly, topsoil depth is insufficient. Check drainage by watering the lawn heavily. If water pools or takes a long time to soak in, clay soil is present. Look for visual signs such as: Patchy grass growth Yellowing areas Soft muddy patches after rain Hard ground during dry weather How to Improve Clay Soil and Poor Topsoil in Mickleham Improving soil takes time, but it is the only way to achieve an even, healthy lawn. 1. Relieving Soil Compaction Compaction is the biggest issue with Mickleham clay soil. Professional Aeration Service removes small plugs of soil, allowing air, water, and nutrients to move into the root zone. Aeration should be done at least once a year in clay heavy lawns. 2. Adding Organic Matter Organic matter is essential for improving clay soil structure. Compost helps bind clay particles into larger aggregates, improving drainage and airflow. Regular applications gradually turn hard clay into workable soil. 3. Improving Topsoil Quality Quality lawn soil should be a sandy loam blend enriched with organic matter. This type of soil balances drainage and moisture retention. Avoid pure sand or builder fill. These materials worsen drainage issues when mixed with clay. 4. Improving Drainage Naturally Improving soil structure is more effective than installing surface drains in most residential lawns. Healthy soil allows water to move through evenly rather than pooling or running off. Step by Step Lawn Soil Improvement Plan for Mickleham Inspect soil depth and drainage Mow the lawn slightly lower than usual Core aerate compacted areas Apply compost and soil conditioners Topdress with quality lawn soil Level low or uneven areas gradually Overseed or returf weak sections Water deeply to encourage root growth This approach works for both new lawns and established lawns showing uneven growth. Choosing Grass That Performs Better in Mickleham Clay Soil Some grass types tolerate clay better than others, but no grass will thrive without soil improvement. Grass selection should consider: Shade exposure Water availability Usage levels Soil condition Even clay tolerant grasses perform poorly when installed over compacted soil with shallow topsoil. Ongoing Lawn Care to Maintain Even Growth Once the soil improves, regular maintenance keeps the lawn healthy. Best practices include: Correct mowing height Deep but controlled watering Avoiding heavy traffic on wet lawns Seasonal aeration and topdressing A professional lawn mowing service that understands local soil conditions can help prevent compaction from returning. How Landscaping and Outdoor Structures Affect Lawn Health Garden landscaping Mickleham projects often involve retaining walls, garden beds, decking, and fencing. These features affect soil movement, drainage, and compaction. Fence installation and decking services in Mickleham should always consider how water flows across the yard. Poor drainage planning can worsen clay soil problems and damage lawns over time. Proper landscaping integrates soil improvement with hardscape installation to protect lawn health. When to Seek Professional Help in Mickleham Some soil problems are too severe for basic DIY solutions. Professional help is recommended when: Clay soil is heavily compacted Drainage problems persist Large areas are uneven The lawn repeatedly fails Local professionals experienced in garden landscaping Mickleham conditions understand the soil challenges unique to the area and can apply long term solutions. Conclusion Uneven grass growth in Mickleham is rarely caused by poor lawn care. The real issue is usually Mickleham clay soil combined with poor topsoil left behind after construction. Fixing the soil is the foundation of a healthy lawn. Once compaction is reduced and topsoil quality improves, grass grows more evenly, mowing becomes easier, and the lawn holds up better throughout the year. A well prepared lawn also supports other outdoor improvements such as fencing, decking, and broader landscaping work. Healthy soil benefits every part of your outdoor space. Local Lawn and Landscaping Support in Mickleham Fixing uneven grass starts with soil, but long term results come from doing the work correctly and consistently. Many Mickleham homeowners try surface fixes without addressing compaction and poor topsoil underneath, which leads to the same problems returning. Sky Nature provides local garden landscaping Mickleham services focused on soil health, lawn performance, and outdoor durability. This includes lawn restoration, lawn mowing service, soil improvement, turf preparation, fence installation, and decking services in Mickleham. Because Sky Nature works regularly in Mickleham and nearby suburbs, the team understands local clay soil conditions and the challenges found in new housing estates. Every lawn and landscape project is approached with long term performance in mind rather than short term appearance. For homeowners dealing with ongoing patchy lawns, uneven ground, or soil issues that do not improve with regular mowing, professional assessment and soil correction can save time and cost in the long run. We love to hear from you Contact Us
- 19 December, 2025
- 10 min Read
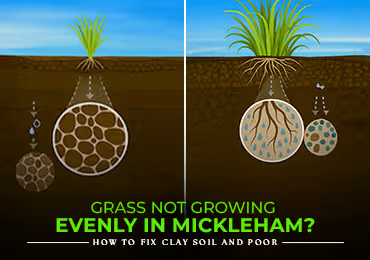
Complete Guide to Lawn Dethatching in Australia: What It Is, Why It Matters & When to Do It
A lush, green lawn is every homeowner's dream — but sometimes, no amount of mowing, watering, or fertilising seems to bring it back to life. If your lawn feels spongy, looks patchy, or struggles to grow, the real issue may lie below the surface. Lawn dethatching is a professional solution that can rejuvenate your grass and restore its health. In this blog, we’ll cover everything you need to know about dethatching in Australia, from what it is to when to do it and how much it costs. What is Lawn Dethatching? Lawn dethatching is the process of removing the layer of organic debris — called thatch — that forms between your soil and the grass blades. This layer is made up of dead roots, leaves, and grass clippings that don’t decompose quickly. A little thatch (under 1.5cm) is beneficial — it insulates the soil and retains moisture. But excessive thatch blocks: Water Oxygen Nutrients This starves your lawn, making it thin, brown, and disease-prone. That’s why investing in a lawn dethatching service in Australia is one of the smartest ways to protect and revitalise your turf. Why Is Dethatching Important for Australian Lawns? Australia's varied climates — from hot summers to cool winters — can stress grass and accelerate thatch build-up, especially in warm-season grasses like Kikuyu, Couch, and Buffalo. Regular dethatching: Stimulates new grass growth Improves soil-to-root contact Enhances water absorption and fertiliser effectiveness Prevents lawn diseases caused by trapped moisture It’s an essential part of seasonal lawn care, especially if you live in Victoria or other southern regions with fluctuating temperatures. When Should You Dethatch Your Lawn? The best time to dethatch is during your lawn’s growing season: Early spring for warm-season grasses (e.g., Couch, Kikuyu) Late spring or early autumn for cool-season grasses Avoid dethatching during winter dormancy or peak summer heat, as this can shock your grass. If you're unsure, a local lawn dethatching service near you assess your turf and advise the right time for treatment. How Is Lawn Dethatching Done? There are three common methods: Manual Raking Using a dethatching rake. Best for small lawns with light thatch. Power Raking Uses a machine with vertical blades to cut through thatch. Ideal for moderate buildup. Verti-Cutting / Scarifying A heavy-duty method using professional equipment for severe thatch layers. Most homeowners opt for a professional lawn dethatching service in Australia, especially for large or heavily compacted lawns. What Does a Lawn Dethatching Service Cost in Australia? The cost of lawn dethatching depends on: Lawn size (m²) Level of thatch buildup Location and access Additional services (e.g., aeration or fertilisation) On average, expect to pay $100–$300 for residential dethatching services. If you’re searching for an affordable lawn dethatching service near me, Sky Nature offers budget-friendly packages tailored to your lawn’s condition. DIY vs. Professional Lawn Dethatching: What’s Better? You can rent dethatching equipment or buy a rake, but DIY dethatching is time-consuming, physically demanding, and risky if done incorrectly. Many lawns get damaged by improper technique or over-dethatching. Hiring a lawn dethatching service in Australia gives you: Trained professionals High-grade equipment Faster results Healthier turf with minimal stress Why Choose Sky Nature for Lawn Dethatching in Victoria? At Sky Nature, we specialise in restoring tired, unhealthy lawns using expert dethatching and eco-conscious lawn care practices. We serve homes across Victoria with fast, reliable, and affordable services that get real results. Whether you're battling thick thatch or prepping for the growing season, we’re here to help your lawn thrive. Local Expertise Eco-Friendly Solutions Competitive Lawn Dethatching Service Cost Free Lawn Inspection & Quote FAQs & Common Concerns About Lawn Dethatching How do I know if my lawn needs dethatching? If your lawn feels spongy, struggles to absorb water, or has yellow/brown patches despite care, it's likely suffering from excess thatch. Insert a screwdriver — if it’s difficult to penetrate more than 2–3cm, dethatching may be needed. Can dethatching damage my lawn? Yes — if done at the wrong time or too aggressively. That’s why it’s best left to professionals who understand the right techniques and timing based on grass type and climate. How often should dethatching be done? Most lawns need dethatching every 1–3 years. Overdoing it can harm the grass, while neglecting it encourages turf disease. Is lawn aeration the same as dethatching? Dethatching removes the surface layer of debris, while aeration loosens compacted soil by punching holes into the ground. However, they work well together for lawn restoration. Should I dethatch before or after fertilising? Always dethatch before fertilising — it clears the path for nutrients to reach the soil effectively. Can I rent a machine and do it myself? Yes, but DIY dethatching comes with a learning curve. Rental machines can be heavy, and incorrect usage may cause lawn damage. If you're searching for lawn dethatching machine rental near me, weigh the effort vs. hiring a professional team. Invest in the Health of Your Lawn with Dethatching A healthy, vibrant lawn starts from the ground up — and that means keeping thatch under control. Lawn dethatching is not just a maintenance task; it’s a crucial investment in the long-term health, appearance, and resilience of your turf. Whether you're dealing with spongy patches, water runoff, or struggling grass, dethatching clears the way for better growth and stronger roots. While it’s possible to do it yourself, a professional lawn dethatching service in Australia ensures safe, effective, and lasting results without damaging your lawn. At Sky Nature, we help homeowners across Victoria bring their lawns back to life with trusted, eco-friendly dethatching services. We love to hear from you Contact Us
- 12 December, 2025
- 7 min Read
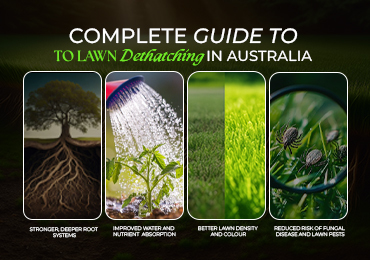
Wooden Fence Replacement For David Cresswell In Victoria Australia
Sky Nature recently handled a clear and detailed enquiry from a Victorian homeowner, David Cresswell. He needed his old wooden fence remove and replaced with a new 1.8 metre treated pine fence. The total boundary length was 55 metres and included two gates. His property backed onto a reserve which provided excellent access for the work. This type of request is common across Victoria because older timber fences eventually weaken and no longer provide the strength or privacy homeowners need. This blog explains the full workflow of this project. It covers inspection, quoting, planning, removal of the old fence and installation of the new treated pine structure. The purpose is to give homeowners a clear idea of what happens during a long fencing replacement and how a project can be completed without damaging garden areas. It also gives practical insight for anyone looking for wooden fence replacement or treated pine fence installation in Victoria. Understanding The Homeowner’s Request David provided all the essential details needed to start planning the fence replacement. His request included fence height, material choice, total length and the number of gates. Old fence removal: Full removal of the ageing timber structure. New fence height: A 1.8 metre treated pine fence along the full boundary. Total length: 55 metres of fencing including two gates. Easy access: The reserve behind his home allowed materials and waste to be moved without disturbing the garden. Clear information at the start helps plan the job accurately and ensures the quote is precise. Fast Inspection And Transparent Quoting Sky Nature arranged a quick site inspection to confirm measurements and check soil conditions. The old fence showed significant wear from weather exposure. Timber near reserves typically ages faster due to open wind and direct sunlight. The old posts were leaning and buried in ageing concrete. Full post removal was necessary to ensure strong foundations for the new fence. The quote included removal, material supply, installation, gates and cleanup. All costs were explained clearly with no hidden additions. Why Treated Pine Was The Right Choice Treated pine is one of the most popular fencing options in Victoria. It is affordable, reliable and performs well in local weather conditions. It also suits both modern and older homes thanks to its clean and simple look. Resistant to termites and moisture. Lightweight and easy to install along long boundary lines. Can be painted or stained later to change the colour. Offers long lasting durability with basic maintenance. Planning The Fence Replacement Planning ensures accuracy and protects garden areas. Sky Nature measured the entire 55 metre run, marked the boundary line and confirmed the position of the two gates. Old fence items near plants were identified in advance. Irrigation lines and underground items were checked before digging. Materials were delivered through the reserve to avoid garden disturbance. All measurements were marked to ensure accurate post spacing. How To Replace An Old Fence Without Damaging The Garden Many homeowners worry about mess or damage during fence removal. Sky Nature uses a garden-friendly method to prevent these issues. Hand tools used near plants for safe clearing. Drop sheets used to collect debris. Old palings removed section by section to avoid collapse. Soil lifted carefully when digging old posts to protect roots. Workspaces kept clean throughout the job. New posts installed with care around vegetation. Removing The Old Fence Removing the old timber fence required patience and proper technique. Each paling was removed carefully and stacked for disposal. Rails were lifted and checked. Concrete footings were slowly removed to prevent soil collapse. Reserve access made this stage smooth because waste could be moved out through the back without affecting the garden. Once the boundary was cleared, the team prepared for the new installation. Installing The New Treated Pine Fence Installation followed a structured method to ensure strength, alignment and long term durability. Posts were set in concrete at the correct depth. Alignment was checked continuously across the 55 metre run. Rails were fixed securely before installing the palings. Palings were placed evenly for stability and a clean finish. Two matching gates were installed with strong hinges and latches. Long Lasting Finish And Maintenance Tips Treated pine performs well over time and offers a natural timber look as it settles. Homeowners can oil or stain the fence every one to two years for improved moisture protection and colour retention. Check gates for smooth operation. Tighten hinges or screws when needed. Keep the area around the base of the fence clear. Look for early signs of wear so small adjustments can be made. Project Outcome The finished result was a strong 1.8 metre treated pine fence spanning the full 55 metres. The two gates were aligned and easy to operate. The new installation provided better privacy, stronger structure and a cleaner appearance. Reserve access helped minimise disruption around the home. The upgrade replaced a failing timber fence with a long-lasting solution suited to Victorian conditions. Conclusion Replacing an old wooden fence is one of the most effective ways to improve privacy and enhance property safety. Treated pine is practical, affordable and reliable across Victoria. This project for David Cresswell shows how proper planning, careful removal and structured installation create a strong and long-lasting result. Sky Nature provides treated pine installation and complete fence replacement in Victoria with clear guidance and honest communication. We’re Here to Help If you need wooden fence replacement, treated pine installation or guidance for your next project, Sky Nature is ready to assist. We love to hear from you Contact Us
- 14 November, 2025
- 6 min Read
What Type of Fencing Works Best for Sunbury and How to Avoid Common Damage
Sunbury has a very specific outdoor environment. Open reserves, elevated blocks, long stretches of farmland and pockets with little wind protection shape how outdoor structures behave. Fencing is one of the first things to feel the impact of this landscape. Many homeowners only think about materials and colour, but the real challenge is whether the fence can stay stable through Sunbury’s seasonal wind bursts, winter moisture, shifting clay soil and long dry spells. This guide explains which fencing types perform well in Sunbury, what causes failure, how repairs should be handled, and how homeowners can prevent avoidable damage. The focus is practical awareness so residents understand what type of fencing suits their property, why a fence fails and how professionals fix it properly. The information also helps people looking for Sunbury fencing, fence repair Sunbury, Colorbond fence Sunbury, Affordable fencing, strong fencing or fencing services in victoria Australia make confident decisions. What Sunbury’s Weather Means for Fencing Stability Sunbury does not have extreme weather every day, but its geography creates three conditions that affect fences more than people expect. Wind exposure: Open plains allow strong gusts to hit fences with full force, transferring pressure into posts and rails. Wet seasons and clay soil: Clay expands and shrinks, causing posts to move and lose long-term stability. Dry, hot periods: Heat shrinks timber and shifts posts, creating weaknesses that fail during the next wind burst. A fence in Sunbury must stay aligned despite soil movement and repeated wind pressure. Fencing Materials That Perform Well in Sunbury Every fencing type has a purpose. Some handle wind better. Some resist water damage. Some are low-maintenance or suited to rural properties. Below is a breakdown of materials that work best for Sunbury conditions. Colorbond fencing: Highly stable, low-maintenance, moisture-resistant and wind-durable with correct installation. Steel & metal panels: Excellent strength for exposed blocks; relies on solid posts and footings. Aluminum fencing: Rust-free with airflow through slats; ideal for front boundaries and pool areas. Iron fencing: Allows airflow and suits heritage areas or acreage blocks. Chain link fencing: Most wind-resistant, practical and affordable for open land. Brick or concrete fencing: Superior stability, low maintenance and ideal for high-wind or high-security properties. Timber fencing: Attractive but requires ongoing care; vulnerable to moisture and soil movement. Which Fencing Types Work Best for Sunbury Weather Considering local climate and soil behaviour, the most reliable fencing materials for Sunbury include: Colorbond Steel or reinforced metal panels Aluminum with strong posts Chain link for maximum wind resistance Brick and concrete for premium stability Why Fences Break in Sunbury Fence failure usually happens over time. Below are the most common causes in Sunbury’s environment. Post movement: Clay soil shifts, causing posts to lean or loosen. Wind pressure: Solid panels take full wind load; weak points bend or pop out. Age & wear: Rust, loose screws and old hardware weaken the structure. Bent/misaligned rails: Even a slight bend reduces panel security. Poor installation: Shallow holes, weak concrete or misalignment cause early failure. How to Fix Fence Damage Correctly Fence repair Sunbury jobs require more than replacing panels. Proper repair restores full structural stability. Inspect posts and footing for movement or cracks Remove damaged panels without bending rails Ensure rails are straight and fully secured Install new panels evenly and securely Reinforce posts, concrete depth or drainage if required How Homeowners Can Reduce Fence Damage Simple maintenance steps help extend fence life in Sunbury. Keep soil from building up around posts Avoid watering directly at fence bases Trim plants pushing against panels Ensure proper drainage around footings Inspect posts annually Fix minor leaning early before it spreads Why Expertise Matters A fence builder in Victoria Australia who works regularly in Sunbury understands the challenges of clay soil, wind exposure and shifting ground. Proper installation requires correct footing depth, alignment and reinforcement. Sky Nature provides Colorbond fence repairs, aluminum fencing, iron fence builds, chain link systems and strong fencing solutions suited to Sunbury conditions. Every project starts with a clear and honest assessment. Conclusion Sunbury’s weather demands fencing that withstands wind pressure, moisture changes and soil movement. Colorbond, steel, aluminum, chain link and masonry remain the most reliable choices. Timber and PVC need much more care. Fence repair in Sunbury should address structural causes—not just visible damage. With the right materials and a skilled fencing team, a fence can stay secure through many seasons of wind, rain and heat. We’re Here to Help If you need strong fencing, expert repairs or guidance on choosing the right fence for Sunbury’s conditions, Sky Nature is ready to assist. We love to hear from you Contact Us!
- 08 November, 2025
- 5 min Read
Make Your Garden Halloween-Ready with Sky Nature’s Complete Services
Halloween is the perfect time to make your garden look fresh and inviting. While decorations bring a festive feel, the real beauty comes from a clean, healthy, and well-maintained outdoor space. Sky Nature offers complete garden care in Victoria Australia to help you prepare for the season and keep your yard in great condition afterward. Our team provides everything your garden needs — lawn care, fencing, decking, landscaping, and post-season maintenance — all in one place. Halloween Lawn Rescue – 15% OFF Give your lawn a healthy makeover this Halloween. Get 15% OFF on any Lawn Aeration, Mowing, or Fencing service when you book before 2nd November. Bundle Bonus: Book a Lawn Care/ Decking package together and receive FREE compost or soil enrichment for your garden. Offer valid till 2nd November only. Bring your lawn back to life this Halloween with Sky Nature. Start with Lawn and Garden Maintenance A neat and healthy lawn sets the tone for your whole garden. Regular mowing, edging, and aeration keep your grass strong and attractive throughout the season. Mowing and edging for a clean, even look Fertilising and aerating to support healthy roots Weed removal to prevent overgrowth Trimming and pruning for tidy hedges and shrubs Expert Tip: Preparing your lawn before Halloween keeps it protected from decorations, foot traffic, and changing weather. Check and Repair Your Fencing Your fence provides both structure and safety for your outdoor space. A strong, well-maintained fence also makes your property look more complete. Repairing or replacing damaged panels Treating wood to protect against rain and sun Installing privacy or decorative fencing Building and securing gates Expert Tip: Fixing loose panels early helps avoid safety issues and supports a tidy, finished look for your garden. Upgrade with Decking and Patio Care Decks and patios are often the center of outdoor activity. Keeping them clean and well-finished adds comfort and appeal. Cleaning and polishing wooden decks Adding protective coating to resist water and stains Repairing cracks or loose boards Installing new decking to expand your space Expert Tip: Decks are perfect for displaying seasonal plants or decorations while keeping your lawn clear and undamaged. Add Freshness with Landscaping and Mulching Good landscaping in victoria australia keeps your garden balanced and helps your plants thrive. Mulching adds protection for the soil and a clean finish to your garden beds. Design and plant new garden beds Add mulch to retain moisture and reduce weeds Build stone borders and pathways Improve soil quality and add seasonal greenery Expert Tip: Applying mulch before Halloween helps your soil recover faster and supports strong growth after the season. Post-Halloween Garden Recovery After Halloween, your garden might need some attention. Decorations, props, and visitors can leave marks, but regular care can quickly bring things back to normal. Safe removal of all decorations and props Raking and clearing leaves or debris Reseeding or aerating areas that look worn Adding compost and nutrients to restore the soil Expert Tip: A quick garden cleanup after Halloween prevents long-term damage and helps your lawn stay healthy into the next season. Post-Halloween Care Offer – Starting 4th November If your garden needs extra care after the festivities, Sky Nature has you covered. Our Post-Halloween Care Offer begins 4th November — perfect for reviving your lawn and garden with soil enrichment, reseeding, and maintenance support. Why Choose Sky Nature Sky Nature provides complete outdoor care that keeps your garden looking its best year-round. Our team works carefully, treating every space with attention and respect. Whether you need a quick lawn refresh or full garden maintenance, we make sure your yard stays clean, strong, and beautiful. Final Thoughts Halloween is a great time to enjoy your garden, but good maintenance is what keeps it looking nice long after the season ends. Sky Nature helps you keep your lawn and outdoor areas healthy with reliable, all-in-one care. Book your Halloween Lawn Rescue Service before 2nd November and get your garden ready for a fresh, festive look — and stay tuned for our Post-Halloween Care Offer starting 4th November. We love to hear from you Contact Us
- 23 October, 2025
- 5 min Read
Transform Your Front Yard into a Haunted Attraction This Halloween
Halloween brings excitement, creativity, and community spirit. Many Perth homeowners go all out with outdoor decorations to welcome trick-or-treaters and impress their neighbors. But behind the fun, your garden can take a beating if not handled carefully. Heavy props, lighting cables, and stakes can easily damage lawns, compact soil, or harm delicate plants. At Sky Nature, we believe a great garden can look both festive and healthy. Here are some expert tips to help you decorate safely, keep your yard in good condition, and enjoy a memorable Halloween. Plan Before You Decorate A little preparation goes a long way. Start by taking a walk around your garden. Identify open areas, delicate zones, and spots with good visibility for decorations. Assess garden health: Check for weak branches, uneven ground, or dry patches before setting up. Plan the layout: Mark clear walking paths, especially if you expect visitors. Choose sturdy areas: Use paved or gravel zones for heavier decorations like tombstones or skeletons. Protect lawns: Place decorations on boards or mats to prevent soil compaction and yellowing patches. Expert Tip: Map your layout before placing decorations. This prevents last-minute adjustments that can damage plants. Create Spooky Pathways and Entrances Your front yard entrance sets the mood for Halloween. Whether you prefer eerie or playful, make sure the pathways are both spooky and safe. Use temporary fencing or hedge decorations to create a guided walkway. Add low-level LED lights or solar lanterns to illuminate the path. Keep cables tucked along edges or under outdoor mats to avoid tripping hazards. Avoid using pointed stakes near roots or in densely planted garden beds. If your garden includes hedges or trees, decorate them lightly using hooks or clips that do not pierce the branches. Decorating Trees, Shrubs, and Hedges the Right Way Use lightweight props and soft materials that don’t pull on branches. Avoid using metal wire or nails; instead, opt for garden-friendly clips or string ties. Place fake webs or small hanging ghosts on outer branches, not the inner growth. Keep decorations off new shoots or freshly pruned areas. Remove decorations within a few days to prevent restricted plant growth. Expert Tip: Lightweight fabric ghosts or paper lanterns work well on delicate branches. Add a DIY Graveyard or Skeleton Corner Use raised areas, gravel sections, or decking for heavy tombstones or props. Avoid pushing stakes deep into soil where plant roots may be growing. Use foam, cardboard, or recycled materials instead of concrete or metal props. Place lightweight boards underneath decorations to protect lawns. Consider eco-friendly fog effects or motion-activated lights that do not disturb soil or plants. Expert Tip: Elevated platforms protect plants and allow you to create layers in your Halloween setup. Decking and Patio Decorating Ideas Arrange themed seating with pumpkin cushions or spider web throws. Use battery-powered or solar lanterns instead of open candles. Add a simple backdrop like black drapes or orange lighting for party photos. Avoid hanging props that could scratch surfaces or block doorways. Expert Tip: LED lights highlight decorations and ensure safety for both people and plants. Lighting and Electrical Safety Choose LED or solar lights instead of traditional bulbs to prevent heat damage. Run cords neatly along edges, using outdoor-safe clips. Avoid laying wires directly over grass or garden beds. Use extension cords rated for outdoor use only. Keep lights elevated or along fences if children or pets are present. Expert Tip: Protect cords from foot traffic using mats or garden clips. Post-Halloween Garden Care Carefully remove all props, cords, and lights. Rake the lawn gently to loosen compacted soil. Water and fertilize the garden to restore balance. Check plants and shrubs for any broken or bent branches. Aerate areas that had heavy props to improve airflow and prevent yellow patches. Expert Tip: Early cleanup helps plants recover quickly and keeps your garden ready for other seasonal displays. Extra Tips for Garden-Friendly Halloween Decor Choose biodegradable or reusable decorations to reduce waste. Use natural materials like hay bales, pumpkins, and wooden signs. Keep artificial materials minimal and easy to remove. Avoid glitter or tinsel, which can be harmful to soil and wildlife. Take photos early in the evening when natural light is best for capturing your setup. Enjoy a Safe and Stunning Halloween Decorating your front yard for Halloween can be both exciting and mindful. With careful planning and the right materials, you can create a festive display without harming your plants or lawn. At Sky Nature, we understand how much effort goes into maintaining a beautiful garden. Our team shares these insights so you can enjoy each season without worry. A well-designed outdoor space adds charm to every celebration — even the spookiest one. If you’re ready to prepare your garden for upcoming seasons or want expert advice on maintaining healthy outdoor spaces, reach out to Sky Nature. Together, we can keep your garden looking its best all year long. We love to hear from you Contact Us
- 18 October, 2025
- 6 min Read

Is Your Lawn Suffocating? Here’s Why Aeration Is the Secret to a Greener Yard in Melbourne
No matter how often you water or fertilize, your lawn can still look patchy, dull, and lifeless. The problem is often not on the surface but underneath the soil. Over time, foot traffic, rainfall, and mowing compact the soil so tightly that air and nutrients can no longer reach the roots. The result is a struggling lawn that looks tired even with regular care. Lawn aeration is the process of perforating soil with small holes to allow air, water, and nutrients to reach the grass roots. It helps the roots grow deeply, creating a stronger, healthier, and greener lawn. For homeowners across Victoria, especially in Melbourne’s clay-heavy soils, lawn aeration is one of the most effective ways to bring your yard back to life. SkyNature offers professional lawn aeration services in victoria designed specifically for Victorian conditions, helping you restore balance to your lawn and keep it healthy throughout the seasons. What Is Lawn Aeration Lawn aeration simply means creating tiny holes in the ground so that air, water, and nutrients can move freely through the soil. These holes help break up compacted layers, allowing roots to breathe and absorb what they need to grow strong. There are two main types of aeration: Core aeration: Removes small plugs of soil from the lawn using a specialized machine. This method is most effective for compacted or clay soils like those common in Melbourne and other parts of Victoria. Spike aeration: Uses solid spikes to punch holes into the soil without removing any material. It works well for lighter maintenance on lawns that are not heavily compacted. Both methods improve soil structure, water absorption, and root health, but core aeration offers deeper, longer-lasting benefits. Common homeowner questions: What does lawn aeration do? It loosens compacted soil, allowing better root growth, improved drainage, and more even lawn coverage. Is lawn aeration necessary in Melbourne? Yes. Because Melbourne’s soil is mostly clay-based, it tends to compact easily, especially with regular use and rainfall variation. Aeration helps maintain healthy soil conditions. Why Lawn Aeration Is Important for Victoria Lawns Victoria’s climate and soil create unique challenges for maintaining a healthy lawn. The heavy clay soil found across Melbourne and surrounding regions holds water tightly, making it difficult for grass roots to access oxygen. During dry summers, this same soil hardens, creating a tough surface that prevents water from soaking in. Regular lawn aeration addresses all of these issues. It: Improves water absorption so the soil can retain moisture more evenly Enhances nutrient flow to the roots for stronger, greener growth Strengthens root systems, allowing grass to recover faster from drought and wear Prevents patchy, dull, and thin areas caused by compaction Increases drought resistance and overall lawn health In Melbourne’s spring and autumn, aeration helps lawns recover from seasonal stress and prepares them for upcoming weather changes. A well-aerated lawn absorbs rainfall more efficiently and uses fertilizer more effectively, meaning you’ll need less water and fewer products to maintain a lush look. When to Aerate Your Lawn Timing plays a major role in how effective lawn aeration will be. The best time to aerate lawns in Victoria, Australia, is during early spring or mid-autumn when grass growth is active and the soil is slightly moist. These conditions help the lawn heal quickly after aeration and promote strong root development. You should consider aerating your lawn if you notice any of the following signs: The grass feels spongy underfoot Water pools on the surface after rain Your lawn thins out or looks dull even with regular watering You can’t easily insert a screwdriver or garden fork into the soil Aeration once or twice a year is enough for most Melbourne lawns, but high-traffic areas or those with heavy clay soil may need it more often. How to Aerate a Lawn (DIY vs Professional) There are two main ways to aerate your lawn — doing it yourself or hiring a professional. DIY Aeration: Homeowners can rent or buy small manual aerators for light maintenance. Spike aerators and small plug machines are available, but they can be hard work and may not reach the ideal depth in compacted soils. If you choose to do it yourself, remember these tips: Water your lawn a day before aeration to soften the soil Mow your grass short beforehand Avoid aerating during extreme heat or when the soil is too dry Professional Aeration: Professional lawn care services use advanced equipment designed to penetrate deeper and cover larger areas more evenly. Experts like SkyNature also assess your soil type, grass species, and overall lawn condition to decide the best method and timing. Professional aeration saves time, delivers longer-lasting results, and ensures your lawn gets the care it truly needs. Not sure where to start? Let SkyNature handle it — book your aeration service today. Precautions and Aftercare Aeration sets the stage for a healthier lawn, but proper care afterward ensures lasting results. Before aeration: Mow your lawn shorter than usual to help the aerator reach the soil Water lightly the day before to soften compacted areas After aeration: Water your lawn regularly for the next few days to encourage root recovery Leave the soil plugs on the surface; they’ll break down naturally and improve soil texture Apply topdressing or fertilizer if needed to boost growth Avoid mowing or heavy foot traffic for a few days SkyNature Tip: Combine aeration with topdressing and fertilization for best results. This combination enhances nutrient absorption and supports quick lawn recovery. Why Choose SkyNature for Lawn Aeration in Victoria SkyNature has years of experience providing professional lawn mentainance and care services across Melbourne and regional Victoria. Our local knowledge allows us to understand how Victoria’s weather and soil affect lawn health and what it takes to maintain it year-round. We use advanced core aeration equipment designed to penetrate even the toughest clay soil without damaging your turf. Every aeration service includes a complete lawn assessment, ensuring your yard receives the right treatment at the right time. Professional-grade tools and techniques Local expertise tailored to Victoria’s climate and soil Safe, efficient, and environmentally friendly methods All-in-one lawn care packages, including aeration, topdressing, and fertilization Our goal is simple — to help you enjoy a greener, healthier, and more resilient lawn without the stress of managing it alone. Get a free quote and see the SkyNature difference today. Frequently Asked Questions (FAQs) 1. What is lawn aeration? Lawn aeration is the process of creating small holes in the soil to improve air, water, and nutrient flow to the grass roots. 2. How often should I aerate my lawn in Victoria? Most lawns benefit from aeration once a year, ideally in spring or autumn. However, heavily compacted or high-traffic lawns may need it twice a year. 3. Can I aerate my lawn myself? Yes, but professional aeration is more effective for compacted clay soils. DIY methods often do not reach deep enough or provide even coverage. 4. How long after aeration can I mow or water? You can water your lawn immediately after aeration, but wait three to four days before mowing to allow recovery. 5. What’s the cost of professional lawn aeration in Melbourne? The cost depends on the size of your lawn and its condition. SkyNature provides transparent quotes with no hidden fees, so you know exactly what to expect. Final Thoughts A healthy lawn starts from the ground up. Aeration gives your lawn the breathing space it needs to thrive, especially in Victoria’s compact clay soils. By improving air, water, and nutrient movement, it strengthens roots, boosts growth, and helps your grass stay greener for longer. If your lawn feels hard, looks dull, or struggles to absorb water, it’s time to give it a breath of fresh air. Give your lawn the care it deserves — get your free lawn aeration quote from SkyNature today. We love to hear from you Contact Us
- 10 October, 2025
- 8 min Read
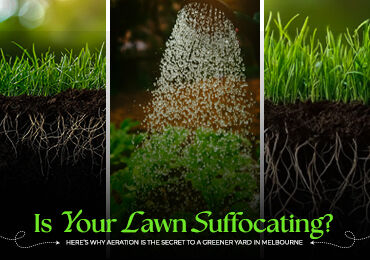
How to Dispose of Hard Rubbish Items Responsibly
Hard rubbish removal can be difficult to deal with if you do not know the right way to dispose of it. Many households in Melbourne face the same challenge every year when they need to get rid of large or bulky items. Knowing your options and choosing the responsible way helps keep the city clean, saves landfill space, and even supports recycling and reuse. This guide explains what counts as hard rubbish, which services are available in Melbourne and Victoria, how to prepare your items, and the practical steps to follow for responsible disposal. What Counts as Hard Rubbish Hard rubbish refers to bulky household items that do not fit into your regular bins. These items are often too large, heavy, or awkward for weekly kerbside collection. Common examples include: Old mattresses and bed frames Sofas, lounges, and chairs Whitegoods such as fridges, washing machines, and ovens Broken furniture like tables and wardrobes Electronics and televisions Outdoor equipment and tools Carpets, rugs, and floor coverings These items can quickly take up space in your home or garage. Many contain materials that can be reused or recycled if handled correctly. Council Services in Melbourne and Victoria Most councils across Melbourne provide a hard rubbish collection service to residents. The details vary depending on your local council. Some councils allow one or two free collections each year. Others issue tip passes so you can take your items directly to a transfer station. Many councils also run dedicated drop-off centres where residents can leave appliances, e-waste, or large furniture. Some of these centres have sorting systems to ensure items are recycled where possible. If you are not sure about your council’s service, check their website or call their customer service team. Knowing the exact rules will help you avoid leaving items outside on the wrong date or in the wrong place. Best Practices Before Disposal Before you place bulky items out for collection or book a rubbish removal service in Melbourne, it helps to prepare them. This makes the process safer, quicker, and more efficient. Clean your items so they are free from food, liquids, or sharp debris. Dismantle large furniture like wardrobes, shelving, or beds so they are easier to handle. Remove recyclable parts such as metal frames, cords, or glass panels and keep them separate. Check safety issues on appliances by making sure doors are detached and cords secured. These simple steps reduce hazards for collection teams and increase the chance of recycling. Four Steps for Responsible Hard Rubbish Removal Step 1. Assess and sort your items: Start by identifying what you need to throw out. Group similar items together such as metals, electronics, or furniture. Sorting early makes the later stages smoother. Step 2. Consider donation or selling first: If items are still usable, think about giving them away to charities, op shops, or selling on platforms like Gumtree or Facebook Marketplace. Step 3. Arrange for recycling or specialised services: Whitegoods, e-waste, and mattresses have dedicated recycling programs. Using these ensures valuable materials are recovered. Step 4. Utilise municipal bulky waste collection: Book your council’s hard rubbish collection service or hire a professional rubbish removal service in Melbourne for larger loads. Why Responsible Disposal Matters Responsible hard rubbish removal is more than just getting rid of clutter. It has long-term benefits for the environment and the community: Reduces landfill waste and conserves space Keeps reusable materials like timber, metal, and plastic in circulation Prevents hazardous items such as e-waste from causing soil and water pollution Improves neighbourhood appearance and prevents illegal dumping Supports local recycling industries and creates jobs Affordable Rubbish Removal Options in Melbourne Not everyone has the time or vehicle to manage bulky waste themselves. If your council collection is not enough, consider professional rubbish removal services near you. Expert rubbish removal providers handle everything from pickup to sorting and disposal. Many focus on recycling and keep costs affordable by charging only for the space your items take in the truck. When searching for a rubbish removal service near you, look for licensed and insured companies. Ask if they recycle and how they handle different materials. Choosing a trusted provider means you can be confident your hard rubbish is disposed of responsibly. Frequently Asked Questions (FAQs) 1. What is considered hard rubbish in Melbourne? Hard rubbish includes bulky household items like mattresses, furniture, whitegoods, electronics, and large appliances that cannot go in regular bins. 2. How often do councils in Melbourne collect hard rubbish? Most Melbourne councils offer one or two free hard rubbish collections per year. Some also provide tip passes or drop-off centres for bulky waste. 3. Can I recycle appliances and whitegoods instead of throwing them away? Yes. Appliances such as fridges, ovens, and washing machines can be recycled for their metal, plastic, and electronic parts through specialised recycling services. 4. What should I do before putting hard rubbish out for collection? Clean your items, dismantle large furniture, remove recyclable parts, and make sure appliances are safe by detaching doors and securing cords. 5. Is professional rubbish removal better than council collection? Council collections are useful for limited items, but professional rubbish removal in Melbourne is faster, more flexible, and ensures recycling is done properly. 6. Can I donate furniture or appliances instead of disposing of them? Yes. If the items are still usable, consider donating them to charities, op shops, or offering them through community marketplaces before disposal. Final Thoughts Hard rubbish removal does not need to be stressful. With council services, recycling programs, and professional help available, Melbourne residents have plenty of options to manage bulky waste responsibly. Start by sorting your items, consider reuse first, and then choose the right disposal method. At Skynature, we understand the importance of responsible rubbish removal in Melbourne. Our team provides reliable and affordable rubbish removal services that prioritise recycling and safe handling. Whether it is an old mattress, broken furniture, or outdated appliances, we make sure your hard rubbish is cleared responsibly. We love to hear from you Contact Us
- 20 September, 2025
- 7 min Read
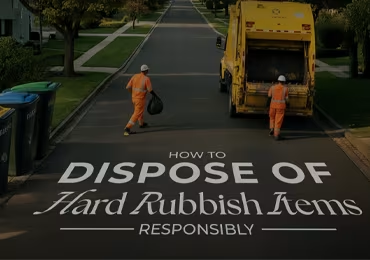
Stone Decking in Victoria, Australia: The Ultimate Guide to Durable & Stylish Outdoor Spaces
Outdoor living is a big part of the Australian lifestyle, and homeowners across Victoria are always searching for durable, low-maintenance, and stylish decking solutions. While timber and composite decks remain popular, stone decking in victoria australia is quickly gaining attention for its timeless beauty and ability to withstand Australia’s diverse climate. In this guide, we’ll explore why stone decking is a smart choice, the best materials available, and tips for maintaining your deck in top condition. Why Choose Stone Decking in Victoria? Victoria’s climate can be unpredictable—hot summers, chilly winters, and rainy coastal conditions mean outdoor spaces need materials that last. Here’s why stone decking stands out: Weather resistance: Unlike timber, stone doesn’t warp, rot, or attract termites. Low maintenance: Minimal cleaning and sealing compared to wood. Aesthetic appeal: A natural, elegant look that complements both modern and traditional homes. Longevity: With proper installation, stone decks can last for decades. Types of Stone Decking Materials Not all stone is created equal. Choosing the right material depends on your design, budget, and lifestyle needs. Bluestone: Popular in Victoria, known for its durability and non-slip surface. Granite: A premium option, extremely hard-wearing and stylish. Sandstone: Softer underfoot, with warm tones ideal for garden settings. Porcelain Pavers: A modern alternative, lightweight yet strong, resistant to staining. Tip: Always choose a stone that suits your outdoor usage. For poolside decking, slip-resistant options like bluestone or textured porcelain are best. Stone Decking vs. Other Decking Materials Wondering how stone compares to other options? Stone vs. Timber: Timber looks warm but requires constant maintenance; stone is sturdier and termite-proof. Stone vs. Composite: Composite is eco-friendly and stylish, but stone offers unmatched natural appeal and longer lifespan. Stone vs. Concrete: Concrete can crack over time, while stone is more durable and visually appealing. By weighing these factors, many Victorian homeowners see stone decking as a smart, long-term investment. Cost & Installation Factors While stone decking may have a higher upfront investment than timber or composite, it offers long-term savings. Key factors that influence cost include: Type of stone selected Size and complexity of the deck design Labour and installation techniques Site preparation (leveling, drainage, etc.) Pro tip: Think of stone decking as a “once in a lifetime” investment. Unlike timber, it doesn’t need frequent replacement. Maintenance Tips for Stone Decking Keeping your stone deck looking great is easier than you think: Regular cleaning: Sweep off leaves and debris to prevent staining. Gentle washing: Use mild soap and water; avoid harsh chemicals. Sealing (if needed): Some stones benefit from sealing to enhance durability. Algae & moss control: A quick clean in wet months prevents slippery surfaces. With basic care, your stone deck can stay beautiful for decades. Best Uses of Stone Decking in Victoria Stone decking is versatile and works beautifully in different outdoor areas: Pool surrounds: Slip-resistant and heat-tolerant surfaces. Patios & courtyards: Elegant entertaining spaces. Garden walkways: Blends naturally with landscapes. Outdoor kitchens: Durable surface for high-use areas. No matter your outdoor design goals, stone decking adds both functionality and visual appeal. Frequently Asked Questions (FAQs) 1. Is stone decking good for the Australian climate? Yes. Stone is naturally resistant to heat, rain, and pests, making it ideal for Victoria’s changing weather. 2. What is the most durable stone for decking? Granite and bluestone are among the most durable, withstanding heavy use and harsh climates. 3. Does stone decking get hot in summer? Lighter-coloured stones like sandstone and porcelain reflect heat better and stay cooler underfoot. 4. Can stone decking be slippery when wet? Most outdoor-grade stone is textured for slip resistance, but proper sealing and cleaning also reduce slipperiness. 5. How long does stone decking last? With correct installation, stone decking can last 20–50 years, far longer than timber alternatives. Conclusion Stone decking is one of the smartest choices for homeowners in Victoria who want durability, low maintenance, and timeless style. From pool surrounds to patios and walkways, stone elevates outdoor living spaces while adding long-term value to your property. Looking for expert stone decking installation in Victoria, Australia? At Skynature, we specialise in designing and building custom stone decks that blend beauty with functionality. Contact us today to discuss your project and create an outdoor space that lasts for decades. We love to hear from you Contact Us
- 13 September, 2025
- 5 min Read
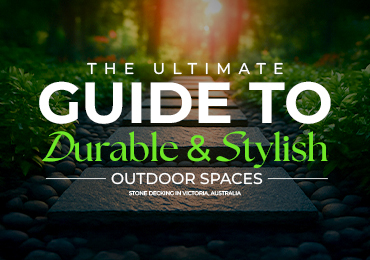
6 Native Australian Plants That Thrive in Low-Maintenance Gardens
Creating a beautiful, sustainable garden while minimizing ongoing effort is an achievable goal for gardeners in Victoria and throughout Australia. With the right selection of native Australian plants, you can enjoy an attractive garden that flourishes with low water, low feeding, and minimal pruning requirements. Native plants are adapted to local soil and climate conditions, making them naturally resilient. This guide discusses some of the best native Australian plants that thrive in low-maintenance gardens and practical tips for designing your easy-care green space. Why Choose Native Australian Plants? Climate Adaptation: These plants have evolved to withstand Australia’s diverse climate ranges, from dry spells to cooler seasons in Victoria. Water Efficiency: Once established, native plants usually need significantly less irrigation than exotic species. Pest and Disease Resistance: They naturally resist many pests and diseases, reducing the need for chemical treatments. Support for Local Wildlife: Native plants attract pollinators, birds, and beneficial insects, enhancing biodiversity. Lower Maintenance: Most natives require less pruning and feeding, saving time and resources. By supporting local ecosystems, your garden not only looks vibrant but also contributes positively to environmental conservation. Top Native Australian Plants for Low-Maintenance Gardens Here are some resilient and visually appealing native plants ideal for Victoria’s low-maintenance gardens: Lomandra (Lomandra longifolia): Tough, drought-tolerant, and adaptable with dense foliage perfect for borders and weed suppression. Kangaroo Paw (Anigozanthos spp.): Striking claw-shaped flowers that attract nectar-feeding birds; thrives in sunny, well-drained spots. Grevillea (Grevillea spp.): Colorful flowers loved by pollinating birds; thrives in poor soils and drought conditions. Westringia (Westringia fruticosa): Evergreen shrub resistant to drought and frost; ideal for hedges and mass plantings. Bottlebrush (Callistemon spp.): Iconic red flowering spikes; attracts native birds and requires little care beyond pruning. Correa (Correa spp.): Bell-shaped flowers blooming in autumn/winter; suitable for shade and drought conditions. Designing Your Low-Maintenance Native Garden: Practical Tips Group Plants by Water Needs: Cluster similar plants to optimize irrigation. Use Mulch Liberally: Helps retain moisture, suppress weeds, and regulate soil temperature. Improve Native Soils Thoughtfully: Add organic matter where needed to boost plant health. Limit Lawn Areas: Replace with native ground covers or hardscaping to cut maintenance. Plan for Seasonal Variety: Mix species to ensure year-round foliage and blooms. Local Benefits: Why Low-Maintenance Native Gardens Suit Victoria Gardening with natives suited to Victoria's temperate climate ensures resilience through warm summers and cool winters. It reduces reliance on intensive irrigation, supports local flora and fauna, and creates authentic Australian landscapes that are both functional and beautiful. Supporting Biodiversity Through Native Plant Choices By choosing native plants, gardeners provide food and habitat for wildlife. Grevillea and Kangaroo Paw supply nectar, while Lomandra offers protective cover — helping maintain ecological balance and promoting a thriving garden environment. Sustainable Gardening with Native Plants Native gardens reduce water use, chemical inputs, and maintenance demands. They support natural cycles, improve soil health, and contribute to urban biodiversity — making them a cornerstone of sustainable gardening in Victoria. Partner with Experts: Sky Nature Landscaping If you’re eager to create a native plant garden effortlessly, consider partnering with professional landscapers like Sky Nature Landscaping in Victoria. They specialize in sustainable, low-maintenance garden designs using native plants to enhance beauty and ecological function. Whether you have a small yard or a larger property, expert landscaping services can guide plant selection and installation tailored to your goals and local conditions. Conclusion Native Australian plants offer an excellent solution for gardeners seeking vibrant, eco-friendly, and easy-care outdoor spaces. Selecting the right species and designing thoughtfully for Victoria’s climate can result in a thriving garden that enriches local wildlife while reducing maintenance time and water use. Embrace the beauty and benefits of native plants to create your dream low-maintenance garden that will flourish for years to come. We love to hear from you Contact Us
- 06 September, 2025
- 4 min Read
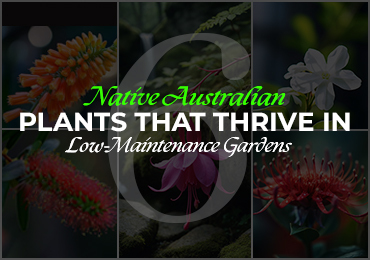
Eco-Friendly Ways to Keep Your Garden Pest-Free
A healthy, thriving garden is every homeowner’s dream — lush greenery, colourful blooms, and thriving plants that make outdoor spaces inviting. But pests are often an unavoidable part of gardening in Australia. From aphids and caterpillars to snails and fungal infections, garden pests can quickly damage your hard work if left unchecked. Many people turn to chemical pesticides for quick results, but these often do more harm than good. Harsh chemicals can affect soil quality, pollute waterways, and even harm beneficial insects such as bees and butterflies. That’s why eco-friendly pest control methods are becoming the go-to solution for sustainable gardening. They protect your plants, maintain biodiversity, and keep your garden safe for children, pets, and the environment. Here are some of the most effective eco-friendly ways to keep your garden pest-free. Why Choose Eco-Friendly Pest Control? Healthier soil & plants: Natural methods build long-term soil health, giving your plants the strength to resist pests. Protecting pollinators: Bees, butterflies, and ladybirds are essential for pollination — chemicals can drive them away. Safe for family & pets: Eco-friendly garden pest solutions avoid harsh toxins. Sustainable gardening: Reduces reliance on synthetic pesticides and supports a balanced ecosystem. 1. Prevent Pests with Smart Gardening Practices The best pest control starts with prevention. Healthy plants are naturally more resistant to disease and insect attack. Improve soil health through composting, mulching, and regular aeration. Nutrient-rich soil produces stronger plants that pests find less appealing. Water wisely. Overwatering can cause fungal growth, while dry soil weakens plants. A steady watering routine keeps roots strong. Rotate crops and mix plant types. For veggie patches, rotating where you plant tomatoes, beans, and leafy greens reduces soil-borne pests. 2. Invite Nature’s Helpers One of the most effective eco-friendly pest control strategies is encouraging beneficial insects and animals into your garden. Ladybirds, lacewings, and hoverflies feed on aphids and mites. Bees and butterflies help pollinate while keeping the ecosystem balanced. Frogs, lizards, and birds naturally control mosquitoes, slugs, and caterpillars. Plant native flowers, herbs (like basil and coriander), or shrubs to attract these helpful creatures. Creating a garden that works with nature reduces your reliance on sprays. 3. Natural Pest Control Remedies Sometimes pests still sneak in, even in well-maintained gardens. Luckily, there are plenty of organic, home-friendly solutions you can try: Neem oil spray – effective against aphids, mealybugs, and caterpillars. Garlic or chilli spray – deters leaf-eating insects naturally. Beer traps – a simple way to catch slugs and snails. Diatomaceous earth – a natural powder that deters crawling insects without harming plants. These options are affordable, safe, and easy to prepare at home — making them excellent alternatives to chemical pesticides. 4. Physical Barriers & Traps Sometimes, the simplest approach is best. Protect your plants by creating physical barriers against pests: Fine mesh netting over veggie patches keeps caterpillars and moths away. Row covers shield crops from insects while allowing sunlight and water through. Sticky traps work well for flying pests like whiteflies. Mulching creates a barrier against weeds and reduces insect nesting. These methods are non-toxic and can be reused throughout the gardening season. 5. Regular Monitoring & Garden Maintenance Consistent monitoring is key to effective pest management. By spotting problems early, you can act before infestations spread. Inspect plants weekly for insect activity or leaf damage. Prune diseased or damaged branches promptly. Remove weeds and garden debris where pests like to hide. Avoid leaving stagnant water, which attracts mosquitoes and fungal issues. Regular upkeep ensures your garden remains vibrant and pest-free — and saves you from bigger problems later. FAQs – Eco-Friendly Garden Pest Control in Victoria Q1: What are the best natural ways to keep pests out of a garden? Companion planting, neem oil sprays, and encouraging beneficial insects are among the most effective eco-friendly methods. Q2: Is eco-friendly pest control safe for pets? Yes — natural methods like neem oil, garlic spray, and physical barriers are safe for pets when applied correctly. Q3: What plants naturally repel garden pests? Marigolds, basil, rosemary, and lavender can deter aphids, mosquitoes, and beetles. Q4: Do I need professional help for pest control in Victoria? For minor issues, DIY solutions work well. But if pests spread across your garden, a professional local garden maintenance service like Skynature can provide lasting eco-friendly solutions. 6. When to Call a Professional While eco-friendly DIY methods work for most home gardens, there are times when infestations become too severe to handle alone. If you notice recurring issues, widespread damage, or pests that don’t respond to natural remedies, it’s time to call in experts. Professional garden maintenance services not only manage pests but also improve soil health, recommend the right plants for your area, and use environmentally safe techniques to restore balance in your garden Conclusion Pest control doesn’t need to harm your garden or the environment. By using eco-friendly pest control methods, you can enjoy a healthy, thriving outdoor space that’s safe for kids, pets, and pollinators. At Skynature, we provide reliable garden maintenance and pest control services across Victoria. From lawn care to sustainable pest management, our local team ensures your outdoor spaces stay green, beautiful, and pest-free. Looking for eco-friendly garden pest control near you in Victoria? Contact Skynature today for expert help. We love to hear from you Contact Us
- 29 August, 2025
- 7 min Read

Why Composite Pool Decking is the Smarter Choice for Your Victorian Poolside
If you own a pool in Victoria, you already know it’s more than just a place to cool off — it’s the heart of your outdoor living space. From summer barbecues to quiet morning swims, your pool area sets the tone for how you relax and entertain. That’s why choosing the right pool decking is such an important decision. While traditional timber has long been a popular choice, composite decking — especially premium options like Ecodecking — is quickly becoming the go-to material for custom pool decks across Victoria. And for good reason. 1. The Benefits of Pool Decking Before we get into material choices, let’s look at what pool decking actually offers: Enhanced Safety – A well-designed deck creates a stable, slip-resistant surface around your pool, reducing accident risks. Aesthetic Appeal – It frames your pool beautifully, making it look like a feature, not just a functional space. Extended Usable Space – A deck provides extra room for seating, lounging, or outdoor dining, turning your pool area into a complete outdoor living space. Property Value Boost – Quality deck installation in Victoria can increase both the appeal and resale value of your home. Low Maintenance with the Right Material – Choose wisely, and your pool deck can stay beautiful without constant upkeep. 2. Understanding the Materials: Timber vs Composite Timber Pool Decking Timber offers a warm, classic look. However, when installed around pools, it comes with challenges: it absorbs water, requires regular sealing, and can splinter or warp under constant exposure to moisture and UV rays. In Victoria’s variable climate, this can mean high upkeep costs and shorter lifespan. Composite Pool Decking (Ecodecking) Composite decking is made from a blend of recycled wood fibres and polymers, creating a weather-resistant deck surface that looks like timber but performs far better. Ecodecking, in particular, is engineered for the Australian outdoors — resistant to fading, rotting, and warping, with minimal maintenance required. 3. Why Composite Decking Excels for Pools When it comes to pool decking in Victoria, composite materials offer several distinct advantages: Slip Resistance – Ecodecking is designed with textured surfaces to reduce slipping hazards — a critical safety feature around pools. Low Maintenance – Forget sanding, sealing, or oiling every year. A quick hose-down is all your outdoor living space needs. UV Stability – Composite decks maintain their colour even under intense Australian sunlight. Water Resistance – Unlike timber, composite boards won’t swell, rot, or crack after repeated exposure to chlorinated or saltwater. Eco-Friendly – Made from recycled materials, Ecodecking is a sustainable choice for environmentally conscious homeowners. 4. Key Considerations Before You Build If you’re planning a deck installation in Victoria, here are some important factors to weigh before choosing your materials: Climate Compatibility – Victoria’s weather can swing from hot and dry to wet and windy. Composite materials perform consistently year-round without seasonal swelling or shrinkage. Long-Term Costs – While composite can have a higher initial investment, the savings on maintenance and replacement make it cost-effective over time. Design Flexibility – Composite boards come in a wide range of colours and finishes, letting you match your pool area to your home’s style. Council Regulations – Some Victorian councils have guidelines on pool fencing and decking proximity. Always check before you start. 5. An Extra Benefit You Might Not Expect One overlooked advantage of composite decking is comfort underfoot. Timber can become scorching hot in peak summer, making it uncomfortable to walk on barefoot. Ecodecking is engineered to dissipate heat faster, meaning fewer “ouch” moments when you step out of the pool. 6. Making the Switch from Timber to Composite If you currently have a timber pool deck, transitioning to composite is easier than you might think. Many existing substructures can be adapted to accommodate composite boards, reducing installation time and cost. A professional deck installation team in Victoria can assess your current setup and provide tailored recommendations. This way, you get a custom pool deck designed for both beauty and performance. Frequently Asked Questions About Pool Decking Q1: What is the best decking for around the pool? Composite decking, especially Ecodecking, is often considered the best option because it resists water damage, won’t warp or splinter, and requires minimal upkeep — making it ideal for pool environments in Victoria. Q2: Does pool chlorine damage composite decking? No — composite decking is highly resistant to chlorine and saltwater. Unlike timber, it won’t absorb chemicals, so it stays looking new for longer. Q3: Is decking around a pool a good idea? Absolutely. It improves safety, enhances the look of your pool area, and creates more usable outdoor space for relaxation and entertaining. Q4: What is the average cost to build a deck around a pool? Costs vary depending on size, design, and material choice. While composite can have a higher upfront investment than timber, it saves money in the long run due to reduced maintenance. Q5: How long do composite decks last? With proper installation and care, composite decks can last 25–30 years or more, even in challenging climates. Q6: What is the negative with composite decking? The main drawback is the higher initial cost compared to some timber options. However, this is often offset by lower maintenance and longer lifespan. Q7: Is there something better than composite decking? For most residential pool areas, composite strikes the best balance between durability, aesthetics, and maintenance. Some homeowners opt for PVC decking, but it can be more expensive and less natural-looking. Q8: What ruins composite decking? Prolonged exposure to harsh cleaning chemicals, abrasive scrubbing, or neglecting basic cleaning can shorten its life. However, normal pool use won’t harm it. Q9: Are composite decks slippery when wet? Quality composite decking, like Ecodecking, is designed with slip-resistant textures, making it safer than many timber surfaces. Q10: Is PVC decking better than composite? PVC is more resistant to moisture and staining but often comes at a higher price and may lack the natural timber-like appearance that composite provides. 7. The Bottom Line: Choosing for the Long Term When you invest in composite pool decking, you’re not just buying a deck — you’re securing years of low-maintenance, high-performance enjoyment. Ecodecking blends modern technology with a natural look, giving you the best of both worlds. For Victorian homeowners who want a stylish, safe, and sustainable outdoor living space, composite materials make more sense than timber in almost every category. Final Thoughts Composite pool decking is the smarter long-term choice for Victorian homeowners who want style, safety, and durability without the hassle of constant upkeep. Unlike timber, composite options like Ecodecking resist water damage, fading, and warping, making them ideal for Australia’s harsh climate while maintaining their natural timber-like look. They also provide superior slip resistance and stay cooler underfoot, ensuring comfort and safety around your pool. While the initial investment may be higher, composite decking quickly pays for itself through reduced maintenance and longer lifespan. By choosing Ecodecking, you’re not just enhancing your pool area — you’re future-proofing your outdoor living space. We love to hear from you Contact Us
- 14 August, 2025
- 8 min Read
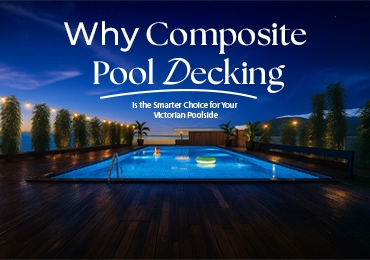
Victoria’s Trusted Garden Maintenance & Commercial Care Services
Maintaining a healthy, attractive garden requires more than just watering plants and mowing the lawn. Gardening services in Victoria are designed to keep both residential and commercial outdoor spaces thriving year-round through skilled maintenance and horticultural care. Whether you have a backyard garden or manage large public or commercial grounds, understanding the scope of gardening services and how they differ from landscaping is essential to making informed decisions. In this guide, we’ll explore what gardening services include, how they compare to landscaping, the typical costs involved, and the role of commercial and contract gardening in Australia—particularly in Victoria’s climate. What Are Gardening Services? Gardening services refer to the regular maintenance and upkeep of outdoor spaces, ensuring plant health, aesthetic appeal, and seasonal readiness. These services are tailored to support different types of gardens, from small residential lawns to more complex gardens with diverse plants and features. Common tasks covered under general gardening services include: Mowing and edging lawns Pruning trees and shrubs Weed control and mulching Fertilising soil and plants Pest and disease management Seasonal planting and garden clean-ups Irrigation system monitoring These services ensure that your garden remains vibrant and healthy, while also preventing issues like overgrowth, soil depletion, or plant diseases. Gardening Services vs. Landscaping Services Although closely related, gardening and landscaping are distinct services. Gardening is focused on the ongoing care and maintenance of existing plants, lawns, and garden features. Landscaping is more structural—it involves the design, planning, and installation of garden features, including retaining walls, turf laying, garden beds, water features, paths, and decks. Put simply: landscaping creates the garden’s foundation, while gardening keeps it alive and flourishing. How Much Do Garden Maintenance Services Cost in Australia? The cost of regular garden maintenance in Australia depends on several factors such as the size of the garden, the complexity of the work, the frequency of service, and location. Lawn size (m²) Complexity / level of work required Frequency of service and access Additional services (e.g., aeration, restoration, fertilisation) Typical rates include: Basic maintenance (mowing, weeding, pruning): $45 to $70 per hour Advanced or large-scale maintenance (hedging, restoration, tree pruning): $80 to $120 per hour For ongoing care, many property owners—especially commercial clients—opt for contract gardening agreements, which offer consistent service and often better value for long-term maintenance. What Services Are Included in Gardening? Lawn care: mowing, edging, fertilising, and seasonal treatments Tree and shrub pruning: to control growth, promote flowering, and prevent disease Weeding and mulching: to keep soil healthy and suppress weed growth Pest and disease control: early identification and treatment Seasonal planting: adding new plants and replacing dead ones Soil care: testing, fertilising, and composting as needed Clean-up services: removal of green waste, leaves, and storm debris For lawns specifically, certain conditions like thatch build-up—an excess layer of dead grass and roots—can hinder growth. In such cases, dethatching becomes an important part of garden restoration. It helps improve water and nutrient penetration, allowing your lawn to thrive. A well-executed dethatching treatment can significantly enhance lawn health and is often recommended during seasonal maintenance cycles. For more insight, explore this complete guide to lawn dethatching in Australia. What Is Commercial Gardening? Commercial gardening is the professional maintenance of outdoor areas in business, public, or institutional settings. Unlike residential gardening, commercial gardening is usually performed on a larger scale and may involve ongoing contracts to manage: Office complexes Apartment blocks Educational institutions Government and council lands Industrial and retail parks Resorts, hotels, and hospitality properties These services ensure that high-traffic areas remain clean, attractive, and compliant with local environmental and safety standards. Where Is Commercial Gardening Practiced? Public green zones: parks, recreational areas, median strips Corporate properties: business parks, commercial office campuses Hospitality venues: golf courses, resort landscapes, and event spaces Institutional grounds: schools, hospitals, universities Retail and shopping centres: including carparks and entryways The goal is to maintain functional, visually pleasing environments that serve both the business and the community. Is Commercial Gardening Intensive or Extensive? Intensive gardening: involves high input—labour, irrigation, fertilisers—for the maintenance or production of plants in concentrated areas. This is typical of flower farms, greenhouses, or specialty crops. Extensive gardening: lower input per square metre, spread over larger areas—such as grass mowing, tree trimming, or general site upkeep. Most commercial property maintenance falls under extensive gardening, with targeted intensive care in high-visibility zones. What Crops Are Grown in Commercial Gardening? Leafy greens: lettuce, spinach, kale Herbs: basil, mint, coriander Root vegetables: carrots, beets, radishes Flowers and ornamentals: both native and exotic species Potted plants and shrubs for retail and wholesale nurseries These crops are cultivated for both local consumption and commercial resale across Australia. What Climate Supports Commercial Gardening in Victoria? Warm summers that support rapid plant growth Mild winters with lower risk of frost Consistent rainfall, particularly in southern and coastal regions Defined seasons, allowing structured planting schedules These climatic conditions are ideal for both maintenance-focused services and crop production in commercial settings. Supporting Long-Term Garden Health Across Victoria From home gardens to public parks and corporate campuses, garden maintenance plays a crucial role in shaping beautiful, sustainable spaces. With the right care—tailored to seasonal needs, local climate, and property type—outdoor areas can stay green, healthy, and ready for every season. If you’re seeking dependable, experienced support for your garden—whether residential or commercial—Skynature offers thoughtful, long-term solutions across Victoria. Invest in the Health of Your Garden A healthy, vibrant outdoor space requires regular care and the right expertise. Whether you're managing a small backyard or a large commercial site, professional gardening services deliver the seasonal attention and horticultural know-how your landscape needs to flourish. At Sky Nature, we offer reliable, eco-conscious gardening and maintenance packages tailored to Victoria's climate and your property's needs. We love to hear from you Contact Us
- 09 August, 2025
- 7 min Read
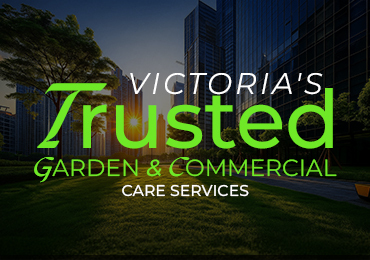
Choosing the Right Boundary Fencing in Victoria: What Every Property Owner Should Know
When it comes to fencing your property in Victoria, it’s not just about putting up a barrier—it’s about enhancing privacy, boosting security, and adding long-term value to your outdoor space. Whether you're a homeowner, landlord, or commercial property manager, choosing the right boundary fencing Service is a major decision. From aluminum fences and iron fencing to timber and chain link, the options are diverse. This guide will help you understand: The different types of fencing materials and styles What influences fencing costs (without giving fixed prices) Fencing regulations in Victoria A pre-installation fencing checklist Tips to maintain your fence How to pick the right fence for your specific needs Let’s dive in and help you make an informed choice backed by expert insight from Skynature—your trusted fence builder in Victoria, Australia. 1. Popular Types of Fencing Materials & Styles Each property has different fencing needs—some require privacy, others focus on durability or modern appeal. Here's a breakdown of the most common fencing styles in Victoria: Aluminum Fencing Sleek, low maintenance, and corrosion-resistant Ideal for pool enclosures and contemporary homes Lightweight yet durable, with modern visual appeal Iron Fencing (Wrought Iron) Decorative and long-lasting, perfect for heritage homes Requires periodic anti-rust treatment Great for high-end aesthetics and security Timber Fencing A traditional, eco-friendly choice Offers natural privacy and sound insulation Can be painted or stained to match the garden style Colorbond Steel Fencing Durable and weather-resistant Designed for maximum privacy and low maintenance Available in a variety of colours for aesthetic flexibility Chain Link Fence Cost-effective solution for larger spaces Common in commercial, sports, or industrial areas Can be paired with screens for added privacy Your ideal material will depend on your goals, budget, and property type—and our team at Skynature can help you match the right style to your space. 2. Cost Considerations: Tailored to Your Property’s Needs Fence installation isn’t a one-size-fits-all service—especially across diverse Victorian landscapes. At Skynature, we don’t believe in generic pricing. Instead, we base our estimates on the unique characteristics of your property. Key factors that affect fencing costs: Property Type: Residential fencing tends to differ in scale and design from commercial or rural fencing. Material Selection: Iron, aluminum, timber, or Colorbond all come with varying costs, durability, and aesthetic value. Design Complexity: Custom finishes, heights, or security features will affect pricing. Site Conditions: Sloping land, tight spaces, or difficult soil can add to installation requirements. Permit & Council Approvals: Some fencing types or locations may need compliance with Victoria's local regulations. Skynature offers free consultations where we evaluate your site and provide a tailored estimate with no hidden costs. We help you balance performance, design, and budget—without compromising on quality. 3. Fencing Regulations in Victoria, Australia Before installing any boundary fencing, it’s important to understand state and local regulations in Victoria. Non-compliance can lead to legal or financial complications. Key fencing regulations include: Height Restrictions: Fences over 2m generally require a building permit. Neighbouring Boundaries: If the fence is shared, both neighbours typically share the cost and must agree on the design (per Fences Act 1968). Corner Blocks & Traffic Visibility: Special visibility rules apply to fences near road intersections. Pool Fencing: Must comply with Australian Standard AS1926, ensuring child safety and spacing of verticals. At Skynature, we handle the approval process where necessary and ensure your new fence is compliant and stress-free from day one. 4. Pre-Installation Checklist: What to Know Before Building Installing a fence requires planning. Here’s a quick fencing checklist to help you prepare: Identify your property boundaries Choose the right fencing style and purpose Check for council regulations or overlays Discuss shared fencing with your neighbour Request a professional site inspection Remove any vegetation or old structures Review installation plan and timelines Book with a licensed fence builder in Victoria Skynature supports you through every step—from planning to clean-up—ensuring professional workmanship throughout. 5. Post-Installation: How to Maintain Your Fence A well-installed fence can last for decades with the right upkeep. Here’s how to keep it in great shape: Timber Fencing Repaint or re-stain every 2–3 years Watch for termites, rot, or splitting boards Keep soil and mulch clear of base posts Colorbond or Aluminum Fences Clean with water to remove dust and debris Avoid piling materials against the fence Touch up scratches to prevent corrosion Iron Fencing Check for rust and apply protective coatings Lubricate hinges and joints as needed Repaint when finish wears off Need help with post-installation fence care? Skynature offers ongoing support and repairs to keep your fencing strong and secure. 6. What Type of Fencing is Right for Your Needs? Choosing the ideal fencing style depends on your goal. Here’s a quick guide: Goal Recommended Fencing Privacy Timber, Colorbond Modern Aesthetic Aluminum, Colorbond Durability & Strength Iron, Aluminum Budget-Friendly Chain Link, Timber Pet or Child Safety Colorbond, Chain Link with mesh Low Maintenance Aluminum, Colorbond Commercial or Rural Use Chain Link, Iron Still not sure? Our team can help you select the most suitable fencing solution after a site evaluation—whether it’s for a small backyard or a large-scale commercial project. Final Thoughts: Trust Skynature for Quality Fence Installation in Victoria Fencing is more than a boundary—it’s protection, privacy, and presentation all in one. At Skynature, we combine craftsmanship, local knowledge, and premium materials to deliver fencing solutions built to last. Whether you need fencing services, fence repair, or complete fence installation in Victoria Australia, we’re here to help. Our experienced team works with residential and commercial clients across the region to deliver affordable, customised fencing options—from aluminum fences to iron and chain link fencing. Ready to upgrade your boundary fencing? Contact Skynature today for a no-obligation quote and let’s bring your fencing vision to life with quality, reliability, and style. We love to hear from you Contact Us
- 01 August, 2025
- 8 min Read
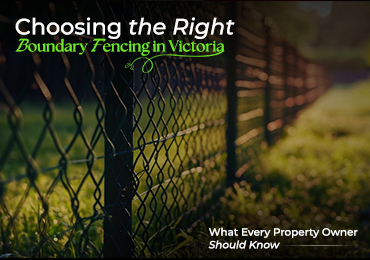
The Complete Guide to Hedge Trimming & Pruning in Victoria
Maintaining a well-groomed garden is essential for both aesthetic appeal and plant health. In Victoria, hedge trimming and garden pruning are two of the most effective yard maintenance practices that homeowners and property managers rely on. Though often used interchangeably, trimming and pruning serve different purposes and are performed with different techniques. This guide will help you understand the differences between hedge trimming and pruning, when and how to carry them out, what tools are required, and why they’re crucial for residential lawn care and property maintenance in Victoria. What Is Hedge Trimming & Pruning? Hedge trimming refers to the process of cutting back the outermost growth of hedges, shrubs, or bushes to shape them, maintain uniformity, and keep them from growing out of control. It’s mainly aesthetic but also encourages denser foliage. Pruning, on the other hand, involves the selective removal of dead, damaged, or diseased branches to improve a plant’s structure, promote healthier growth, and reduce the risk of pests or disease. It's more technical and health-focused. Both are essential parts of a proper lawn mowing service and yard maintenance routine in Victoria. What Is Hedge Trimming & Pruning? Feature Hedge Trimming Garden Pruning Purpose Shape & tidy Health & growth Tools Hedge trimmers Secateurs, saws Frequency Regular Seasonal Plant Focus Hedges, shrubs Trees, bushes, perennials Result Clean appearance Stronger structure While hedge trimming is part of general residential lawn care, pruning is more horticulturally focused and requires knowledge of plant biology. When Should You Trim or Prune? When to Trim Hedges In Victoria, the best time for hedge trimming is late winter to early spring before new growth begins, and then again in early summer for a clean-up. Evergreen hedges benefit from two trims a year, while deciduous hedges may need only one. When to Prune Pruning is best done in late winter or early spring, depending on the species. For flowering shrubs, prune immediately after blooming to avoid cutting off flower buds. Purpose, Process, Frequency & Tools of Hedge Trimming Purpose Maintain tidy appearance Encourage denser growth Control hedge height and width Improve curb appeal Tools Required Electric or petrol hedge trimmer Manual shears Ladder for tall hedges Safety gloves and goggles Frequency 1–3 times per year, depending on growth rate and plant species. Process 1. Inspect hedge shape and overgrowth 2. Start trimming from bottom to top 3. Keep the top narrower than the base 4. Step back regularly to check symmetry Trimming also supports other property maintenance activities like lawn mowing, leaf clearing, and seasonal cleanup. Purpose, Process, Frequency & Tools of Pruning Purpose Remove dead/diseased wood Shape plant naturally Encourage flowering or fruiting Reduce risk of pests or storm damage Tools Required Bypass pruners (for small branches) Loppers (for medium branches) Pruning saws (for thick limbs) Disinfectant (to prevent disease spread) Frequency Once or twice annually, or as needed for corrective pruning. Process 1. Identify dead, diseased, or crossing branches 2. Make clean cuts just above a bud or branch collar 3. Disinfect tools between cuts to prevent spread 4. Avoid excessive cuts to reduce stress on plant 3 Common Types of Pruning There are three common methods: Thinning – Removing entire branches to allow more light and air through. Heading – Cutting back growth to stimulate dense branching. Cleaning – Removing only dead or diseased parts for safety and plant health. These methods form the core of professional garden pruning services in Victoria. Benefits of Pruning The cost of lawn dethatching depends on: Promotes healthy growth and flowering Prevents the spread of disease Improves plant structure and stability Reduces hazards from falling branches Increases sunlight and airflow Pruning also helps rejuvenate old or overgrown plants and ensures long-term garden health. Benefits of Hedge Trimming Enhances property appearance instantly Keeps hedges compact and manageable Prevents obstruction of walkways and windows Deters pests by removing hiding spots Encourages thicker, fuller foliage Proper hedge trimming is especially valuable in yard maintenance routines across Victoria’s residential suburbs. Why Winter Is Better Than Spring for Trimming & Pruning in Victoria While spring is often associated with new growth, winter is actually the ideal time for most hedge trimming and pruning activities in Victoria. Here's why: 1. Plants Are Dormant During winter, many trees, shrubs, and hedges enter a dormant phase, meaning their growth slows down significantly. This makes it easier to prune without stimulating excessive new growth, which could be damaged by late frosts or unpredictable weather. 2. Easier to See Plant Structure With less foliage, it's easier to see the framework of branches. This allows for more precise cuts, especially in pruning, where removing dead or diseased wood requires careful judgment. 3. Prepares Plants for Healthy Spring Growth Pruning and trimming in winter gives plants time to heal before the growing season. When spring arrives, the plant can direct its energy toward fresh, strong growth, resulting in healthier blooms, fuller hedges, and better structure. 4. Reduces Risk of Pests & Diseases Cold weather limits the activity of insects, fungi, and bacteria. Trimming and pruning during this time minimises the chance of infection or pest attacks, which are more common in warmer seasons. 5. Better Timing for Flowering Shrubs Pruning flowering shrubs in winter ensures you don’t accidentally cut off buds that would bloom in spring. This is especially important for plants that flower on new growth. How to Trim an Overgrown Hedge Without Killing It Overgrown hedges can be tricky to manage. To trim them safely: Start gradually—avoid removing more than one-third of the hedge at once Use sharp tools to make clean cuts Trim in stages across seasons for recovery Focus on the sides first, then reduce the top slowly Avoid trimming in extreme heat or frost This careful approach helps restore the hedge without shocking or killing the plant. Tips for Hedge Trimming & Pruning Overgrown hedges can be tricky to manage. To trim them safely: Always use clean, sharp tools Trim or prune on dry, mild days Disinfect blades between plants to avoid cross-contamination Learn the specific needs of each plant species Observe regrowth and adjust frequency accordingly Hire property maintenance experts for complex or high-reach jobs Both pruning and hedge trimming are essential services within a complete lawn mowing and garden care plan. Why Hedge Trimming & Pruning Matter in Victoria Victoria’s varied climate—ranging from cool coastal winds to hot inland summers—means plants grow at different rates throughout the year. Regular hedge trimming and pruning help your garden withstand seasonal changes, prevent storm damage, and look well-maintained year-round. Professional care also ensures your yard aligns with local council regulations and improves overall property value. Local Experts in Hedge Trimming & Pruning – Skynature At Skynature, we specialise in professional hedge trimming and pruning services across Victoria, Australia. Our experienced team understands local plant types, seasonal needs, and the right techniques to keep your garden thriving—without overcutting or damaging your hedges. Whether you need routine shaping or corrective pruning, we offer tailored, reliable solutions for residential lawn care, yard maintenance, and property upkeep. We love to hear from you Contact Us
- 25 July, 2025
- 9 min Read
Rubbish Removal Victoria Australia – Clean Homes Start with Clean Surroundings
We all want a clean, clutter-free home. But let’s be honest — life gets busy, junk piles up, and before you know it, the backyard’s filled with broken chairs, garden waste, or those boxes you meant to sort out “someday.” That’s where professional rubbish removal services come in — and if you’re in Victoria, Australia, there’s no better time to clear the clutter than now. Whether it’s a spring clean, post-renovation mess, or just weekly household junk, proper rubbish removal isn’t just about tossing things out — it’s about reclaiming your space and peace of mind. And with Skynature, one of the most trusted rubbish removal service companies in Victoria, cleaning up has never been easier. Why Rubbish Removal Shouldn’t Be an Afterthought Rubbish doesn’t just ruin the view — it can become a real problem: It attracts pests and insects. It’s a fire and safety hazard. It clogs up valuable storage space. It can even lower the value of your property. By booking a trusted home cleaning service in Victoria that includes professional rubbish removal, you’re not just improving how your space looks — you’re protecting your health, your home, and even your neighbourhood. What Counts as “Rubbish” Anyway? You’d be surprised at what ends up sitting in yards, garages, and driveways. Here’s a quick list of common types of rubbish we help Victoria homeowners get rid of: Household waste – Broken furniture, old electronics, kitchen scraps, worn-out mattresses Green waste – Lawn clippings, tree branches, garden trimmings Renovation debris – Plasterboard, timber, bricks, roofing tiles Garage junk – Old tools, unused paint tins, rusted bikes Bulk or hard waste – White goods, washing machines, fridges, old couches If it’s non-toxic, non-hazardous, and taking up space? Chances are, we can take it. rubbish removal service company Same-Day or Scheduled Pickups Need junk gone fast? We offer flexible booking options, including emergency clean-outs and scheduled pickups to suit your timing. Eco-Conscious Disposal We don’t just dump everything in landfills. We sort, recycle, and dispose of rubbish responsibly — because clean homes should never mean a dirty planet. Professional, Friendly Team Our crew is trained, insured, and punctual. No gruff tradies — just respectful, hardworking professionals who treat your space like it’s their own. Transparent Pricing No hidden fees, no nasty surprises. We quote upfront based on volume and type of waste — simple as that. When Should You Book a Rubbish Removal Service? If you’re unsure when to bring in the pros, here are some common use cases where rubbish removal makes life easier: Moving House Don’t haul old furniture or broken appliances to your new place. Clear it out before the move and start fresh. Spring Cleaning Once a year (or more), give your home a full refresh — including the yard and garage. Renovation or Construction DIY jobs leave a surprising mess. Save your back and skip the tip runs. Garden Overhauls Pruning trees or landscaping? Let us handle the green waste while you enjoy the new view. Deceased Estate Cleanouts A sensitive task. We handle it with the care and discretion it deserves. What to Expect During a Rubbish Pickup with Skynature Booking with us is easy, and the process is straightforward: Contact & Quote Call or book online with a few photos or a quick description of the waste. Confirm Schedule Choose a time that works for you — even same-day service if available. We Arrive On-Time Our team turns up with the right equipment, vehicles, and attitude. We Load It All You don’t lift a finger. We do all the heavy lifting and cleanup. Responsible Disposal We recycle where possible and dispose of the rest according to Victorian regulations. Rubbish Removal Isn’t Just a Chore – It’s a Reset There’s something powerful about walking into a room or backyard that’s finally cleared. It feels like a fresh start — mentally and physically. When you free your home of junk, you make space for: Better storage Safer movement (no tripping hazards!) Cleaner air More peace of mind And let’s not forget — it just feels good. Key Takeaways Rubbish removal helps you reclaim space and reduce health hazards. Skynature provides fast, friendly, and eco-conscious removal services in Victoria. Services include household, garden, construction, and hard waste. Ideal for spring cleaning, renovations, estate clearances, and more. Booking is easy, pricing is transparent, and results are immediate. FAQ – Quick Answers for Curious Cleaners How much does rubbish removal cost in Victoria? Costs vary based on the type and volume of waste. At Skynature, we offer clear upfront pricing — no surprises. You can get a free quote online or via call. Do I need to sort the waste myself before pickup? Nope! Our team does the sorting for you. Just let us know what needs to go, and we’ll handle the rest. What happens to the rubbish after it’s collected? We follow sustainable practices, sorting for recycling and safely disposing of the rest according to environmental standards. Ready to Reclaim Your Space? Whether you’re tackling a big cleanup or just tired of tripping over clutter, Skynature is here to help. We’re proud to serve homes across Victoria with rubbish removal that’s fast, respectful, and eco-smart. Give us a call or book online now — let’s clean up together. We love to hear from you Contact Us
- 02 July, 2025
- 7 min Read

How to Choose the Best Wood Fence for Your Victorian Home
If you're living in Victoria and thinking about adding or replacing a fence, wood is a timeless choice that balances aesthetics, functionality, and affordability. But choosing the best wood fence for your Victorian home isn't just about picking a style and calling a contractor. It's about finding a balance between your property's needs, local weather conditions, and the overall look you want to achieve. In this guide, we'll walk you through how to choose the right wood fencing in Victoria without the overwhelm. Why Wood Fencing Works So Well in Victoria Wood fences remain a popular choice for homeowners in Victoria for several good reasons: Natural Look: Wood blends beautifully with the green landscapes and period architecture common in Victorian suburbs. Privacy and Security: Timber fencing offers a solid barrier against noise and nosy neighbours. Versatility: From classic pickets to tall privacy panels, wood offers plenty of design flexibility. Repairable: Damaged panels or posts can usually be fixed or replaced without redoing the whole fence. Whether you're building a decorative garden fence or a privacy wall, timber fencing in Victoria offers long-term value with the right care. Key Factors to Consider When Choosing Wood Fencing in Victoria 1. Purpose of the Fence Ask yourself: Why do I need a fence? Is it for privacy, security, pet containment, aesthetic appeal, or all of the above? Privacy: Go for tall panels or vertical slat designs. Security: Consider sturdier hardwoods and solid construction. Decoration: Look at lattice or picket styles with decorative tops. 2. Type of Timber The kind of wood you use impacts durability, look, and maintenance: Treated Pine: Cost-effective and widely used, but may not last as long as hardwoods. Hardwoods (like Merbau or Ironbark): More durable and weather-resistant, ideal for long-term performance. Cypress Pine: Naturally termite-resistant and great for structural posts. When choosing timber fencing for privacy in Victoria, always ask your contractor if the timber is sustainably sourced and suitable for local conditions. 3. Design and Style Your home's architectural style matters. Victorian-era homes often pair beautifully with: Picket Fencing: Classic charm and street appeal. Vertical Slats: Clean lines for a more modern take. Lattice Tops or Decorative Posts: Add visual interest while maintaining privacy. 4. Maintenance Requirements Wood fencing needs some care to stay in good condition: Staining or Sealing: Reapply every 1-2 years to prevent rot and sun damage. Inspections: Check for loose boards, nails, and signs of termites. Repairs: Know when a quick wood fence repair in Victoria is enough, and when it's time for a full wood fence replacement. 5. Budget and Cost The cost of wood fencing in Victoria varies based on timber type, fence length, height, and style. Generally: Treated pine is cheaper but may require more maintenance. Hardwood and custom designs come at a premium but last longer. Get multiple quotes from local wood fence contractors in Victoria and ensure the scope of work includes installation, finishing, and cleanup. Key Takeaways Choose your fence style based on purpose: privacy, decoration, or security. Match timber type to your budget and environment. Don’t overlook maintenance – plan for periodic sealing or painting. Work with experienced wood fence contractors in Victoria for best results. Common Use Cases for Wood Fencing Front Yard Boundaries: Picket fences with a heritage touch. Backyard Privacy Walls: Tall timber panels for peace and quiet. Garden Enclosures: Decorative wood garden fencing in Victoria homes. Pool Safety Barriers: With treated wood that complies with local safety regulations. Frequently Asked Questions Q1: How long does a timber fence last in Victoria? With proper maintenance, a timber fence can last 10–20 years or more, depending on the wood type and exposure to weather. Q2: Can I DIY a wooden fence installation in Victoria? Yes, but it’s best left to professionals for durability and compliance with council regulations. Q3: What is the average cost of wood fencing in Victoria? On average, it ranges from $75 to $120 per metre, depending on timber type and design. Final Thoughts Choosing the best wood fence for your Victorian home is about more than good looks. It’s about creating a secure, private, and welcoming space that enhances your lifestyle and adds value to your property. At Sky Nature, we help you make informed choices with top-quality timber, expert craftsmanship, and personalised service. Ready to transform your outdoor space? Contact us for a free quote today! We love to hear from you Contact Us
- 26 June, 2025
- 6 min Read
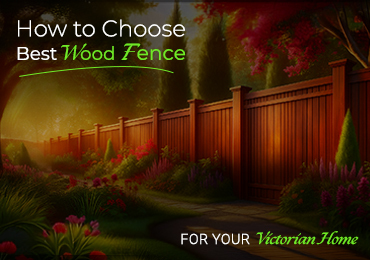
Top 7 Benefits of Professional Gate Installations in Victoria, Australia
When it comes to securing and enhancing the value of your property in Victoria, few upgrades are as effective and long-lasting as a professionally installed gate. Whether you're a homeowner, a business owner, or managing a commercial facility, investing in expert gate installation in Victoria brings multiple benefits that go far beyond aesthetics. Here are the top 7 reasons why professional fencing gate installations in Victoria are worth every dollar. 1. Enhanced Security and Peace of Mind One of the most obvious benefits of installing a gate is the added layer of security it provides. Professionally installed gates act as both a physical and visual deterrent to intruders. Whether you're considering residential gate installation in Victoria or managing a warehouse that needs secure access, having the right gate can make a big difference. Key Takeaway: Properly installed gates reduce unauthorized access and provide greater control over who enters your premises. 2. Increased Property Value and Curb Appeal First impressions count. A well-crafted gate instantly improves the aesthetic appeal of your home or business. For real estate investors or homeowners looking to sell, an attractive gate can be a deciding factor for buyers. Use Case: Timber gate installations in Victoria are especially popular in residential settings for their natural look and durability. 3. Customisation to Suit Every Need Unlike DIY options, professional gate installers in Victoria, Australia offer a wide range of custom solutions tailored to your exact requirements. From automatic gate installation in Victoria to custom gate installers in VIC who design gates for unique landscapes, customisation means no compromises on style, function, or material. Popular Options Include: Sliding and swinging gates Timber, steel, or aluminium designs Manual or automated systems 4. Regulatory Compliance and Safety Especially in industrial gate services in Victoria and commercial setups, there are strict safety and compliance requirements. Professional installers ensure that the gate system adheres to all relevant Australian standards, including workplace safety codes. Expert Tip: Skynature’s team is well-versed in local council regulations and can help navigate approval processes smoothly. 5. Durability and Long-Term Performance When you hire experts for gate installation, you're not just paying for the structure—you're investing in materials that are tested for Victoria’s climate. Whether it's harsh sun, salt air near the coast, or heavy rainfall, professional-grade gates are designed to last. Bonus: Professionals use corrosion-resistant hardware and proper mounting techniques to ensure longevity. 6. Smart Technology Integration Modern gate installers in Victoria offer tech-savvy solutions. Automatic and remote-controlled gates enhance convenience while maintaining high-security standards. Integration with smartphone apps, intercoms, and camera systems is no longer just for high-end properties. Use Case: Residential properties in urban Victoria often opt for keyless entry or app-based controls for secure deliveries and family access. 7. Professional Installation Saves Time and Headaches Let’s be honest—DIY gate installations rarely go as planned. From improper alignment to unreliable automation setups, cutting corners can lead to costly repairs. With a trusted provider like Skynature, the job is done right the first time. Peace of Mind: You get expert measurements, proper anchoring, and reliable post-installation support. Quick Benefits Recap Boosts property security Adds visual appeal and value Allows for custom designs and automation Meets all legal and safety standards Handles Victoria's tough climate conditions Offers smart tech integration Ensures quality workmanship and support Frequently Asked Questions What is the best type of gate for homes in Victoria? Timber and automatic gates are both popular for residential gate installation in Victoria due to their durability and aesthetic value. Do I need council approval for a new gate in Victoria? Depending on the height and location, some gate installations may require local council approval. Skynature can assist with all compliance matters. How long does a professional gate installation take? Most standard installations are completed within 1-3 days. Custom or commercial gate installation in Victoria may take longer depending on the scope. Ready to Upgrade Your Entrance? If you’re planning a secure, stylish, and durable fencing gate installation in Victoria, Skynature is here to help. With years of experience and a reputation for quality, our team makes sure your property gets the protection and polish it deserves. When you’re ready to upgrade your outdoor living space, don’t just build a deck—build it right. We love to hear from you Contact Us
- 19 June, 2025
- 5 min Read
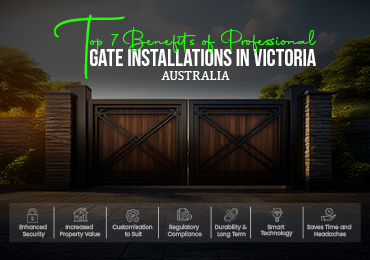
Top Dressing Lawn – A Step-by-Step Guide for Lush, Healthy Grass
Top dressing your lawn is one of the best ways to transform patchy turf into a thriving, vibrant green expanse. But to get that dream lawn, it's not just about top dressing—you'll want to tackle thatch buildup, ensure proper aeration, and maintain consistent care. This guide walks you through dethatching your lawn, choosing lawn dethatching services (if needed), preparing your soil, aerating your lawn, and applying top dressing for professional-grade results. Why Top Dressing Lawn Matters Top dressing involves spreading a thin mix of compost, sand, and soil over your turf. It: Improves soil structure and drainage Encourages healthy root growth Smooths out unevenness and repairs bare patches Works best after dethatching and aerating But if your lawn is caked with old grass debris, it will block air, water, and nutrients. That’s where dethatching your lawn and aerating your lawn come in. Step 1 – Dethatching Your Lawn for Better Penetration Dethatching removes the buildup of dead grass and organic material at the soil surface (the “thatch layer”). If left unchecked, thatch: Prevents water and nutrients from reaching roots Encourages pests and disease Makes top dressing ineffective How to dethatch your lawn: Check thatch depth—anything over ½ inch is problematic. For small areas, use a handheld dethatching rake; for large lawns, rent or hire a power dethatcher. Go over the lawn once lengthwise, then sideways. Remove debris and dispose of it—or compost it if clean. If this sounds tricky, consider lawn dethatching services—many local providers can do a neat, efficient job. Pairing a service with your top dressing process saves time and guarantees effectiveness. Step 2 – Aerating Your Lawn Before Top Dressing After dethatching, aerating your lawn is key to ensuring the amendments reach the root zone. Core aeration relieves compaction and fosters root development through better water absorption. DIY aeration steps: Ensure soil is moderately moist (water first if dry). Use a core aerator (plug-style) over the lawn once or twice, spacing passes evenly. Leave soil plugs on the surface—they break down, enriching your lawn. Combining dethatching and aeration creates healthy entry points for top dressing to work wonders. Step 3 – Choose the Best Top Dressing Mix A high-quality top dressing mix typically includes: 40–60% coarse sand (improves drainage) 30–40% quality compost (adds nutrients) 10–20% topsoil (for texture consistency) Local suppliers or turf professionals can blend premixed solutions. Use a shovel or wheelbarrow to haul the mix to your lawn area. Step 4 – Applying Top Dressing to Your Lawn How to top dressing lawn properly: Use a shovel or drop spreader to distribute ⅛ to ¼ inch of mix evenly. Lightly rake to incorporate into grass without smothering it. Water thoroughly to help the mix settle. Don’t mow for a few days, or set mower high and catch clippings. This seals the amendments into working with your existing soil and plants. Step 5 – Follow-up Care & Maintenance Continue watering lightly and regularly for 1–2 weeks. Fertilize with a balanced lawn feed a month later. Resume mowing at the proper height (usually 2½–3 inches). Consider spot-treating with compost in bare or low areas. Combine seasonal dethatching, aerating, and top dressing annually or bi-annually for optimal lawn health. Spread the Load: Hire Professional Lawn Dethatching & Aerating Services If the idea of rental gear or repetitive work isn’t for you, a pro service can help: Lawn dethatching services—cut thatch back fast; leaves minimal mess. Aerating your lawn services—offers plug aeration for compaction relief. Combined with top dressing lawn services, you can skip the hassles and get expert results. FAQ – Common Questions About Top Dressing Lawn Q1: Can I top dress without dethatching? You can—but you’ll see poor soil contact and little benefit unless thatch is removed first. Q2: When is the best time to aerate and top dress? Early spring or early autumn—when grass is actively growing—for best recovery. Q3: How much top dressing should I apply? A thin layer of about ⅛ to ¼ inch per application; don’t smother the grass. Final Thoughts: A Beautiful Lawn Starts with the Basics Proper dethatching your lawn, aerating your lawn, and carefully layering top dressing lawn mix sets the foundation for a thick, green lawn that resists weeds, drought, and disease. Whether you tackle it yourself or hire lawn dethatching services, this seasonal care will pay dividends in long-term turf health—and will make your garden a standout in the neighborhood. When you're ready for expert help or just need the right products, visit Sky Nature to explore soil mixes, top dressing blends, and professional lawn care services. We love to hear from you Contact Us
- 14 June, 2025
- 6 min Read
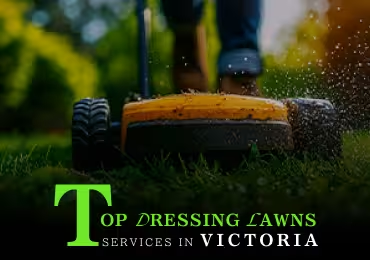
Hedge Trimming and Pruning: Elevate Your Garden with Professional Care
Achieving a lush, well-shaped hedge is more than just cutting back greenery—it’s about promoting healthier growth, enhancing curb appeal, and maintaining a tidy garden. At SkyNature, our Hedge Trimming and Pruning experts deliver outstanding garden care services that not only beautify your outdoor space but also improve plant health and longevity What Is Hedge Trimming and Pruning? Hedge trimming involves shaping and maintaining hedges, shrubs, and topiary into neat forms. Pruning goes deeper—cutting away dead or overgrown branches to encourage new growth and overall plant health. Both are essential components of gardening and mowing service routines, ensuring your greenery stays healthy and stunning. Why Your Garden Needs Professional Hedge Trimming and Pruning? 1. Promotes Healthier Growth Removing diseased or dying branches helps plants heal, redirect energy towards new shoots, and resist pests and disease outbreaks. 2. Boosts Aesthetic Appeal Regular trim keeps hedges looking bold and structured—ideal for both residential and commercial lawn & garden services. 3. Improves Safety & Light Overgrown branches can block walkways or touch homes. Proper pruning improves visibility, ventilation, and natural sunlight throughout your garden. 4. Maintains Hedge Shape Different plants require specific trim styles. Professionals know when to prune for that classic box look or a more relaxed, natural finish. Our Process for Hedge Trimming and Pruning Initial Garden Assessment We start with a walkthrough to identify: 1. Hedge health and structure 2. Types of plants (native, hedging, ornamental) 3. Overgrowth, disease, and pest signs Tailored Hedge Pruning Plan We customize care plans depending on plant species and your goals—whether it’s a sharp edge along a driveway or sculpted hedging screen. Precision Pruning & Shaping Using clean, well-maintained tools (hedge shears, bypass pruners, loppers), we: 1. Remove deadwood 2. Thin dense areas for airflow 3. Trim to tidy shapes and defined lines Final Review & Cleanup After trimming, we clear all debris, tidy up branches, and give your garden a polished finish. Benefits of Choosing SkyNature’s Garden Care Services Expert Knowledge Our horticulturists understand Australian hedging species and pruning techniques. Comprehensive Lawn Care We combine hedge trimming and pruning with mowing, fertilizing, mulching, and pest control for full-service garden care. Commercial-Grade Equipment Ideal for both small yards and large commercial landscapes. Eco-Friendly Practices We compost green waste, avoid harsh chemicals, and prefer organic care whenever suitable. Flexible Scheduling Monthly, quarterly, or seasonal visits—tailored to your garden’s unique needs. When You Need Hedge Trimming and Pruning Neighbour Complaints – Overgrown hedges may block views, footpaths, or cause disputes. Selling Your Home – Well-shaped hedges boost curb appeal and make a great first impression. New Growth Seasons – Hedges grow quickly in spring and autumn, needing regular maintenance. FAQs (Snippet-Friendly) Q1: How often should I schedule hedge trimming? Most hedges need trimming 2–4 times a year, depending on species and growth rate. Evergreen hedges benefit from consistent upkeep. Q2: Will cutting too much damage my hedge? Professional pruning targets no more than one-third of green growth at a time, preserving health and structure. Q3: Can you service large commercial landscapes? Absolutely! We offer full commercial lawn & garden services, including hedges, trees, flower beds, and turf care. SkyNature: Victoria’s Quality Gardening and Mowing Service With years of experience and a trusted team of green-fingers, SkyNature stands out in garden careservices, offering both residential charm and professional commercial results. We combine meticulous hedge trimming and pruning with mowing,weeding, and more to create outdoor spaces that thrive. Ready to Refine Your Garden? Contact us today for a FREE quote on hedge trimming and pruning or our full suite of gardening and mowing service options. Let SkyNature craft a healthier, more beautiful landscape—tailored just for you. Call us at 61 416959758 or visit skynature.com.au/contact Transform your garden with expert care today! We love to hear from you Contact Us
- 11 June, 2025
- 5 min Read
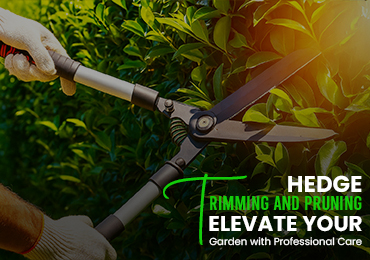
5 Reasons Why You Should Hire a Contractor to Build Your Deck
A deck is more than just a place to lounge or entertain—it’s an extension of your living space and an investment in your home. While it may be tempting to tackle the project yourself to save on labor costs, hiring a professional deck contractor often results in better quality, fewer headaches, and even cost savings in the long run. Here are five compelling reasons why hiring a contractor to build your deck is the smartest decision you can make. 1. Expertise and Experience Professional deck builders bring years of experience and technical knowledge to the table. They understand: Structural engineering principles Local council regulations and permits Material performance based on local weather (especially important in places like Melbourne with variable climates) Building codes for safety and compliance Without this expertise, a DIY deck might suffer from poor foundation, unlevel surfaces, or even structural failure. A contractor ensures that your deck is built to last, both aesthetically and functionally. 2. Access to High-Quality Materials Most contractors have partnerships with trusted suppliers, allowing them access to: Premium materials at wholesale or discounted prices Newer, high-performance products not available in big-box stores A better understanding of which materials work best in your environment They also know how to handle these materials correctly—cutting, sealing, and installing them to maximize their lifespan and performance. 3. Time and Cost Efficiency While DIY projects can be rewarding, they’re often more time-consuming and expensive than anticipated. Miscalculations, rework, tool rentals, and wasted materials can quickly add up. Hiring a contractor offers: Faster completion with fewer delays Accurate cost estimates and timelines Fewer surprises, because the contractor plans for contingencies You save valuable time and avoid the stress of coordinating labor, deliveries, and inspections. 4. Compliance and Warranty Protection Deck construction is subject to local building codes and safety standards. A licensed contractor: Understands zoning laws and permitting requirements Handles paperwork and inspections for you Ensures your deck complies with legal and structural safety standards Additionally, many contractors offer workmanship warranties, giving you peace of mind. If something goes wrong, you’re covered—unlike a DIY job, where you’re on your own. 5. Better Design and Customization Options Deck contractors don’t just build—they also design. Whether you want: A multi-level deck Integrated lighting Custom railings or seating Compatibility with landscaping or pools A skilled contractor can help bring your vision to life with professional-grade results. They also offer practical suggestions based on your home layout, sun exposure, and lifestyle needs. Bonus: Safety First Safety is often overlooked in DIY projects. Contractors use the right tools, safety gear, and construction techniques. This not only protects them during the build—but ensures your deck is safe for long-term use. FAQs About Hiring a Deck Contractor Q1: Should I still get involved in the design process? Absolutely! A good contractor collaborates with you to ensure the deck fits your vision, lifestyle, and budget. Q2: How long will the project take? Simple decks can take a few days, while more complex builds may span 1–3 weeks depending on weather and scope. Q3: What should I look for when hiring a deck contractor? Check for: Licenses and insurance Client references or reviews Portfolio of past work Written contracts and warranties Conclusion While DIY deck building might look like a fun weekend project, the advantages of hiring a professional contractor far outweigh the risks and costs of doing it yourself. From ensuring structural safety to delivering a beautiful, customized design, a skilled contractor can transform your vision into a long-lasting reality—efficiently and stress-free. When you’re ready to upgrade your outdoor living space, don’t just build a deck—build it right. We love to hear from you Contact Us
- 04 June, 2025
- 5 min Read
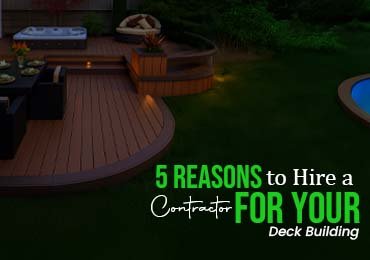
Choosing the Right Fence for Your Melbourne Property: A Comprehensive Guide
Whether you’re living in a quiet suburban street or an urban Melbourne neighbourhood, a fence isn’t just a boundary—it’s a statement. It defines your space, enhances your property’s aesthetics, provides privacy, and adds security. With Melbourne’s unpredictable climate and diverse architecture, choosing the right fence is both a functional and stylistic decision. This blog walks you through everything you need to know to choose the ideal fencing solution for your Melbourne home—from materials and design to council regulations and climate considerations. Why Fencing Matters for Melbourne Homes Fencing in Melbourne serve multiple purposes: Enhance street appeal and increase property value Provide safety for kids and pets Ensure privacy from neighbors and busy streets Protect against intruders and wildlife Match the home’s architecture, especially in heritage suburbs like Carlton, Fitzroy, and Hawthorn Factors to Consider Before Selecting a Fence 1. Purpose of the Fence Determine the primary reason for the fence: Privacy: Opt for taller, solid options like timber or Colorbond Security: Choose steel, brick, or wrought iron with secure gates Noise reduction: Solid masonry fences help reduce sound from roads Decoration: Picket or slatted fences for visual appeal Pool safety: Comply with Victoria’s pool fencing laws 2. Melbourne’s Weather Conditions Melbourne is known for having four seasons in a day. Choose a fence that can withstand: Rain and humidity (moisture-resistant) Strong sun (UV resistance) Wind gusts and storms (sturdy structure and anchoring) 3. Maintenance Requirements How much time are you willing to spend on upkeep? Low maintenance: Colorbond, aluminium, PVC Moderate to high maintenance: Timber (requires regular sealing), wrought iron (needs rust prevention) 4. Budget Factor in: Material costs Installation charges Long-term maintenance Popular Fencing Materials for Melbourne Properties 1. Timber Fencing Ideal for: Heritage homes and natural aesthetics Pros: Warm, classic look Good for privacy Customisable designs Cons: Requires regular staining or painting Vulnerable to rot, pests, and weathering Popular Styles: Paling, slatted, picket, lapped-and-capped 2. Colorbond Steel Fencing Ideal for: Modern homes, backyards Pros: Weather-resistant and rust-proof Long-lasting colour Low maintenance Cons: Less decorative Can retain heat in summer Melbourne Tip: Opt for lighter shades in hot suburbs to reduce heat absorption. 3. Brick or Rendered Masonry Fencing Ideal for: High-end or sound-sensitive areas Pros: Excellent sound insulation Extremely durable High security Cons: Expensive May need council approval 4. Aluminium or Steel Slat Fencing Ideal for: Contemporary and urban homes Pros: Modern and stylish Low maintenance Rust-resistant Cons: Higher initial cost than timber 5. Wrought Iron Fencing Ideal for: Victorian and Federation-style homes Pros: Elegant and timeless Durable with proper care Cons: Prone to rust if untreated Less privacy 6. PVC (Vinyl) Fencing Ideal for: Families looking for easy-care solutions Pros: Won’t rot or fade Easy to clean Cons: Limited style options Can be less sturdy than metal or wood Melbourne Council Regulations You Need to Know Different local councils in Melbourne have different rules. Generally: Front fences are restricted to 1.2–1.5 metres Side and rear fences can be up to 2 metres Corner blocks must ensure visibility for traffic Heritage homes may require special permits for certain designs or materials Neighbours must be consulted for boundary fencing (under the Fences Act 1968) Check with your local council or speak to a licensed fencing contractor familiar with Victorian fencing regulations. Fencing Styles That Match Melbourne Architecture Home Style Recommended Fence Style Victorian / Edwardian Wrought iron or timber picket Californian Bungalow Horizontal slatted timber or brick base Contemporary Aluminium slats, rendered walls, Colorbond Hamptons / Coastal White picket or PVC fencing Inner-city terrace Iron or decorative steel Sustainability Tip If you’re environmentally conscious, consider: Recycled timber fencing Composite fencing (made from wood fibers plastic) Green fencing using plants and climbers with trellis systems Should You Hire a Professional or Go DIY? A DIY fence can save money, but it often lacks: Professional alignment and sturdiness Understanding of slope grading and foundations Knowledge of legal compliance For long-term investment, it’s wise to hire a local Melbourne fencing expert who can manage everything from permits to post holes. FAQs: Fencing in Melbourne 1. What is the best low-maintenance fence for Melbourne? Colorbond and aluminium slat fencing are both low-maintenance, durable, and ideal for Melbourne’s changing weather. 2. Can I share fencing costs with my neighbour? Yes, under the Fences Act 1968, you can propose cost-sharing with your neighbour for a dividing fence. 3. What is the best fence for noise reduction? Solid masonry or brick fences are best for blocking traffic or neighbourhood noise. 4. How do I maintain a timber fence in Melbourne? Regularly inspect for rot, treat with sealants, and repaint or stain every 2–3 years. 5. Do I need council approval for my fence? Not always, but front fences over certain heights or those on heritage properties often require a permit. Conclusion The right fence for your Melbourne property should balance function, form, and regulation. With so many material and style options available, making an informed choice means understanding your home’s character, the purpose of the fence, local climate, and council rules. Take your time, seek expert advice, and choose a fencing solution that enhances your lifestyle, boosts your home’s value, and complements your surroundings. We love to hear from you Contact Us
- 28 May, 2025
- 8 min Read
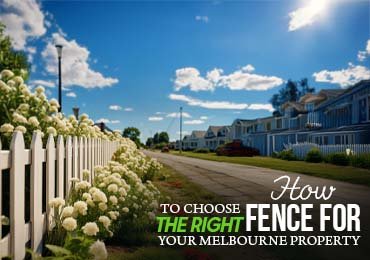
Decking Materials for Melbourne’s Weather Conditions: Durability and Style
Melbourne’s famously unpredictable climate—sunshine one moment, rain the next—can be tough on outdoor structures, especially decks. Whether you’re building a new deck or upgrading an existing one, choosing the right decking material is critical for longevity, comfort, and aesthetics. This guide explores the best decking materials suited for Melbourne’s unique weather, helping you make an informed decision that balances style, durability, and maintenance. Why Weather Matters When Choosing Decking Materials Melbourne’s climate features: Hot summers with intense UV radiation Cool, wet winters Sudden temperature swings High humidity and occasional frost These conditions can cause wood to crack, warp, fade, and rot—making your choice of decking material crucial for a long-lasting outdoor area. Top Decking Materials for Melbourne Conditions 1. Merbau (Hardwood Timber) Durability: ★★★★☆ Style: Rich, reddish-brown tones Maintenance: Moderate Why it’s great for Melbourne: Merbau is naturally oily and dense, making it highly resistant to termites, rot, and weather fluctuations. It handles Melbourne’s moisture and sun well. Keep in mind: Merbau can bleed tannins, especially when wet, so sealing and careful installation are important—especially near paving or pools. 2. Spotted Gum Durability: ★★★★☆ Style: Attractive grain with variations from pale browns to deep reds Maintenance: Moderate This Australian native hardwood is known for its natural fire resistance (great for bushfire zones) and durability. It’s perfect for coastal Melbourne suburbs that experience wind and salt air. Tip: Needs annual oiling to maintain colour and prevent graying. 3. Composite Decking (WPC or PVC) Durability: ★★★★★ Style: Wide range of colours and wood-look finishes Maintenance: Made from a mix of wood fibres and recycled plastic, composite decking is UV-stable, weatherproof, and resistant to mold and termites—ideal for Melbourne’s extremes. Why choose it? Won’t splinter or crack Easy to clean Eco-friendly options available Best brands in Australia: Trex, ModWood, Ekodeck 4. Treated Pine Durability: ★★★☆☆ Style: Simple and paint/stain adaptable Maintenance: High Treated pine is one of the most budget-friendly decking options and can be stained or painted any colour. However, it’s softer and more prone to warping in Melbourne’s fluctuating conditions. Use it if: You’re on a tight budget and can commit to regular sealing. 5. Blackbutt Durability: ★★★★☆ Style: Pale brown to golden hues Maintenance: Moderate Blackbutt is a locally sourced Australian hardwood, making it sustainable and well-suited to Melbourne’s climate. It’s also BAL-29 fire rated, a requirement in some areas. 6. Aluminium Decking Durability: ★★★★★ Style: Modern, industrial aesthetic Maintenance: Minimal Resistant to rust, rot, pests, and UV damage, aluminium is a great low-maintenance option. It stays cool underfoot and doesn’t warp—ideal for decks exposed to full sun. Note: More expensive and less traditional-looking than timber. Decking Style Meets Functionality While durability is key, your decking also contributes to your home’s aesthetic and resale value. When selecting materials, consider: Colour harmony with your home’s exterior Texture and finish smooth, grooved, natural grain Slip resistance important for poolside or shaded decks Heat retention light-coloured materials stay cooler Installation Considerations for Melbourne Decks Ventilation Ensure good airflow under your deck to prevent moisture build-up and timber decay. Drainage Proper drainage is essential to avoid water pooling, especially in wetter Melbourne months. Sealing and Treatment Even the best materials benefit from regular maintenance — cleaning, oiling, or staining to maintain appearance and structural integrity. Sustainability & Eco-Friendly Choices Concerned about environmental impact? Look for: FSC-certified hardwoods Recycled composite materials Local species like Blackbutt or Spotted Gum Reusable aluminium options Eco-friendly decks not only reduce your footprint but may also increase buyer interest if you plan to sell. FAQs: Decking in Melbourne Q1: Which decking material requires the least maintenance? Composite decking is the winner—no oiling, staining, or sanding needed. Q2: Will my deck fade in Melbourne’s sun? Yes—especially timber. Use UV-protective oil or sealant to slow fading. Composite decking fades less. Q3: What’s the best decking material for poolside areas? Composite or aluminium decking — they’re water-resistant and don’t splinter. Q4: How often should timber decking be maintained? Oiling or sealing is recommended every 6–12 months, depending on exposure. Q5: Is it worth investing in composite decking? Yes, if you want a long-term, low-maintenance solution. The upfront cost is higher, but savings over time can balance it out. Conclusion Melbourne’s weather can be unforgiving, but the right decking material ensures your outdoor space stays safe, stylish, and functional for years. Whether you prefer the natural charm of hardwoods like Merbau and Spotted Gum or the ultra-low maintenance of composite or aluminium, your deck should reflect your lifestyle, budget, and aesthetic. Consult a decking professional to get the most suitable option for your suburb and home. With smart planning and quality materials, your deck can become a beautiful year-round retreat—even in Melbourne’s famously four-seasons-in-a-day weather. We love to hear from you Contact Us
- 24 May, 2025
- 6 min Read
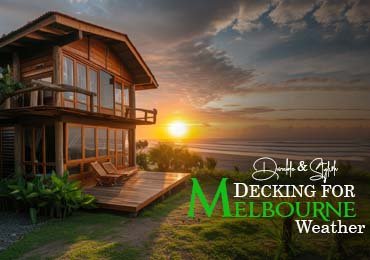
Lawn Mowing Tips for Melbourne Gardens: Achieving a Healthy and Beautiful Lawn
In Melbourne, where the seasons can change in a single day, maintaining a healthy and vibrant lawn is both an art and a science. Whether you’re a seasoned gardener or a weekend warrior, mowing your lawn correctly is one of the most crucial steps to ensure your garden looks its best year-round. From understanding your grass type to timing your mowing sessions with Melbourne’s unpredictable weather, this guide provides everything you need to know to achieve a lush and beautiful lawn in this iconic Australian city. Why Mowing Matters More Than You Think Mowing isn’t just about keeping your lawn neat. It’s essential for: Encouraging denser growth Preventing weeds Improving drought tolerance Enhancing your home’s curb appeal Done improperly, however, mowing can damage your grass, invite pests, and increase water consumption. Understand Your Lawn Type: Warm- vs. Cool-Season Grasses Melbourne lawns commonly feature cool-season grasses such as: Fescue Ryegrass Kentucky Bluegrass In warmer northern suburbs or newer developments, you may also find: Buffalo Kikuyu Couch Grass Knowing your grass type determines: How often you mow How high you cut What equipment to use Lawn Mowing Tips for Melbourne’s Climate 1. Stick to the One-Third Rule Never cut more than one-third of the grass blade in a single mow. Removing too much stresses the plant and reduces its photosynthetic ability 2. Adjust Your Mower Height Seasonally Spring: Begin with a slightly higher setting to encourage deeper roots. Summer: Keep grass longer to shade the soil and retain moisture. Autumn: Gradually lower the height to prepare for winter dormancy. Winter: Mowing may not be necessary unless there’s continued growth. 3. Mow When Grass Is Dry Wet grass clumps, dulls mower blades, and can create an uneven cut. Late morning or early afternoon is ideal after the dew has dried. 4. Keep Your Blades Sharp Dull blades tear grass rather than slicing it, causing brown tips and inviting disease. Sharpen your mower blades at least once per season. 5. Change Mowing Patterns Avoid mowing in the same direction every time. Rotating patterns prevents soil compaction and keeps the grass growing upright. 6. Leave Clippings (Mulch Mowing) Leaving short clippings on your lawn can return nutrients to the soil and improve moisture retention—especially beneficial in Melbourne’s dry summer months. Frequency of Mowing in Melbourne Season Mowing Frequency Spring Weekly Summer Every 1–2 weeks Autumn Every 2–3 weeks Winter Monthly or as needed Watering Before or After Mowing? It’s best to water the lawn the day before mowing, not immediately before. Mowing dry grass ensures a clean cut. After mowing, wait a few hours before watering to avoid potential disease. Avoiding Common Mowing Mistakes Scalping the Lawn: Cutting too low can expose soil, increase weeds, and stress the turf. Bagging Every Time: Unless your lawn is too long or wet, let clippings decompose on the lawn. Mowing with Dull Blades: Causes jagged edges and brown spots. Ignoring Safety Gear: Always wear sturdy shoes and eye protection, especially with petrol mowers. Choosing the Right Lawn Mower for Melbourne Gardens Depending on your lawn size and budget, you may choose from: 1. Push Reel Mowers Eco-friendly, great for small gardens, and gentle on cool-season grasses. 2. Electric Mowers (Corded or Battery) Low maintenance, quiet, and ideal for mid-sized lawns. 3. Petrol Mowers Powerful and durable—best for larger lawns or uneven terrain. 4. Robotic Lawn Mowers A growing trend in Melbourne—automated, quiet, and efficient for tech-savvy gardeners. When to Edge Your Lawn Edging gives your lawn a polished look. For best results: Edge after mowing to maintain a crisp border. Use manual or electric edgers along driveways, paths, and garden beds. Lawn Care Beyond Mowing To support healthy mowing, consider: Aerating in autumn or spring to reduce compaction. Fertilising every 2–3 months using a lawn-specific formula. Top-dressing in spring with sand or compost to level the lawn and improve soil health. Sustainable Lawn Practices for Melbourne Given water restrictions and environmental concerns, consider: Drought-tolerant grasses Smart irrigation systems Rainwater collection for garden use Native grass alternatives These options reduce your water bill and support Melbourne’s sustainability efforts. FAQs: Lawn Mowing in Melbourne Depending on your lawn size and budget, you may choose from: Q1. What is the best height to mow grass in Melbourne? For cool-season grasses, aim for 5–7 cm. In hot summers, keep grass slightly longer to shade the soil. Q2. Can I mow after it rains? Avoid it. Mowing wet grass leads to clumping, uneven cuts, and can damage your lawn and mower. Q3. How often should I sharpen my mower blades? Ideally once every 20–25 mowing hours or once per season. Q4. Should I mow before or after fertilising? Mow before fertilising to ensure the nutrients reach the soil. Q5. Is it OK to mow during winter in Melbourne? Only if the grass is actively growing. Most cool-season grasses go dormant in winter. Conclusion A well-manicured lawn doesn’t require hours of work—it requires smart habits. By understanding Melbourne’s unique climate, your lawn’s grass type, and applying the right mowing practices, you can enjoy a thick, green, and healthy lawn year-round. Whether you’re maintaining a large backyard in Doncaster or a cozy front yard in Fitzroy, these tips will ensure your garden becomes the envy of the street. And remember—consistency is key! We love to hear from you Contact Us
- 19 May, 2025
- 7 min Read
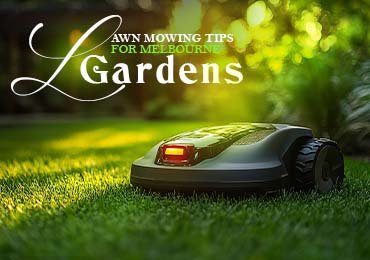
Revitalize Your Lawn: The Power of Lawn Dethatching and Expert Mowing Services
If your lawn is looking a little tired—even with regular watering and mowing—it might be time to look beneath the surface. One of the most overlooked lawn care practices is lawn dethatching, and when paired with professional mowing services, it can bring your lawn back to life in no time. Let’s break down why these two services can make all the difference. What Is Lawn Dethatching—and Why Does It Matter? Over time, your lawn can develop a layer of thatch: a dense mix of dead grass, roots, and organic debris that sits between the soil and the green grass above. A little thatch is normal (and even beneficial), but too much can suffocate your lawn. Signs your lawn may need dethatching: Grass feels spongy underfoot Water runs off instead of soaking in Bare spots or thinning grass Increased pests or lawn diseases Lawn Dethatching removes that excess layer, allowing water, nutrients, and air to reach the roots where they’re needed most. The result? Healthier, greener, and more resilient turf. The Role of Professional Mowing Services You might think mowing is simple—but doing it right takes more than just cutting grass. The height, frequency, and pattern all impact lawn health. Professional mowing services ensure: Correct mowing height based on grass type Sharp blades for clean cuts (not tearing) Strategic mowing patterns to prevent compaction Regular scheduling for consistent growth Paired with dethatching, expert mowing helps promote even growth, strengthens root systems, and gives your lawn a clean, polished look. When to Dethatch and Mow for Best Results Timing is key for both dethatching and mowing. Here’s a general guide: Best Time to Dethatch: For warm-season grasses: Late spring to early summer For cool-season grasses: Early autumn or early spring Mowing Tips Post-Dethatching: Wait a few days after dethatching before mowing Avoid cutting more than one-third of the grass height at once Water deeply to support recovery Use Cases: Who Benefits Most? While dethatching isn’t a weekly necessity, it's ideal for: Lawns with heavy foot traffic Properties with thick, patchy grass Gardens recovering from seasonal stress (heat, frost) Homeowners preparing for landscaping upgrades Why Trust a Professional Team Like Sky Nature? At Sky Nature Landscaping Services, we treat every lawn like our own. With years of hands-on experience across Sydney’s diverse landscapes, we know when your lawn needs a little TLC—or a full reboot. We combine tailored dethatching techniques with precision mowing services to keep your outdoor space lush, healthy, and picture-perfect. While the metaverse has faced setbacks, it is far from dead. The industry is shifting focus towards practical applications, including:
- 02 May, 2025
- 3 min Read
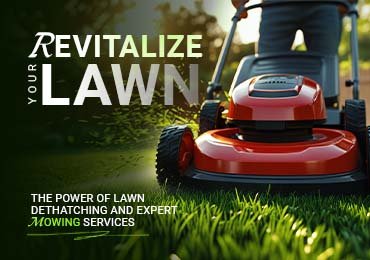
Garden Landscaping Trends in 2025 You Should Try
Landscaping in 2025 isn’t just about having a good-looking yard — it's about creating a space that reflects your lifestyle, supports local ecosystems, and adapts to changing climates. Whether you're starting fresh or thinking about a backyard upgrade, these garden landscaping trends are worth exploring this year. Here’s what’s shaping outdoor spaces across Australia — and how you can bring these ideas to life. 1. Climate-Responsive Landscaping As heatwaves and unpredictable rainfall become more common, water-wise gardens are no longer optional — they’re essential. What’s trending: Drought-tolerant native plants like Kangaroo Paw, Lomandra, and Grevillea Smart irrigation systems with weather-based scheduling Gravel or decomposed granite paths that reduce runoff This isn’t just about sustainability; it’s about reducing maintenance while keeping your outdoor space lush all year round. 2. Edible Landscapes: Function Meets Beauty In 2025, more homeowners are blending form and function by growing food alongside flowers. Think herbs in vertical planters or raised veggie beds that double as garden dividers. Popular integrations: Mixed garden beds with rosemary, lavender, and ornamental kale Fruit trees used as privacy screens Chic chicken coops or compost bins that blend into the design It's a great way to stay connected to nature — and your dinner ingredients. 3. Outdoor Living Spaces That Actually Get Used Gone are the days when a patio meant a slab of concrete and a lonely BBQ. Modern landscaping in 2025 embraces full outdoor rooms tailored to how you live. Ideas to try: Sunken fire pit zones with built-in seating Pergolas with retractable canopies and climbing vines Outdoor kitchens complete with prep space, lighting, and mini-fridges If it’s inviting and practical, you’re more likely to use it — whether it’s for entertaining or your morning coffee. 4. Low-Mow, Eco-Friendly Lawns Lawns are shrinking, but they’re not disappearing — they’re just evolving. Smart swaps include: Native grass blends that require less water and mowing Creeping ground covers like Dichondra or native violets Artificial turf in compact zones (ideal for pets or shaded areas) These choices reduce upkeep while supporting local pollinators and biodiversity. 5. Sensory Garden Elements In 2025, landscaping goes beyond the visual. More designs are integrating sensory experiences — perfect for mindfulness, accessibility, and family-friendly spaces. Incorporate elements like: Soft-textured plants and rustling grasses Water features for soothing sound Fragrant blooms like jasmine, gardenia, or lemon myrtle This is landscaping that invites you to slow down and engage with your environment. 6. Tech-Integrated Landscaping Technology is quietly transforming outdoor design — not with flashy gadgets, but smart solutions that make your garden easier to manage. Examples include: Smart lighting systems you control from your phone Robot mowers for consistent, quiet trimming Weather-based irrigation that adjusts automatically It’s all about convenience without compromising style or sustainability. Use Cases: Who Should Try These Trends? Busy professionals: Low-maintenance, smart features that save time Families: Edible gardens, safe play areas, and interactive spaces Eco-conscious homeowners: Native plants, water-saving systems, and wildlife-friendly designs Entertainers: Comfortable outdoor zones designed for socialising Think of your garden as an extension of your home. Before making changes, consider how you want to use the space — and what kind of atmosphere brings you joy. If you're unsure where to begin, a professional landscaper can help you visualise the possibilities, pick suitable plants for your climate, and avoid costly mistakes.
- 27 April, 2025
- 4 min Read